Jenesis is another one-man megaWAD released in 2011 after a long development cycle. It's for
Doom II, playing in Boom-compatible source ports. Doomworld forum superstar
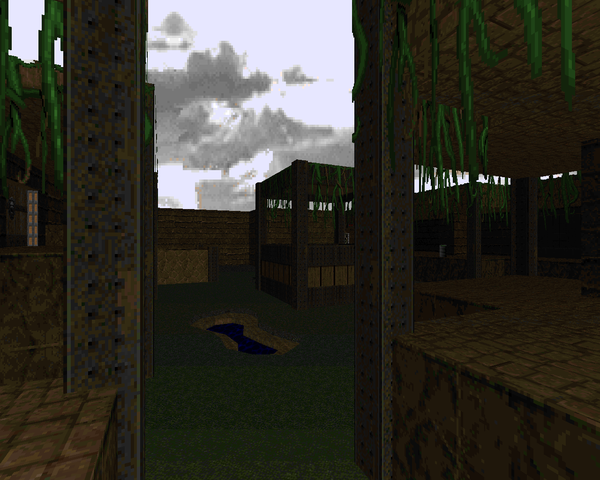
James "Jimmy" Paddock released the megaWAD at three different stages, adding more maps and replacing the finale each time. The final product marks the tale of a space marine dispatched to the familiar locale of Phobos to deal with a demonic invasion. You'll have to fight your way across the moon, make your way to Deimos (again), and take the UAC teleporter there into Hell, where you will once again do battle with that jerk, Baphomet. You'd think they'd learn, really. How many times has Hell's invasion been stopped? You'd almost be better off warring against the dimension itself...
Like a number of other releases from 2011, Jimmy draws inspiration from the classics. His list of influences include pretty much all the classically revered megaWADs –
Memento Mori (
I and
II),
Requiem,
Hell Revealed,
Alien Vendetta, and
Scythe. It's not exhaustive, though, and one can clearly tell where he's drawn from official products, like
Plutonia (especially the MAP31 mashup). In general, though, the maps have a character all their own, with Jimmy's gameplay preferences shining through. Action is in the knockabout
Plutonia style, though toned down with a few major exceptions. People playing the WAD straight through will have an easier time; many of the pistol starts are ball-busters, though certainly surmountable.
Few of these maps pass what I'd call medium-size, with monster counts usually numbering 200 or lower. As such, Jenesis tends toward quick plays. Expect to dodge fireballs from every angle. There's some observable trends in map flow as well. Jimmy tends to reuse space by filtering the player through common areas with the playing area increasing in size as you explore and flip switches. More importantly, he's an utter bastard that loves dropping you into (mostly) inescapable situations. There's no shortage of blind drops or effectively one-way doors to restrict your ability to retreat. Thankfully, health and ammo are usually in adequate supply. If there's an exception, you probably missed something.
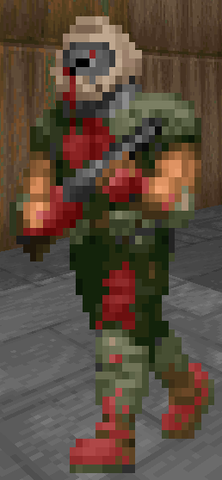
The only real change to Doom's traditional gameplay comes with Jimmy's new enemy, some kind of possessed marine. It behaves exactly like a sergeant except it's more durable, about on par with the commando. They're generally not that threatening unless you have to deal with them from multiple locations, much like the commandos, as you can't quickly wipe them out with a few taps of the chaingun. No; the real threat comes from Doom II's bestiary, especially the revenants and arch-viles. Expect to do a lot of dancing and maybe get a few fistbumps in. Most of these levels aren't exactly groundbreaking in terms of aesthetics, either, though they're all solid and gorgeous to look at in detailing and lighting. There are some things Not Yet Seen, at least for me, like the gorgeous molten gold falls of Alchemy or the desiccated Highway of Destruction.
Should you play Jenesis? Hell yes! It's fast (well, not as fast as some), fun, and has some cool bits of Boom, though the additional features aren't always evident. In fact, you won't see the craziest stuff he has in store until near the end of the megaWAD. But that's a-okay; saving the fireworks for the big finish is hardly a mortal sin. If you like Doom II, you should like Jenesis.


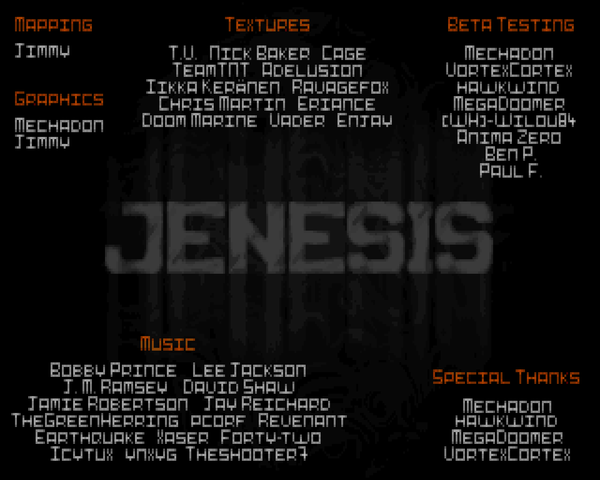
JENESIS
by James "Jimmy" Paddock
| Treatment Plant | MAP01 |
|---|
| Nice little nukage facility. There's a main compound and an outer yard area that's sectioned off to initially restrict player exploration, designating the map flow. As it's a treatment plant, the amount of toxins you have to wade through is actually pretty small, with the most dangerous section involving, of course, spectres. Imps crowded on ledges seems to be the order of the day. My favorite fight is actually a secret encounter, awarding the rocket launcher, but you'll have to take out two revenants with limited arms. | 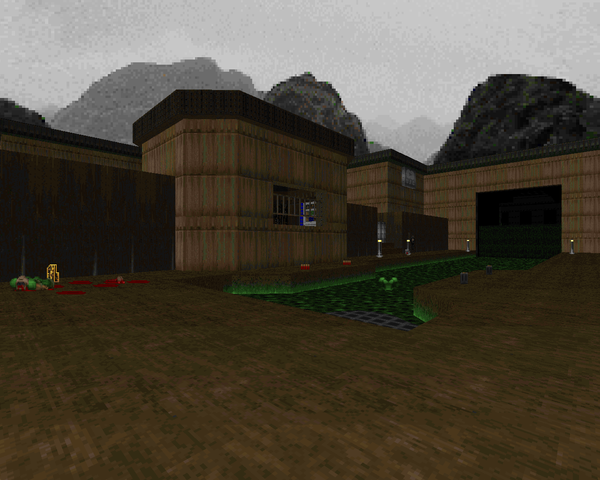 |
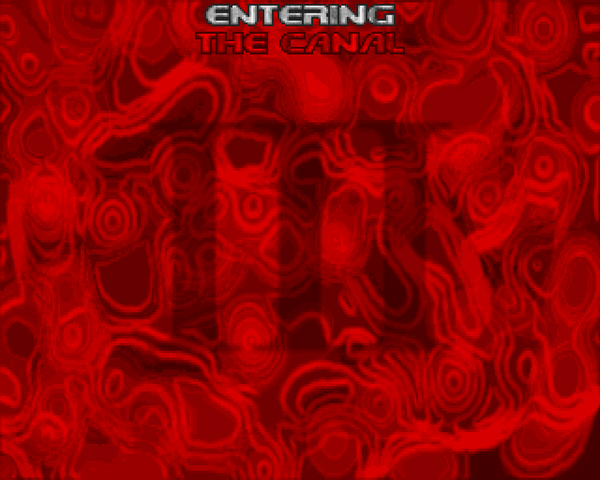
| MAP02 | The Canal |
|---|
 | Really cool tough map. It's got a Plutonia / "Inmost Dens" vibe with all the tan bricks and water and some of that carries over through the fights. I was feeling pretty snarky before I grabbed the blue key; boy was I surprised! And that's not to mention a brutal pistol start which has you ducking every which way to find a safe zone where you can finally take a breath. The southern room's also pretty nasty, with plenty of hitscanners and lost souls to worry about on top of the two revenants in the center. Roaring good fun (and I like that exit hallway). |
| The Oasis Facility | MAP03 |
|---|
| Nice techbase map divided by a rocky outcrop. Action's a bit lighter once you take out the welcoming party, with the nastiest bits being outside the base. It's mainly an issue of watching your back for projectiles while you take out more threatening monsters, like hitscanners, or the ever-present imps. The eastern room could be pretty dangerous if you're reckless; it's loaded with commandos and sergeants. The northern outcrop is my favorite part of the map, packing the most action and allowing for some great imp / SSG time. | 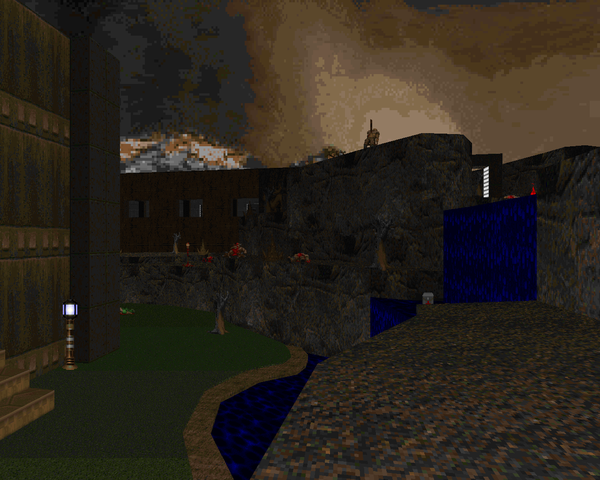 |
| MAP04 | The Garden Terminal II |
|---|
 | This is a tribute to one of Hell Revealed's rougher, early levels. The initial approach is much nicer, a crawl down a green canyon spotted with imps and Hell knights. The actual Terminal is brutal, outstripping its origins through features like the crenelated chaingunner walls (shades of "Everything Dies") and a park area rife with crossfire, not to mention an opening storm of imps and demons you'll have to contain. |
| Submerged Refinery | MAP05 |
|---|
| Nice and tight Plutonia-esque nukage plant. You'll be doing a bit of trudging through the waste, typically with a rad suit to back you up. Though the southern portion of the map is in some ways mirrored, the content of each half is quite different. The beginning is a little hairy, just a bit, but you get the SSG pretty quick and can get to some earnest demon slaughtering. In particular I like the western annex with its courtyard-style fight that awards combat armor to the artful dodgers. | 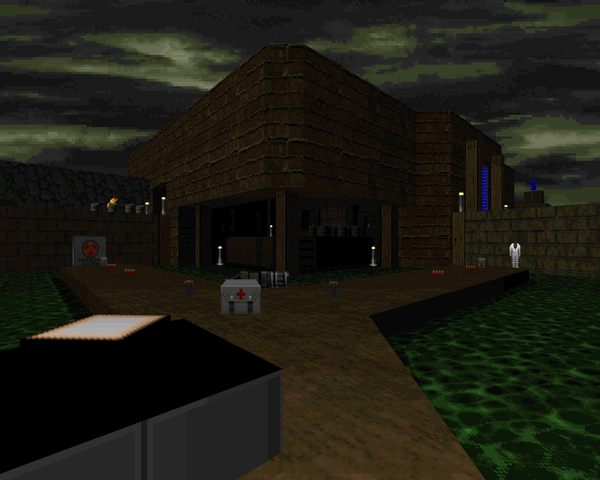 |
| MAP06 | Waystation |
|---|
 | Short and symmetrical outpost level with pretty intricate map flow. As you clear the map, the tiny area in which you're allowed to move slowly expands until you've visited all the yards and catwalks. As far as sights go, there's a pretty cool tower to the east complete with a faux-3D bridge. It's one of the trickier situations as two revenants on the other side can't be lured to your position. You'll also be subject to plenty of enemy projectiles, from the toughs on pillars outside the play area to the skeletons dutifully stalking the perimeter. |
| Dead Station | MAP07 |
|---|
| Not quite "Dead Simple". The monsters do appear in waves, more or less, but the battleground is a crater containing the entrance to an underground bunker. Things are a bit tricky as the space for combat is more open. After you take out the mancubuses you have a few big mobs to handle before the finale, a contingent of lost souls, pain elementals and cacodemons. It wouldn't be so bad were it not for the ample space they have to run around. Very quick play with some nice action. | 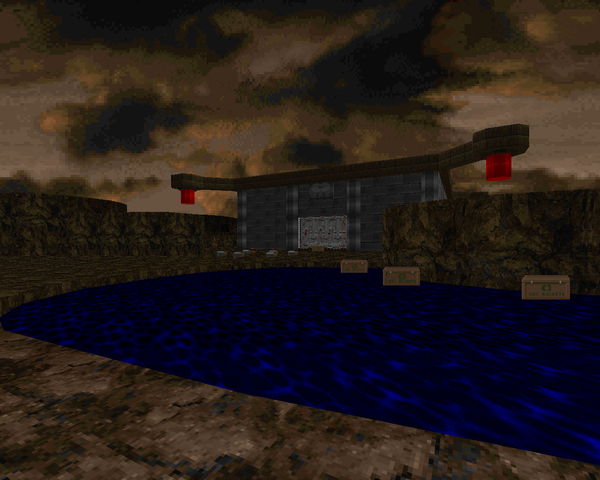 |
| MAP08 | Plunge |
|---|
 | Cool sewer level with the illusion of depth thanks to several unreachable vistas. After you clear out the opening area you have to jump into the unknown. It's not that bad, with most of the actual grief centering around the central room with the two keys. I imagine with secrets the ammo situation is less dire. The toughest encounter for me was the northwestern room, packed with some imps, some toughs, and an arch-vile, my best weapon being the SSG. The finale isn't so nasty, giving you plenty of room to run and a fairly obvious plasma rifle secret so knocking out the gate guardians goes much easier. |
| Slime Vaults | MAP09 |
|---|
| More sewers, of course. The difference here is the emphasis on sludge and some really cool encounters, first set up by what will soon be a very dizzy revenant. When you hit the main chamber you'll find two avenues of exploration. While you can investigate the majority of either side first, there's definitely a right way to do things. Otherwise you'll spend a lot of time backtracking through nukage without protection. The finale is awesome but dangerous, putting you on a descending platform at the mercy of three revenants in similar situations. You'll have to be agile, or just thank Jimmy for the health and armor right before you hit the switch. |  |
| MAP10 | Ruins |
|---|
 | Large cool map built around a series of ancient ruins and tunnels with plenty of light and shadow to add a dynamic atmosphere. Some neat places to visit, like a cathedral to the northeast or the row of shelled-out buildings to the north. Some nasty fights, too, like an ambush just before you jump into the huge sluice or the (basically optional) monster rising from the ruins. I like the rounded cavern walls in the outdoor section; it gives the map an organic feel. I think the whole northern gauntlet is my favorite segment, though the whole southwestern cavern / ruins complex has some neat sights. |
| Devil's Industry | MAP11 |
|---|
| This is a nice, large fusion of mines and techbase, housing what appears to be some kind of foundry. Action is pretty madcap, especially an opening that drops you in a nasty crossfire. Other highlights include an arachnotron shooting gallery to the west and the whole eastern mines complex, with a gorgeous faux-3D bridge, a marble interlude, and a blazing finale when you grab the red key. I like the use of the little one-way dropoff shortcuts that lead back to the main three yards and the few bits of tech / machinery. |  |
| MAP12 | Highway of Destruction |
|---|
 | Now here's something different! Jimmy gives his more intricate maps a pass for a straightforward highway crawl set into Deimos's coastline. Gameplay is either manic or annoying with the latter reserved for chaingun tapping hell knights and imps off to the side, or the incredibly rude roadblock trap shortly after the Spiderdemon. Yeah, there's a Spiderdemon, but he's pretty easy to take on. Most of the action involves mowing down the hordes of monsters coming down the highway for you, be they arachnotrons, mancubuses, imps, or the impressive army of demons at the finale. Very fun. |
| Transporter Station | MAP13 |
|---|
| Another techbase with a lot of caves to cover. This opening is particularly rough as there's a pain elemental and several other flying enemies amid all the riffraff. Securing a weapon while avoiding personal injury is paramount. The base is a lot of fun to explore, with an emphasis on teleporters carting the player around to otherwise inaccessible areas. I enjoyed the northern outdoor area as it's a bit more cramped as far as monsters go with sneaky placement on the sidelines. The final battle is a nicely telegraphed fight with a Spiderdemon with its own surprise. |  |
| MAP14 | Poisoned Ocean |
|---|
 | The transporter whisks Doomguy away to an outpost in the middle of a sea of nukage. It's nominally a techbase whose biggest defining feature is an outdoor walkway connecting the northern and southern areas. Like "Waystation", expect to see monsters on platforms outside the playing area. It's a bit more relaxed than the previous outings, serving as a nice breather. Highlights include a claustrophobic library housing several barons, and the southern annex, which has a ton of imps to slay, followed up with some revenants for your pleasure. |
| Alchemy | MAP15 |
|---|
| Jimmy nails an aesthetic all his own with this molten gold masterpiece. Beware the liquid metal; it's all 20% damage. Gold is just a nice theme to build a Doom map around is all. The cascading gold in the outdoor section stands out in my mind, though the combat (excepting the slugfest in the plasma rifle yard) isn't that memorable. Most of the good stuff is in the base, like the golden sewers or the opening, which gets straight to the heart of the matter with some arch-vile fisting. My standout encounter is the aforementioned plasma yard battle; like Plutonia, it's a teleporter trap that doesn't dawdle, and while there's a bit of cover to be had the monsters have a tendency to trap you behind the columns. Excellent! | 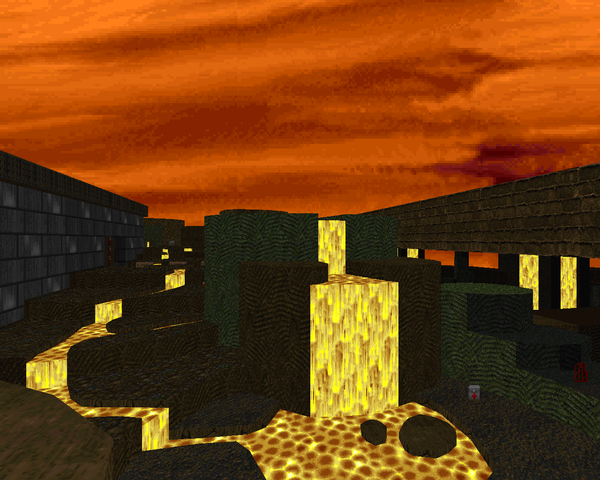 |
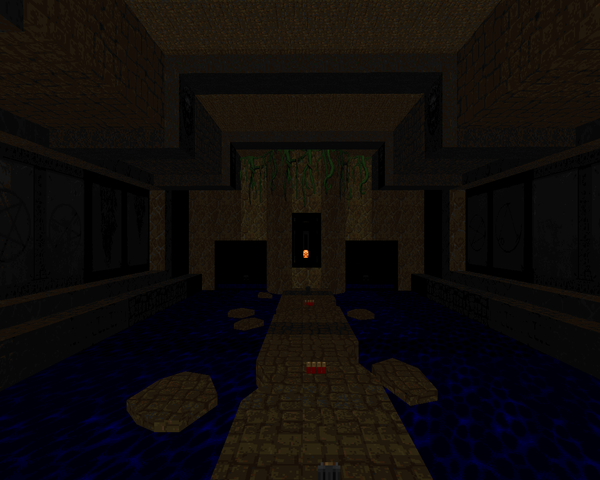
| MAP31 | Duality |
|---|
 | This is a mashup of TNT's MAP02 ("Human BBQ") and Plutonia's MAP02 ("Well of Souls"). Virtually all of the architecture should look familiar, though the encounters have been remastered to Jimmy's liking. It's a tough level, with Jimmy exercising tight control on ammo and health. There's no SSG to be found here, and while the BFG makes its first appearance, you'll want to save it for the final guardian. The BFG room is probably my favorite encounter, especially in a map where ammo is so scarce. It's a lot like the original, but tuned up, with an arch-vile in the center square. Nice work. |
| Reprise | MAP32 |
|---|
| Speaking of MAP02, this is apparently an alternate version of "The Canal" from 2004. Doomwiki describes it as a de-make; all I know is, the maps are two very different experiences, and while you can kind of see some similarities in the layout, that's about as far as it goes. It's a cool tough as balls level with nice touches like the out of reach red key. Be prepared to get your teeth kicked in, though, with a very tight Cyberdemon fight, a sizzling outdoor fight that'll leave you reeling, and a wave of revenants that come a knockin' down a narrow corridor. I hope you're good at dodging rockets. |  |
| MAP16 | Crestfallen |
|---|
 | Techbase set into a large mountain system. Like the details like the little guard towers at the entrance. Most of the area is actually the exterior, including a bridge over a chasm to the east and a vast stretch of rocky terrain to the west. Standout encounter for me is the crawl through the dangerous valley, seeded with revenants you'll have to watch out for, but my favorite area is the little marble ruin to the southwest with a bridge you'll have to raise from deep below, which manages to be a dangerous fight with all the spectres choking the area. |
| Deadline | MAP17 |
|---|
| Now here's a cool level. It's an underground railway and while it's still got some power, it's derelict and overrun with demons. The pistol start is a fantastic challenge, forcing you to confront a number of increasingly aware monsters while you dodge sprightly over the energized rails. There are actually two designated rally points in either direction, marked by the SSG, which is a nice touch. Once you get access to the central station, the difficulty eases up, as you'll have oodles of ammo, health, and a rocket launcher. The rest of the map's action is passable, but nothing really measures up to getting that first solid foothold. I also enjoyed the final segment, where some water inundating the final rail segment is electrified, giving you no safe space. | 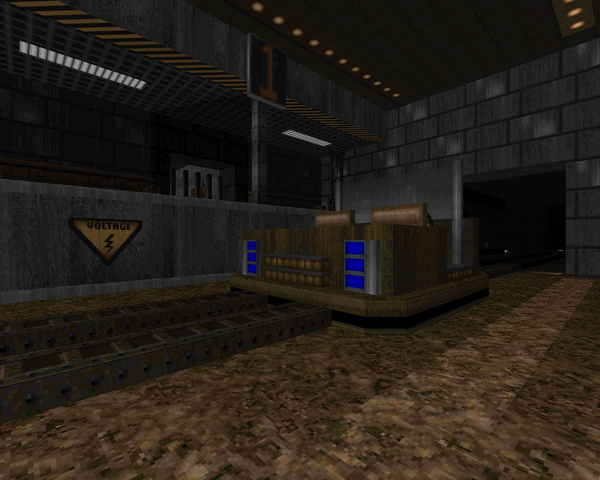 |
| MAP18 | Mineshaft |
|---|
 | Very fun and comparatively relaxed Plutonia-esque ruins map. Well, it's supposed to be some mines, but it screams Plutonia. The only weird part are the up and down elevators near the very beginning. Activating them at first isn't very hard, but using them to return is kind of clunky. Other cool bits include flooding a section of the mines to progress and some neat architecture, like the mancubus platforms to the northeast or the very sexy lighting in the northwestern room, where the burning windows shoot revenant rockets. There's another room where similar windows shoot imp fireballs; kind of reminds me of Legend of Zelda. No real standout encounters for me, though I did get to punch an arch-vile to death for a rocket launcher. |
| Subterranean Labs | MAP19 |
|---|
| Neat map that's half underground techbase and half lava-filled caverns. The techbase isn't so interesting; the encounters are pretty standard room clearing though Jimmy does a good job of refilling one of the warehouse rooms for your return. The best action happens in the earthen areas, where lost souls flit back and forth while you're on the lookout for barons and surprise appearances from some of Doom's more insidious monsters. I particularly enjoyed the final room, with the lurking revenants and arch-vile emerging from the lava fall. | 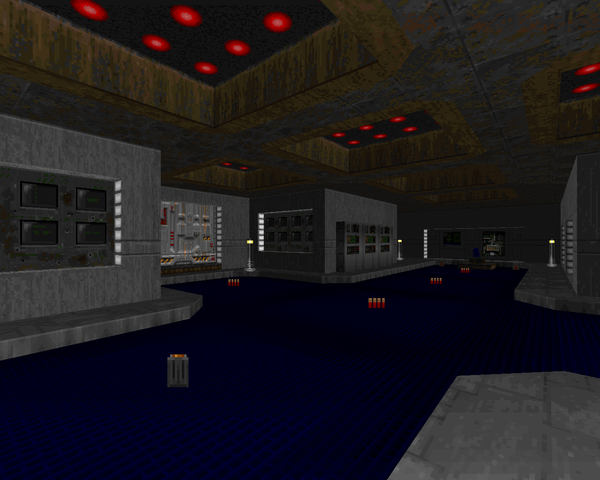 |
| MAP20 | Into the Gate |
|---|
 | Jimmy ups the ante a little bit with this military installation. There's a strong sense of symmetry that gives it just the slightest edge of reality, particularly in those nukage-rimmed L-shaped switch rooms (or the gate complex). The big shift is toward more lethal traps and surprises, especially from the blue door on. Besides the immediate threat, you'll get a Cyberdemon showdown on a helipad which you can augment with an army of Hellspawn at your leisure. Actually, the second time I faced this trap I managed to break it so that maybe half the pack didn't teleport in. The finale pits you against a contingent of possessed marines guarding the teleporter. They're...not that exciting, actually. Basically just tougher sergeants. |
| The Other Side | MAP21 |
|---|
| Yeesh! Your first trip to Hell is a short, scavenger-oriented map whose centerpiece is a blood-filled canyon. Ammo and health aren't cheap (unless you know the secret), so you'll have to weather the fireballs coming from the other side of the moat until you're prepared to take them on. Take note of the berserk pack on the canyon side; it's an invaluable resource. | 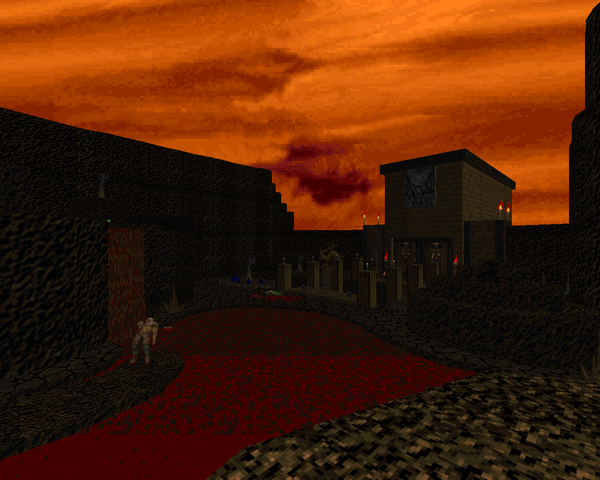 |
| MAP22 | Haunted Halls |
|---|
 | It's a medium-size Hell keep in marble and brick with some very neat features. You'll have to do some work to get a decent weapon for monster clearing, which makes bits like the sequence for opening the SSG door quite memorable. Other standouts include the red key switch; upon returning to the north central room, you'll stir up a ton of airborne aggression; it's probably my standout encounter, besides the whole SSG section. The part where the floor lowers to reveal the exit is pretty cool (very neat lighting, too). Is that crusher room a callback to HR's "The Jail"? |
| The Atrium | MAP23 |
|---|
| This is a demon-infested fortress isolated in a lava-filled crater. I almost feel like Jimmy exercises too much control over ammo and weapons here, but I kind of skipped by the plasma rifle given that my immediate reaction to the trap was to run to a safer location. It's a neat encounter, but if you don't know what's about to happen, you'll probably waste a good bit of time like I did. Anyway, watch your stores carefully and make good use of your items, or you'll fall prey to one of several arch-viles stalking around, not to mention the enemies on the outer ring firing in, really a waste of your ammo until you get a nice stock going. | 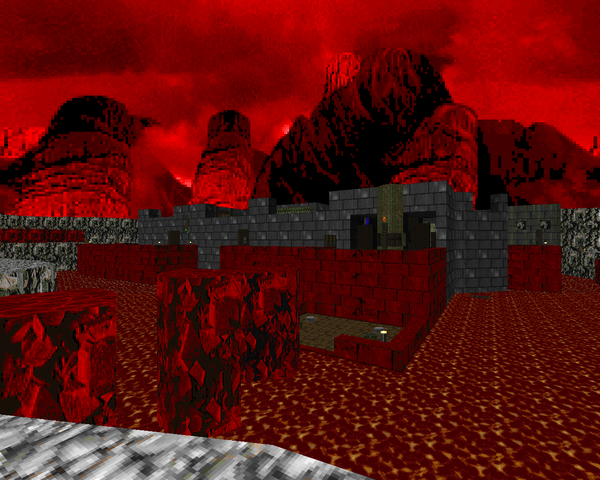 |
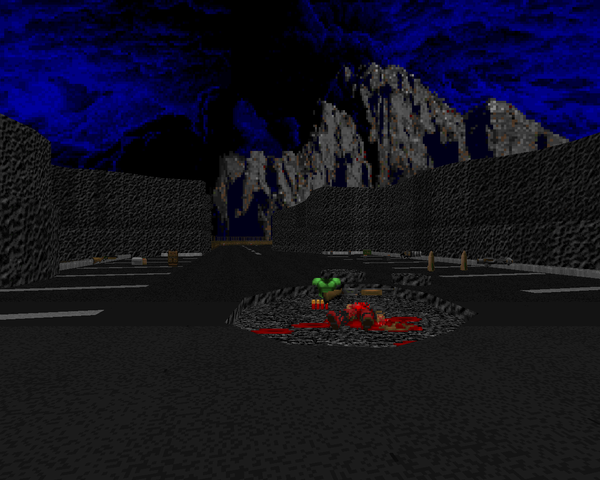
| MAP24 | Hades' Wall |
|---|
 | Very obvious homage to Ultimate Doom's "Against Thee Wickedly" with the approach and fortress facade. It's mostly small areas of neatly ordered Hell dotting an inhospitable landscape that in some parts is swamped with lava. There's plenty of ammo and health to be had; your main task is to secure all three keys and cross the large western lake to reach the final showdown. The whole area's fun to explore with all the terrain and little secrets stashed here and there. The end of the map is my standout encounter, evoking in my mind more Ultimate Doom, this time "Unto the Cruel", but I might just have Ep4 on the brain. There's a Spiderdemon and a ton of other trash running around, not to mention the welcoming party facing the ledge outside the door. I just like the look of the courtyard, especially the gothic cross. |
| The Carcass Pit | MAP25 |
|---|
| Simple, cool map. It starts in a small, moody fortress but most of the action takes place in the surrounding crater, which includes the eponymous carcass pit. The building isn't very interesting, though the spectre reveal is a cool moment. The meat of the map is in the vast northern area, which has several stages of action. The initial clear can be pretty tricky on top of the Cyberdemon overseer, but you've got a grand opportunity to make your own contribution to the carcasses before a tricky finale that mirrors your first visit, but with a simple twist. | 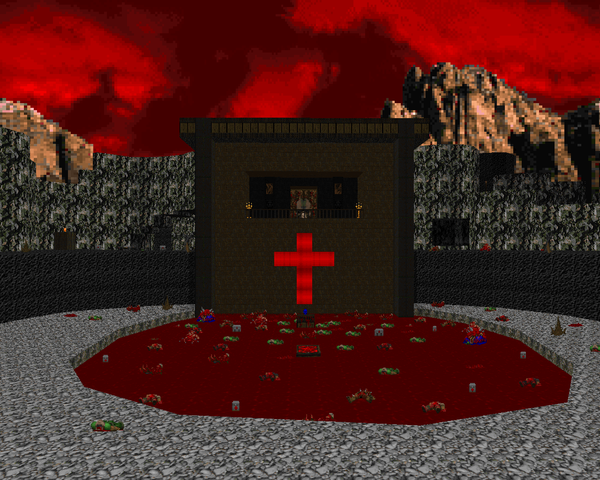 |
| MAP26 | The Savage Abyss |
|---|
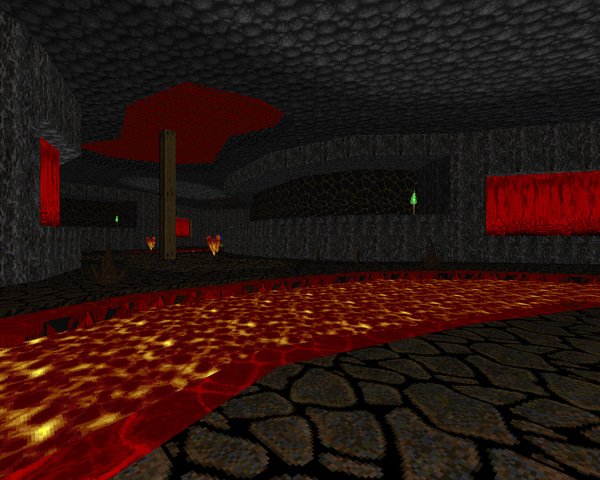 | Completely unlike anything that has gone before, this is a long and brutal map that evokes Doom II's "Spirit World" as well as shades of ultra-hard megaWADs past. This chasm is full of diabolical encounters. The beginning may not seem like it, but when you jump into the underground revenant-lined tunnel to the northwest, you'll know fear. Also, that ridiculous revenant-stocked spiral staircase with arch-viles lording over you at the top. And the finale, where you'll have to sprint over three pillars before doing some up-close BFG bumping with three Cyberdemons hailing you with rockets from the other side of the abyss. I hope you like skeletons. And arch-viles, definitely arch-viles. |
| The Vulcanum | MAP27 |
|---|
| Another difficult map (though not quite so much), this one set in a series of underground passageways (with some overworld hijinks). If handing you a BFG at the opening doesn't set the tone, I don't know what will. Well, maybe the two stationed Cyberdemons at either side of the main door with arch-viles at your back. It's an intricate, brutal map, particularly bits like the northeast section, with a hidden lava fall arch-vile coupled with an overlooking Cyberdemon and a staircase of revenants in your way... Let's just say that finding a safe place is tough work. All this running through lava tubes ends with another blood-filled carcass pit and quite a nasty climax. |  |
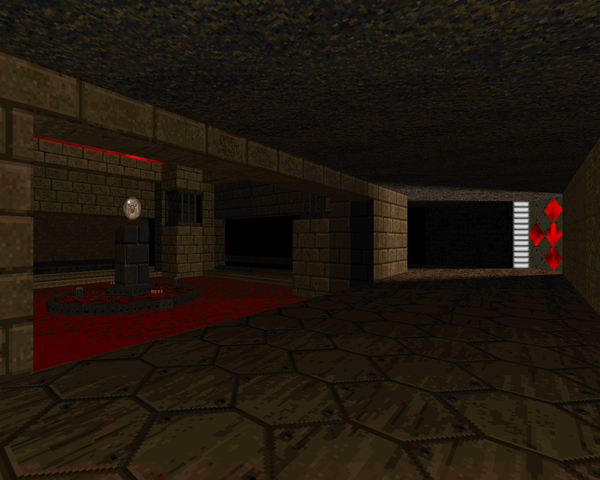
| MAP28 | Baphomet's Keep |
|---|
 | A thankfully low-key affair after the past two pain trains. This is Baphomet's house, and true enough, you'll have to fight a boss shooter at the end. It's an easy fight though once you know the trick. The main thing you'll bump into is a nice, pressing pistol start where you're outgunned and the penultimate chamber, which is pretty awkward to deal with. The rest is just a nice Hell temple with some great lighting (particularly in the western section) and a ton of blood. And, er, a weird catwalk to the red key that may have some crying foul. Very neat level. |
| Mutant Jenesis | MAP29 |
|---|
| Whoa, cool opening sequence! This is a dark and ruined techbase of sorts. It's a tough map, mainly due to the proliferation of hitscanners. The durable mutant troopers really stand out as a threat; once you've made the main outdoor area safe, you're basically home free, barring any cock-ups with the other demonic insurgents, like the southeast baron annex. I love the careful lighting around the blue bars in the office building (though it falls apart when the bars raise) and the final room, containing the Hellish core of evil (leading to a just as cool closing sequence) is nice as well. | 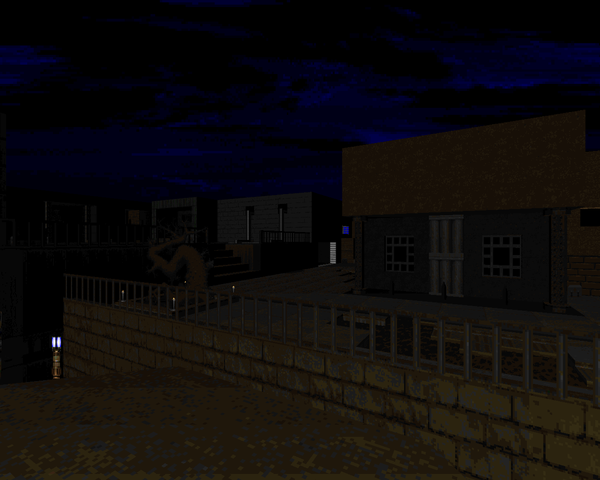 |
| MAP30 | Abysm |
|---|
 | Cool boss map. It's another demon shooter at the very heart of Hell, but taking him down is pretty straightforward if you solve either of the side puzzles, one of which is a neat little shooting gallery. Just watch your back and have a little patience; he's got more health than your average brain. Those pulsing wall textures are absolutely stunning if you take the time to check them out. |
JENECYST
These final maps were excised from previous iterations of
Jenesis. "Putrid Cathedral" ended
Jenesis Pt. 1 at MAP11, and "The Guardian" ended
Jenesis Pt. 2 at MAP20. I've reviewed them here as to do otherwise seems hardly fair.
| Putrid Cathedral | MAP11 |
|---|
| The opening of this map is kind of reminiscent of "The Vulcanum" insofar as you start out in a hallway amid a sea of blood with tons of goodies in front of you. Oh, and the arch-vile surprise. Activating the boss shooter platform is a minor puzzle but it's an easy fight from there on out as the pillar is in a pretty safe location, ignoring the monsters inside the chamber itself. | 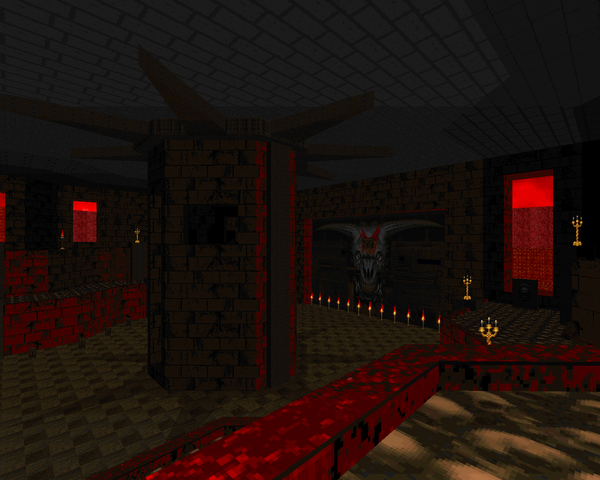 |
| MAP20 | Guardian |
|---|
 | A bit of a different spin on the boss shooter set on a mountain side. You're actually gonna have to climb inside the bastard, but to do that, you need to get him to open his mouth first. It's not that tricky unless you blissfully ignore the lost souls that love to jump right in front of you. Don't squander your cells – you'll need them to slay his retainers lurking in his gullet. Pretty cool map! |
YOU CANNOT GRASP THE TRUE FORM
OF GIYGAS'S ATTACK
Map31 is sooooo suuupppeeerrr kool. I'd love to see more levels like that. Great wad.
ReplyDeleteyou could always beg jimmy to do a tnt meets plutonia mashup based on map31
DeleteThe Human Well of BBQ'ed Souls. (For a better Map31 name)
ReplyDeleteJust wanted to point out about MAP24. I think it's more a tribute to "Against Thee Wickedly" than "Unruly Evil".
ReplyDeleteYou are absolutely right; "Against Thee Wickedly" was the level I had in my mind, based on the things I mentioned ("the approach and fortress facade") but some six years ago I typo'd to "Unruly Evil". Thanks for the correction!
DeleteOne of the best WADs I have ever played. Or at least high up on my list. Jimmy simply knows how to create both levels and music and his music is often at least 40% of the experience. As with Plutonia 2, Jenesis is in my opinion one of the WADs that could pull kind of cinematic feel in later levels while still being DOOM. Something TeamTNT had problems with in my opinion. Not a fan of their gimmicks and "cool" level behavior.
ReplyDeleteUnfortunately, I had quite a few bugs. Searching online proved that it is probably my stubbornly set ZDOOM? I could not find mention of said bugs anywhere so the problems probably were on my side. Stuck doors, unresponsive switches and non-working triggers. Had to watch a video of the map and then cheat because I thought I am just stuck but I was not.
For example, the skull switches in MAP28 during the final encounter did not work at all and there were other maps like that :/