Insane_Gazebo had a dream. His goal - to pair slaughter combat with beautiful environments, because it's what he wanted to play, and as far as he could see was pretty much nonexistent. It looks as though he may have left, and while some people may still have their fingers crossed, I guess that
Sunder is pretty much done... for now. IG may have fulfilled his dream better than he could have hoped, though. His influence is felt through a new generation of authors who have taken his approach to heart, kicking off a revolution of iteration and experimentation, plumbing previously unexplored depths in gameplay and aesthetics. Ribbiks and dannebubinga count themselves among
Sunder's disciples, possessed by a strong LUST for the paradigm brought to life by Insane_Gazebo. Seeing each other as kindred spirits, they combined their talents to bring you this intense loveletter to
Sunder -
Sunlust.
Sunlust is a full Doom II megaWAD, meant to be played in Boom-compatible ports. A few of the levels are big enough in scope that GLBoom-plus is recommended over any other source port. I managed to hack through them in ZDoom, but the former is strongly recommended. One thing you'll notice as you play - there is virtually no story to Sunlust. In fact, the only text screen that showed up in ZDoom was after I had finished it, with the writer not entirely sure as to the nature of the final confrontation, but thank you for playing. Looking at the embedded DeHackEd file, there's more, but it's pretty much along the same lines. The only motivation you really need is that there are thousands of demons to kill and they're occupying roughly thirty of the most breath-taking microcosms ever devised for Doom.
First, my hat is off to dannebubinga (Daniel Jakobsson) for his work here. danne's most well-known works are
Combat Shock and
Combat Shock 2, both of which expanded upon
Sunder's ideas with new themes and more intricate combat scenarios.
Sunlust showcases his talent in several less-explored fashions. The big one in my mind is that his early levels actually ease the player in to the slaughter stuff that dominates the back half of the mapset, rather than starting out big and getting bigger. I also think that
Sunlust's generally smaller scale brings the dynamic feel of his encounters to the forefront, not to say that the battles of the
Combat Shock series aren't just as complex. It's more that the dynamism was hiding in plain sight.

danne's partner in crime, Ribbiks (Zachary Stephens), exceeds my expectations. Ribbiks made a name for himself in 2013 with
Stardate 20X6 and
Swim With the Whales, two mapsets known for their unusual color schemes as much as their unrelenting difficulty. His characteristic megastructures dominate the set, as well as his penchant for inventing new ways to challenge the player. One scheme in particular - used in MAP19 and varied upon in MAP29 - blew my mind. It's also refreshing to see more medium-length levels, something between the exhausting epics of 2013 and his bite-sized
Crumpets, also published this year.
Sunlust is hard, but lower difficulties are fully supported for players who aren't ready to break themselves upon the rock. Some encounters will remain essentially the same, but lessen in potential duration, so you get a taste of the action without choking on the spices. Ribbiks suggests that MAP29 is maybe the hardest one of the set, so it's a great test case for some of the differences. As a strong believer of trial by fire, I never turned the dial down from UV, but I was sorely tempted on at least one occasion, and it's always there if the encounter designs prove to be too intense. There will still be challenges to conquer. At the very least, the atmosphere of these maps is so engrossing that they are well worth a walkthrough in -nomonsters mode. Screenshots hardly do these levels justice with all the attention given to dynamic lighting, MAP25 being a fantastic example.
Putting Sunlust under the banner of "slaughter" is a pretty broad generalization. To the uninitiated, "slaughtermap" is a pejorative, something used to easily hand-wave away a style of gameplay as mindless BFG spam or rocket spam. The hyperbole suggests that authors are just belt-feeding enemies into a line that players can handle without any real thought on their part. Certainly, there are encounters in PWADs that fall prey to the almighty circle strafe. In slaughters, though, you usually have to do some footwork to get stuff to the point that your eyes can glaze over, involving a lot of crowd-surfing; that is, running in between enemies that are out for your blood or someone else's. Sometimes, you have to do some herding / crowd-shaping, getting enemies to bunch up in a certain way so that you can eventually carve out some sort of escape path. While you're still holding down the fire button, there's way more strategy involved than the word "spam" implies.
And, really, the opening half of Sunlust doesn't have a lot of this slaughter-type play. I think that MAP15 is the tipping point, and even then, you still have bunches of battles that are navigated with finesse over brute force. The only times I was ever able to lay down suppression fire into a choke point was against invading forces of revenants, which also requires some dodging skill on the player's part (and, as is the case with the tower in MAP20, staying out of the LOS of the arch-viles inside). There is just too much going on in any given level for me to be able to pigeonhole this as anything but high skill-ceiling gameplay, which is something of a mouthful but more honest than slaughter. I don't think I've ever been forced to carefully pace around a pillar in order to avoid being blasted by arch-viles stationed in the cardinal directions, but this is exactly the kind of gameplay boundary I want to see pushed, and I am very fortunate that I have authors like Ribbiks and danne who are more than willing to see what new challenges may yet be coaxed from this twenty year-old game.
Sunlust is a beautiful, brilliant array of color combinations, striking architecture, and immaculate detailing, augmented with painstaking dynamic lights and lighting gradients. Finding a great vista is like shooting imps in a barrel. It also plows through a whirlwind of themes, each lasting about about a handful of maps. I'd love to see some more of some of these in the same way that I fell in love with Swim With the Whales; for instance, the heavily organic aesthetic that begins with "The Womb" flashes by in two levels, with "Blood Geometry" and "Inverti in Darkness" going their separate (but appreciated) ways. However, while yellow and metal in the void (MAP29 and 30) only lasts for two levels, their sheer size gives the concept plenty of time to breathe. In retrospect, I guess that none of the themes post-MAP16 really stick around with the exception of nightmare green, which must drive the dudes behind Necromantic Thirst wild.
And that's one of the most compelling aspects of playing PWADs - at least, from my point of view - the imagination run wild. Sunlust's megastructures and set pieces speak of Things Not Yet Seen, from the solid sheets of flesh in "The Womb" to the rotating lift wall of "Go Fuck Yourself", the ethereal steeple of "Maelstrom", the cyberspace of "Neo Georuru"... and all points in between. Even the more mundane settings are elevated through the typically impeccable geometry and, as mentioned several times before, the superb lighting. I can't stress how important lighting is toward building a level's visuals, whether it's sheer contrast, blinking, flickering, or glowing.
Way back when I started playing Doom PWADs, I was watching videos of crazy stuff like Deus Vult II, hoping that I would eventually have the chops to hack it in these gorgeous settings against the battles they were presumably scaled for. After running through the PWAD equivalent of Hell Week, I'm pretty sure that I can suffer through just about anything that's thrown at me... within reason. And that's a relief. Yeah, I'm one of those people who rarely dials it down to HMP or lower, but I was willing to practice ("Everything is fun if you just practice!"). Don't let your own pride dissuade you from undertaking this wonderful journey. It's worth it.


SUNLUST
by Zachary "Ribbiks" Stephens
and Daniel "dannebubinga" Jakobsson
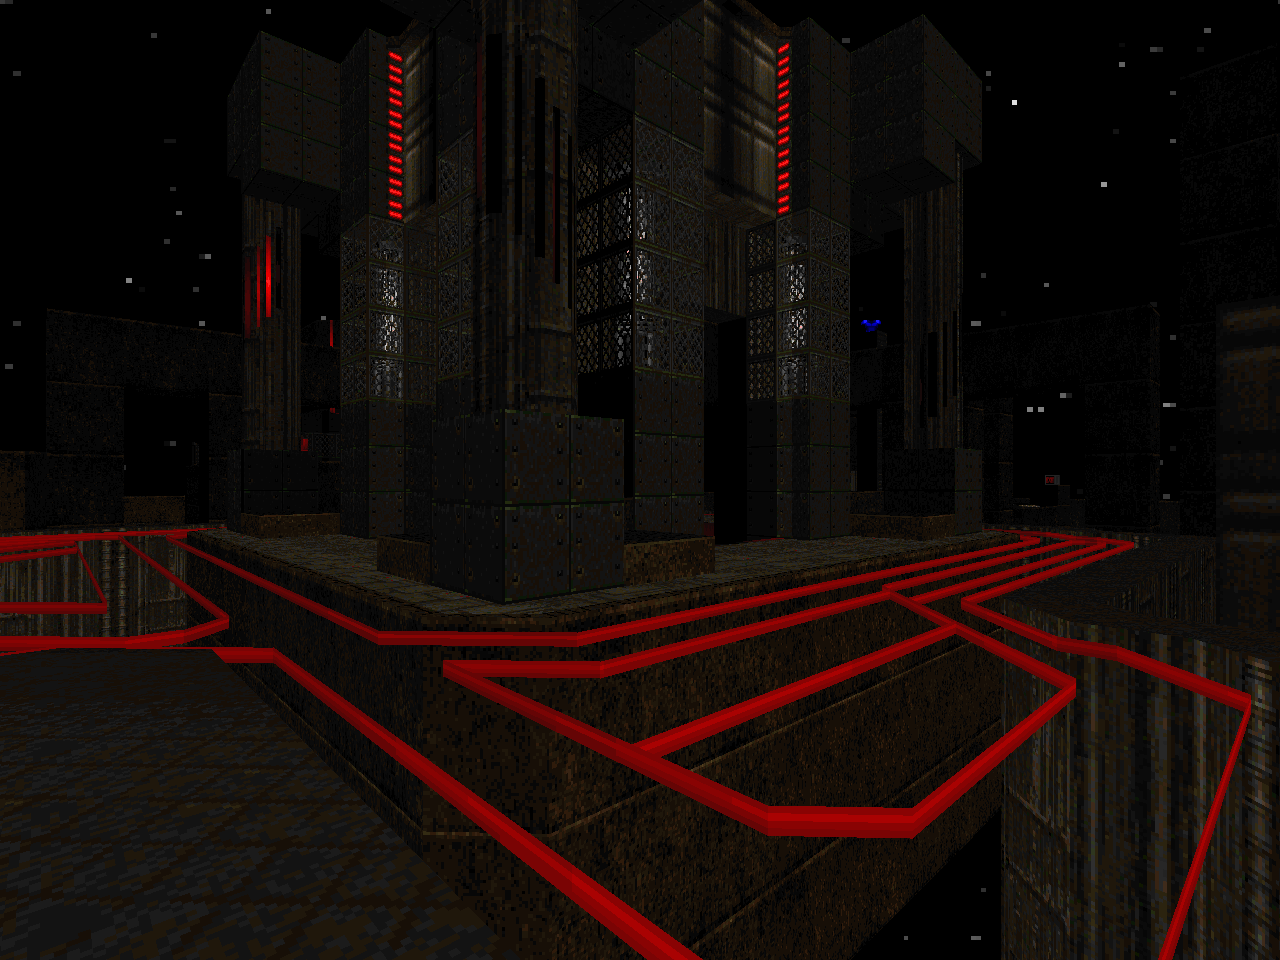
| Chasing Suns | MAP01 |
|---|
| by Zach Stephens aka "Ribbiks" and Daniel Jakobsson aka "dannebubinga" |
|---|
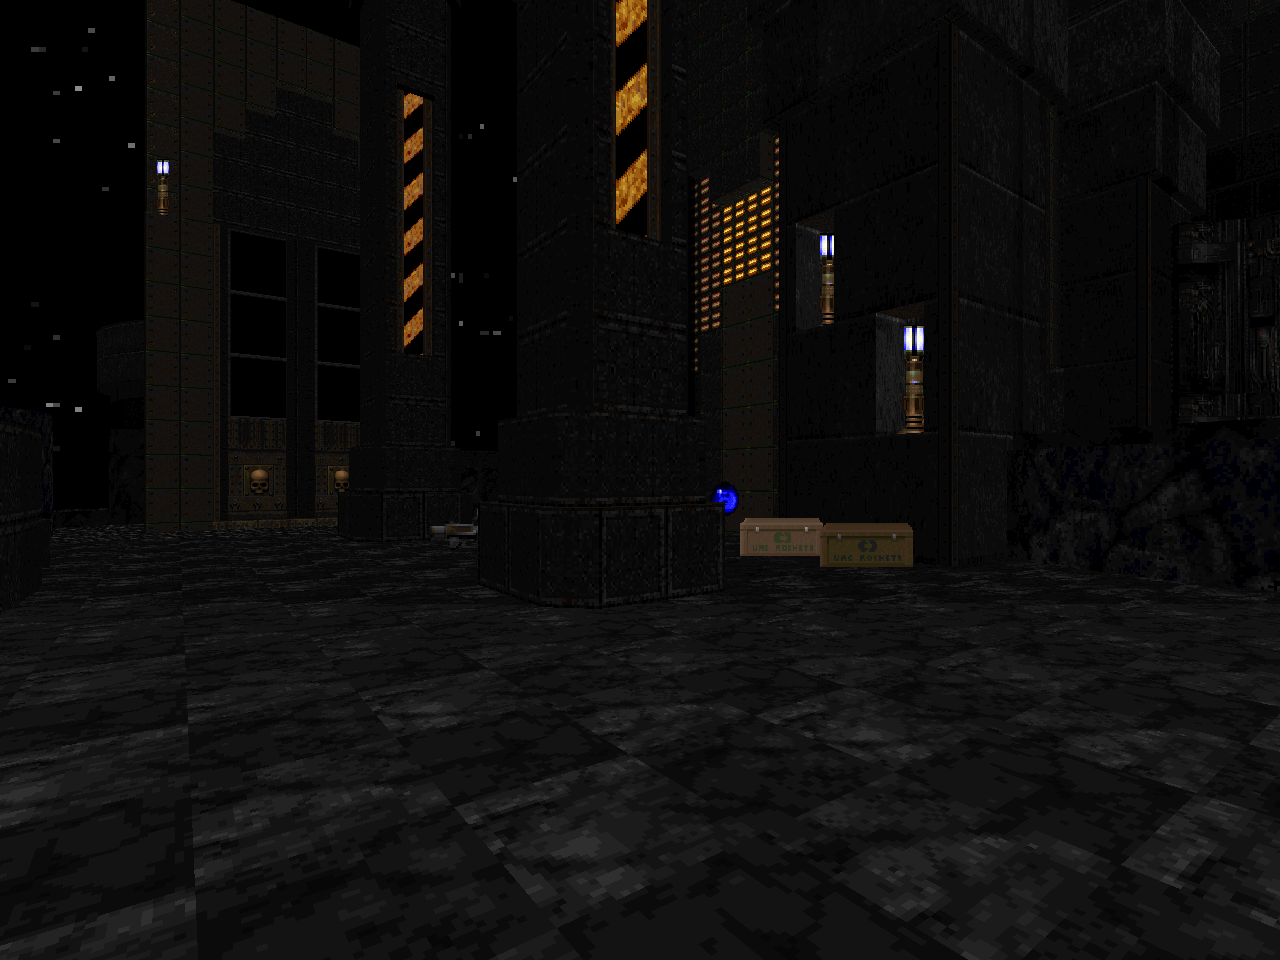
| An impressive gothic opener, riddled with moving orange lights and Plutonic bricks. "Suns" may not be what you would expect from the pedigree of the authors, but it's also pretty far from your bog standard MAP01, as it comes with a healthy dose of "doesn't fuck around" with the commando alcoves and that early mancubus, which attempts to lock down the starting area. The chaingun is an indispensable tool; grab it as early as you can for maximum hitstun while pursuing the yellow key. It also helps to make a beeline for the SSG once it's open, since it'll save you time and ammo against stuff like the pain elemental. | 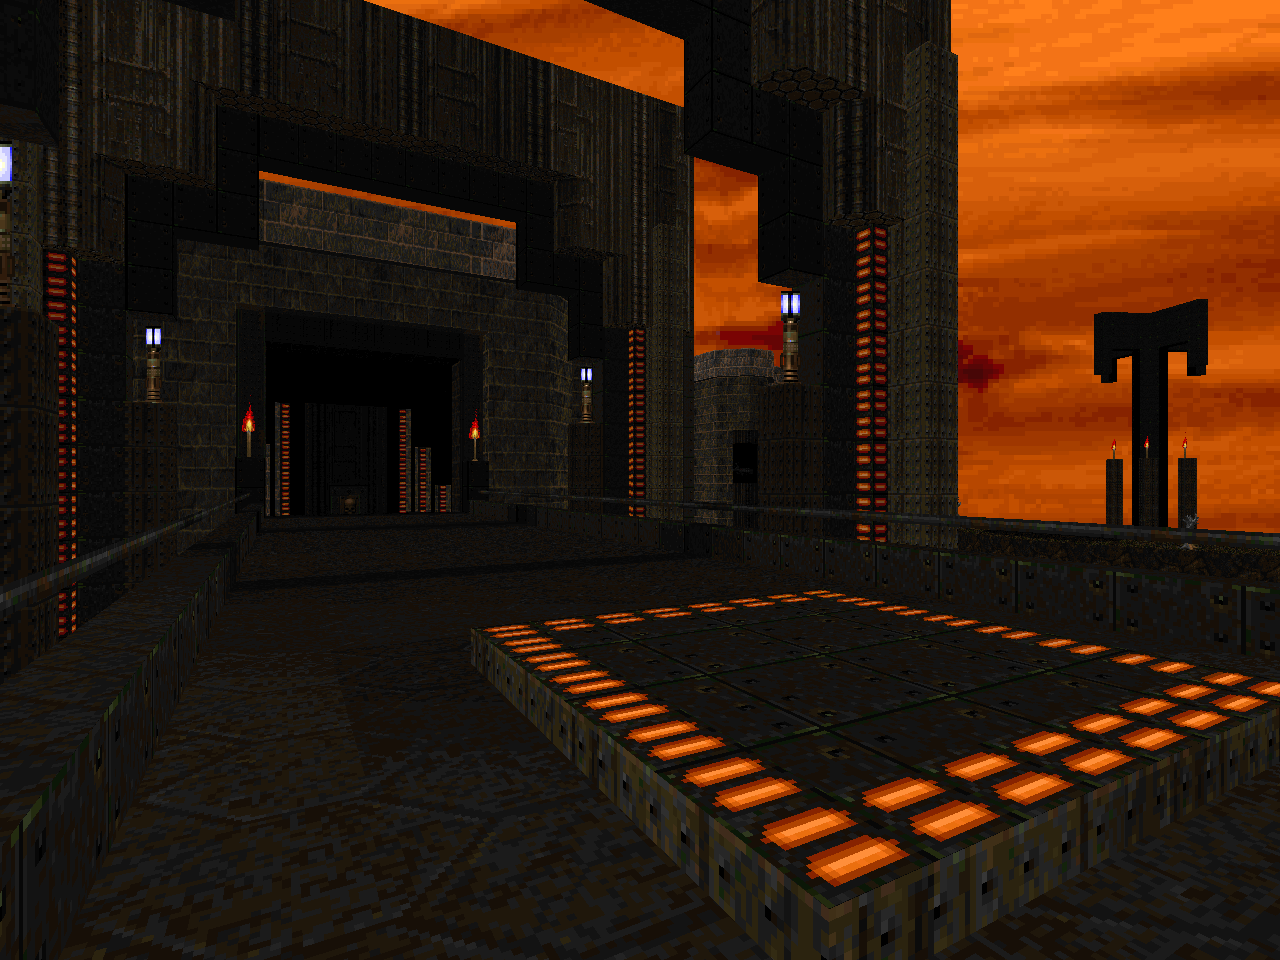 |
| MAP02 | Down Through |
|---|
| by Daniel Jakobsson aka "dannebubinga" |
|---|
 | A splendid little level that's full of raw sewage, caves, and monsters that are just dying to be resurrected by arch-viles. Word up! danne is slightly less reliant on hitscanners as you roll into MAP01, but the aforementioned sorcerers figure pretty heavily into the challenges that await you. The big cavern to the north is an important stepping stone in using an open area that's tricky to maneuver around in as the site of a major teleport ambush, and the use of all the flying monsters adds another layer of complexity, though you'll probably just rush the pain elemental. The cramped western room is a great rock-and-hard place, pinning you between a revenant and two commandos vs. a mancubus. Some really fun secrets, here; I especially liked the plasma gun alcove. |
| Forgotten Shrine | MAP03 |
|---|
| by Zach Stephens aka "Ribbiks" |
|---|
| A gorgeous brick and metal ruin in Ribbiks's earthy style. "Shrine" mixes exploration with lots of vertical motion, including loads of dead drops used to quickly transition from one floor to another, usually returning by teleports that aren't always immediately apparent. It's like a kinder, gentler sojourn into the cavern levels of Stardate 20X6, though you'll still have to deal with moments like the blue key bridge that locks you in to the delight of a handful of enemies. The plasma gun secret area is a vivacious encounter that does a fantastic job with light and shadow for a particularly memorable experience, considering the otherwise simple composition. Very cool. | 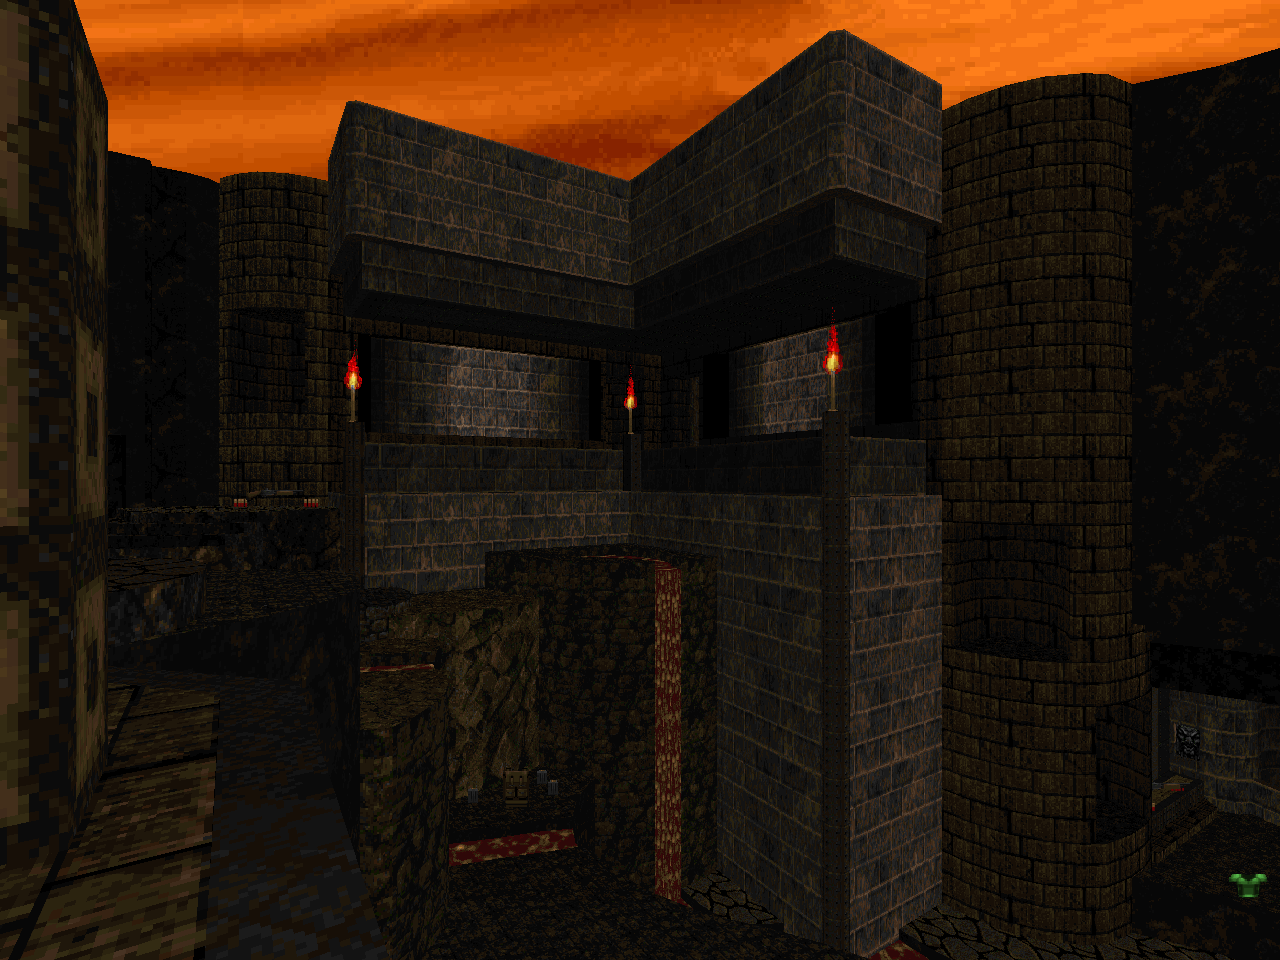 |
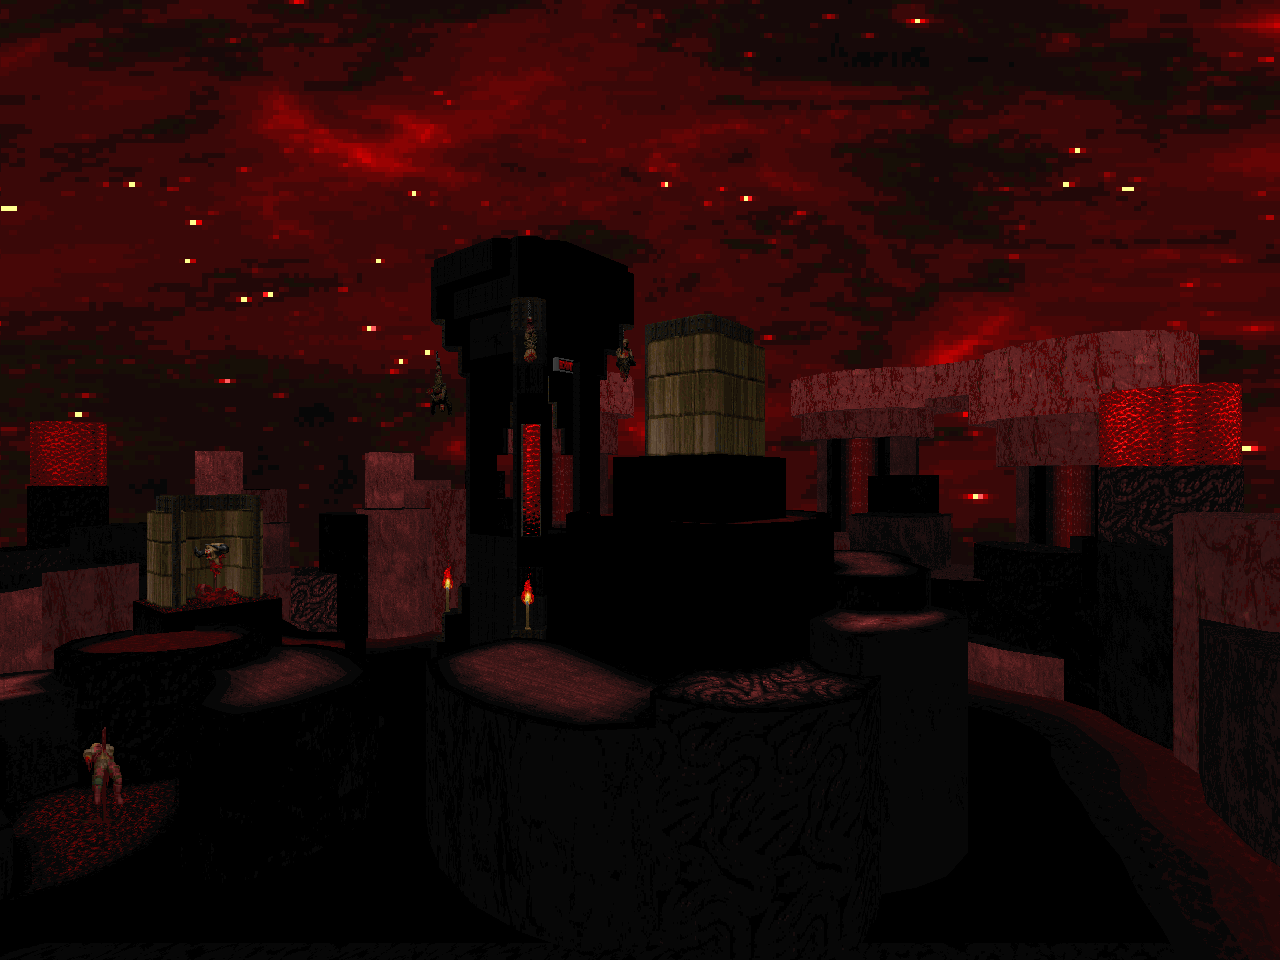
| MAP04 | Sol |
|---|
| by Zach Stephens aka "Ribbiks" and Daniel Jakobsson aka "dannebubinga" |
|---|
 | More naturalistic beauty, but the liquid is mostly lava, and there's a greater emphasis on earthen trappings, within which the outline of the Hellish fortress has been constructed. "Sol" points the way toward the future with an opening that's pretty claustrophobic before punting you into a hornet's nest of revenants and Hell knights and other snipers overseeing the main chamber. You need to grab all three keys to exit, each one with its own particular challenge. I'm not sure what unlocks the secret plasma gun, since it appeared to be available without any particular prompting on my part. The trickiest fight for me was the aerial rush to the southeast, due to the flying monsters dominating what little free space you have to start and the influx of chaingunners by both the key and up the exit path. The pure chaos of the central area is really fun to fight out, though. |
| Gear Up | MAP05 |
|---|
| by Daniel Jakobsson aka "dannebubinga" |
|---|
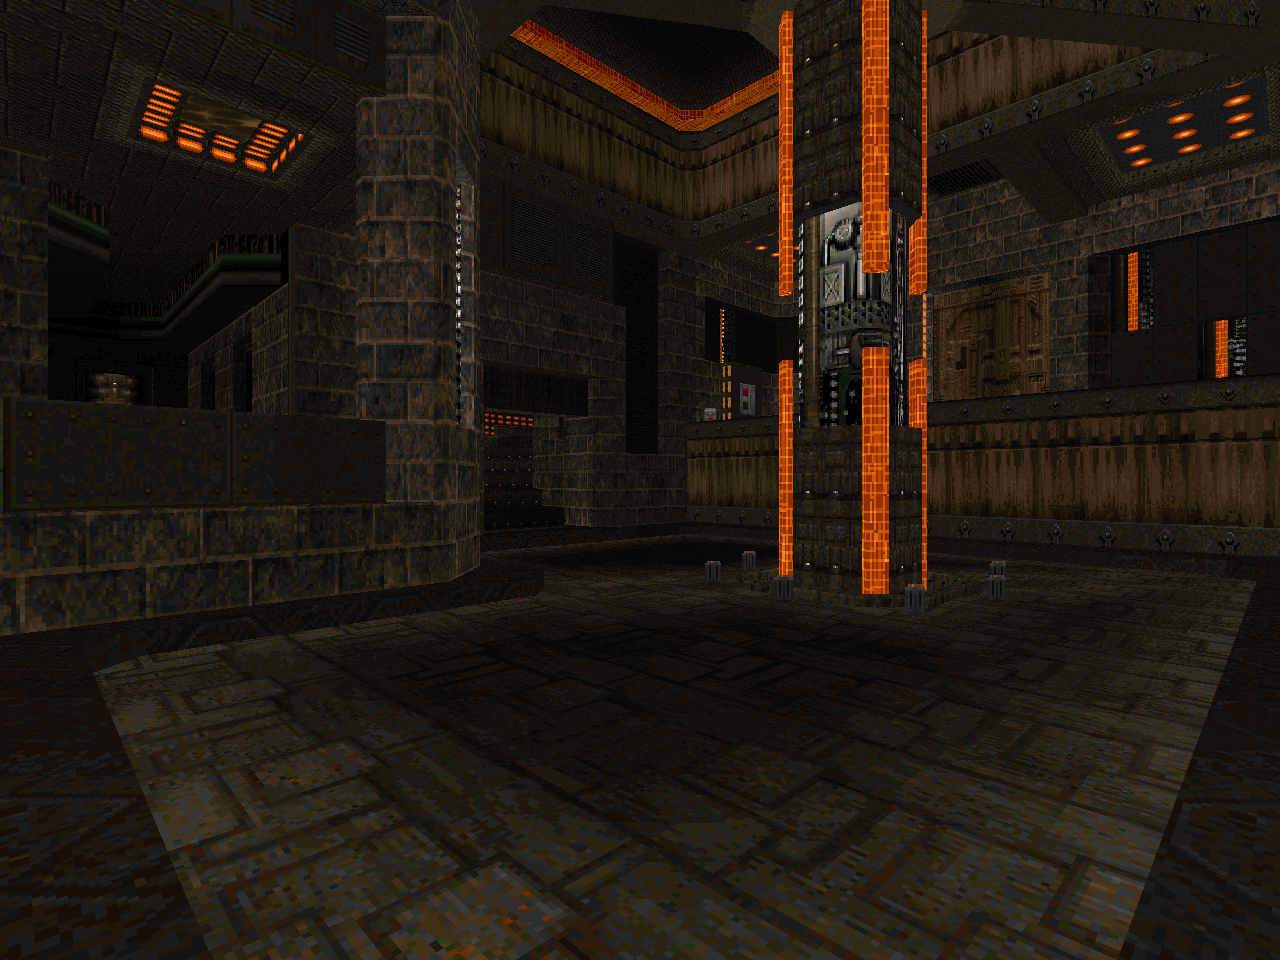
| Danne brings a slightly different color scheme with a reliance on red that brings to mind his "Closure" from Combat Shock 2. It takes place on an orbital platform containing a fortress built out of an enormous sea of lava and has a cool thing going on with the walkway that runs through the central hub to give it a real space age feel. It's a pretty rough little level since there is a horseshoe of revenant snipers overlooking the starting area and poking too deep into any of the side areas (activating those little pedestals) triggers some kind of trap and with all the chaos going around you're a little hard-pressed for ammo. Highlights include a veritable ring of chaingunners that will mostly eat themselves alive with a handy blur sphere and practically invisible specters in the lava pit to the northeast supplementing an otherwise easy arch-vile battle. It's more treacherous than anything. | 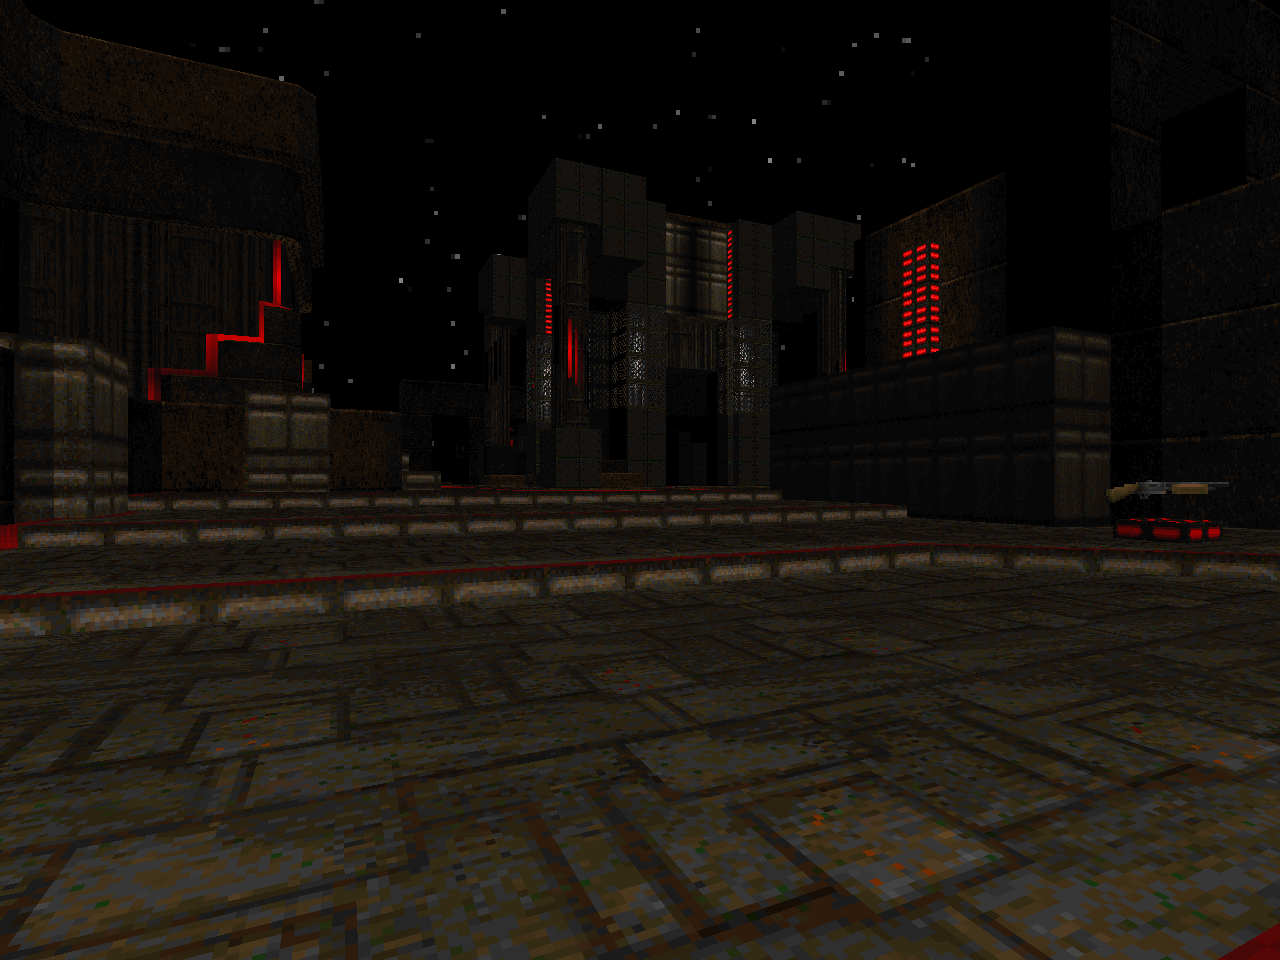 |
| MAP06 | Neo Georuru |
|---|
| by Zach Stephens aka "Ribbiks" |
|---|
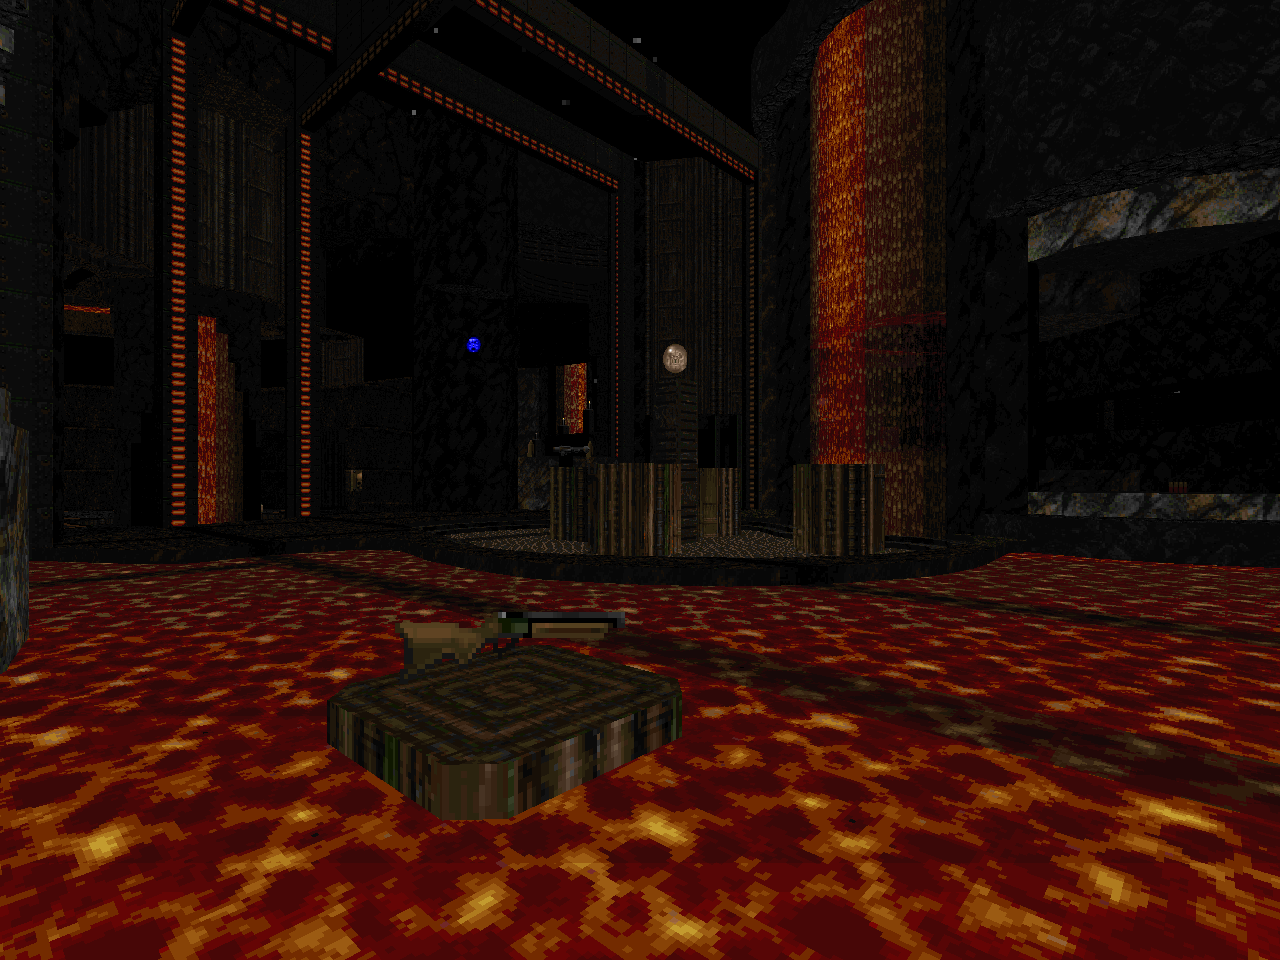
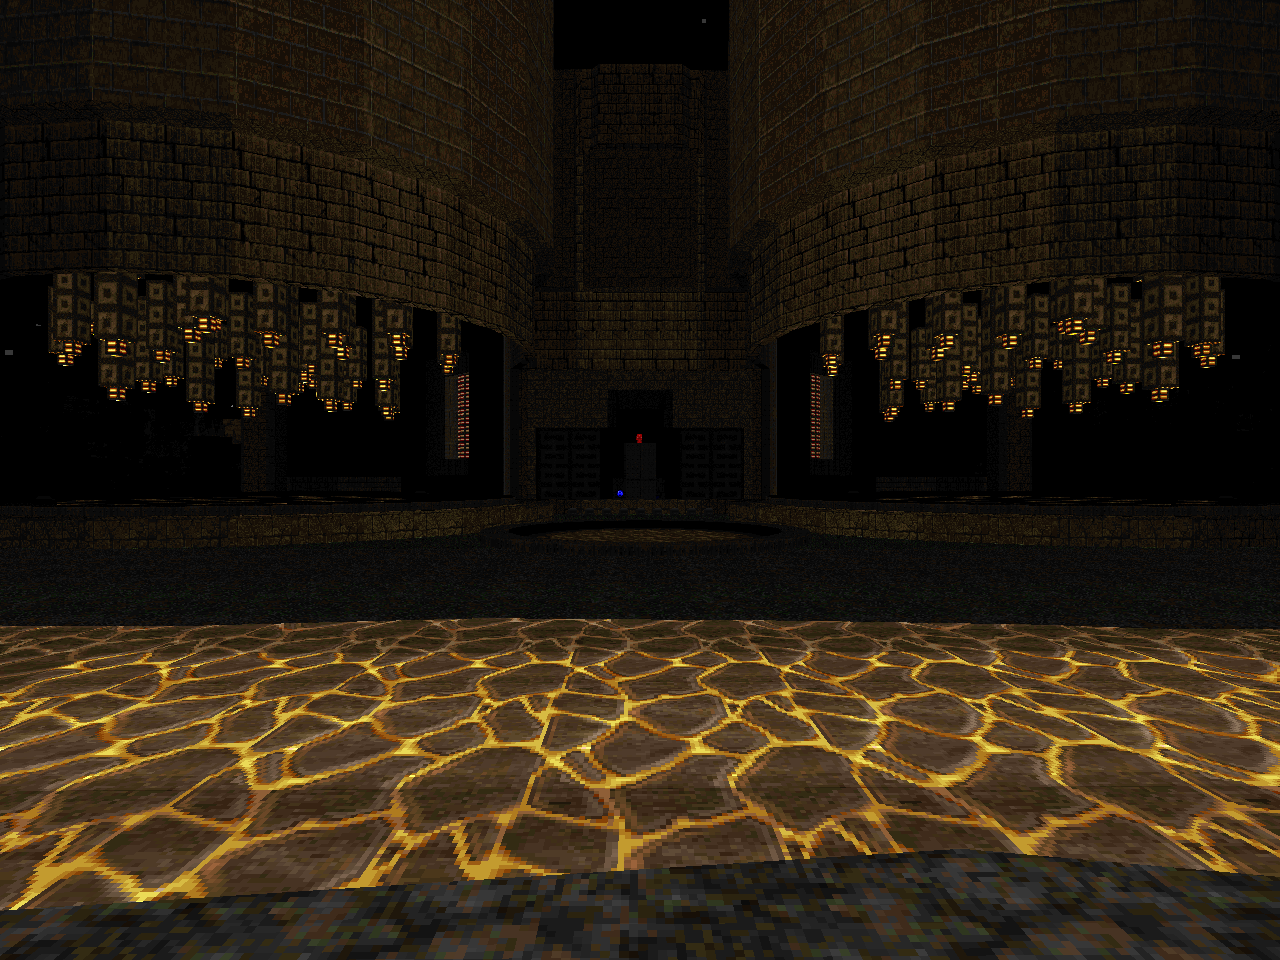
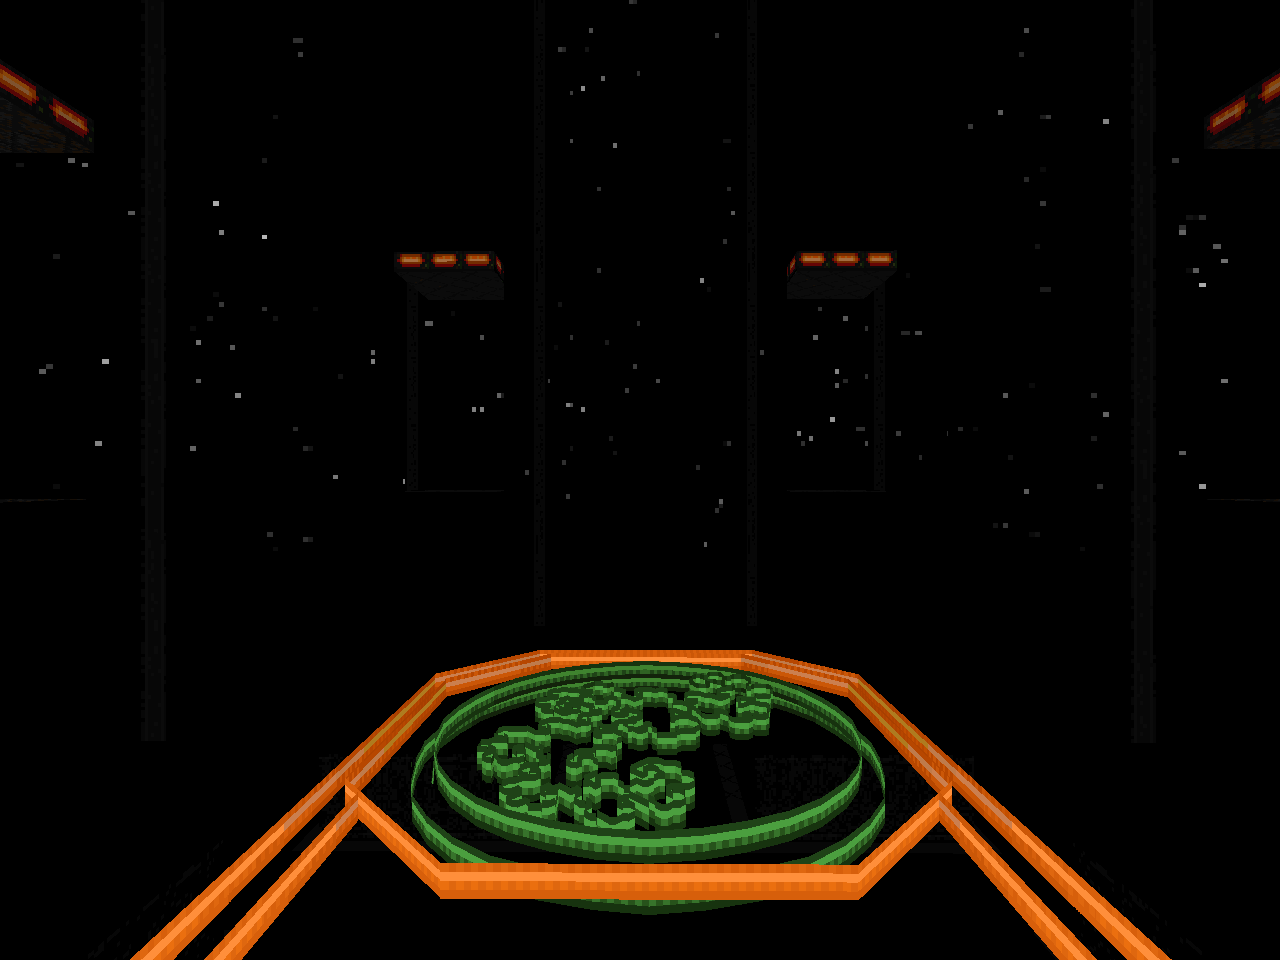 | Ribbiks targets something a little more vibrant with a mixture of green and yellow lights in this short, complex thriller set in an ocean of nukage. Of course, the opening is pretty intense since you're looking at putting down commandos, imps, and cacodemons, and it's still pretty gruesome as you leap from the starting area to one of the other platforms, but things lighten up once you've got the rocket launcher in hand, not the least of which because you can bump off that annoying arch-vile sniper. The southern section feels like a proper hornet's nest, especially with the daunting gallery of barons, who of course are annihilated through a charitable crusher action once you've blitzed through their area. The big finish at the circle elevator is a nice coda, especially if you've built up plenty of rockets to easily suppress the couple of arch-viles that backs the squad. The biggest hooks for me are the spiral green teleporter pads and the digital exit room (and maybe those lamp orbs). |
| Total Enclosure | MAP07 |
|---|
| by Zach Stephens aka "Ribbiks" and Daniel Jakobsson aka "dannebubinga" |
|---|
| A dark, treacherous base with acidic sludge and... slowing mires, interestingly. Something like a Darkwave0000 piece. Ribbiks and Danne start to hammer in the congested last stand battles. The final area doesn't use a teleporter, but the conflux of arachnotrons and Hell knights are deadly when coupled with the exploding barrels that's tucked into their closets, which would ordinarily be your safe haven. The rocket launcher battle is a pretty memorable fight that has you balance suppression fire between the back pad and the wide open area to the southeast. Regardless of how you probe the map out, you'll have to kill all the arachnotrons to reach the exit, which is one half of the MAP07 slot usage. The other is a really cool gimmick where the level is staffed with secret alcoves which house mancubuses; finding all of them grants access to the BFG in the secret annex that comprises the level's eastern portion. Which, of course, is a secret in and of itself, and has another secret area tucked in the back where you'll find a megasphere. | 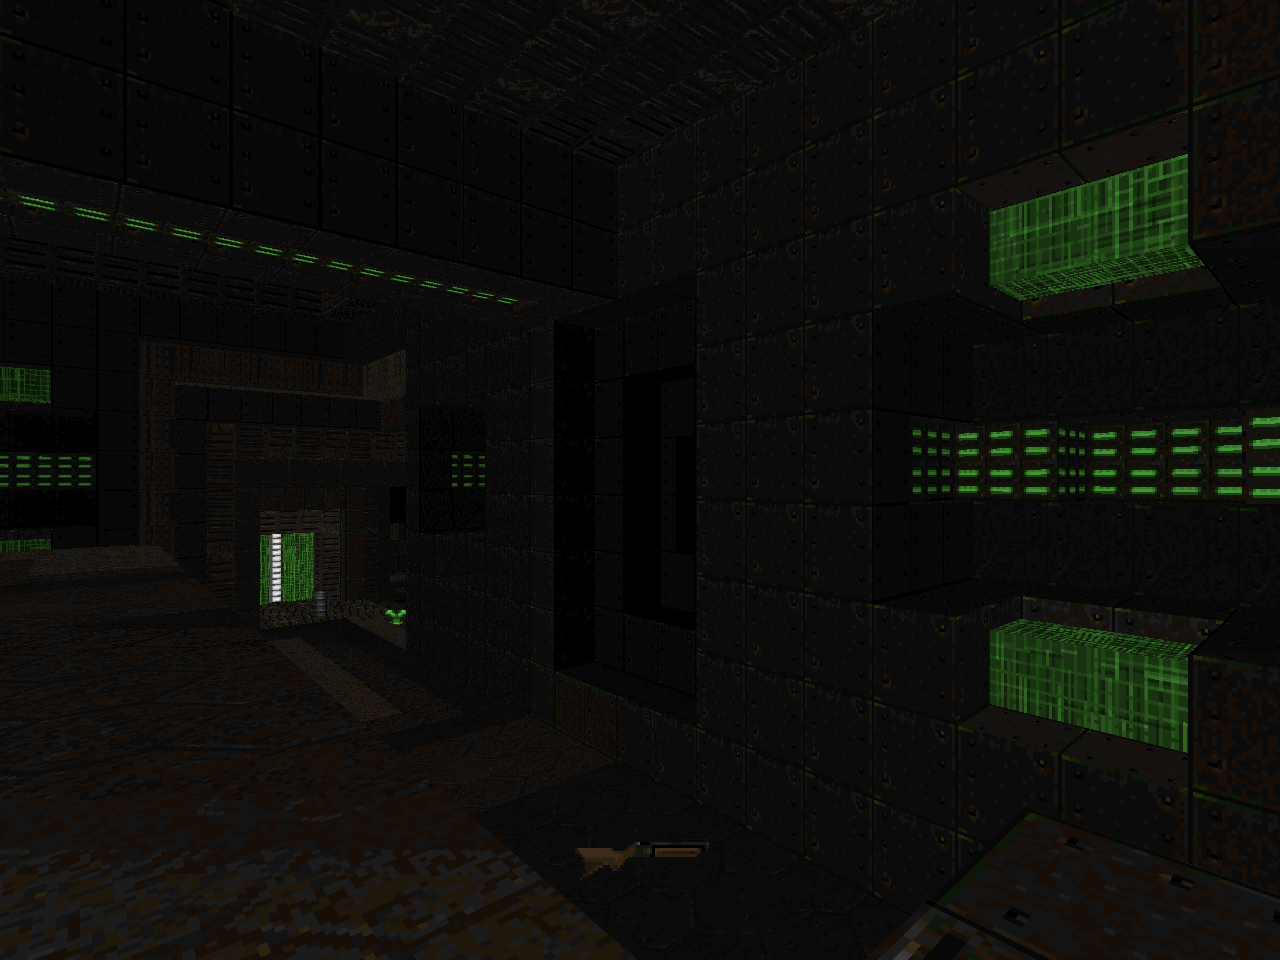 |
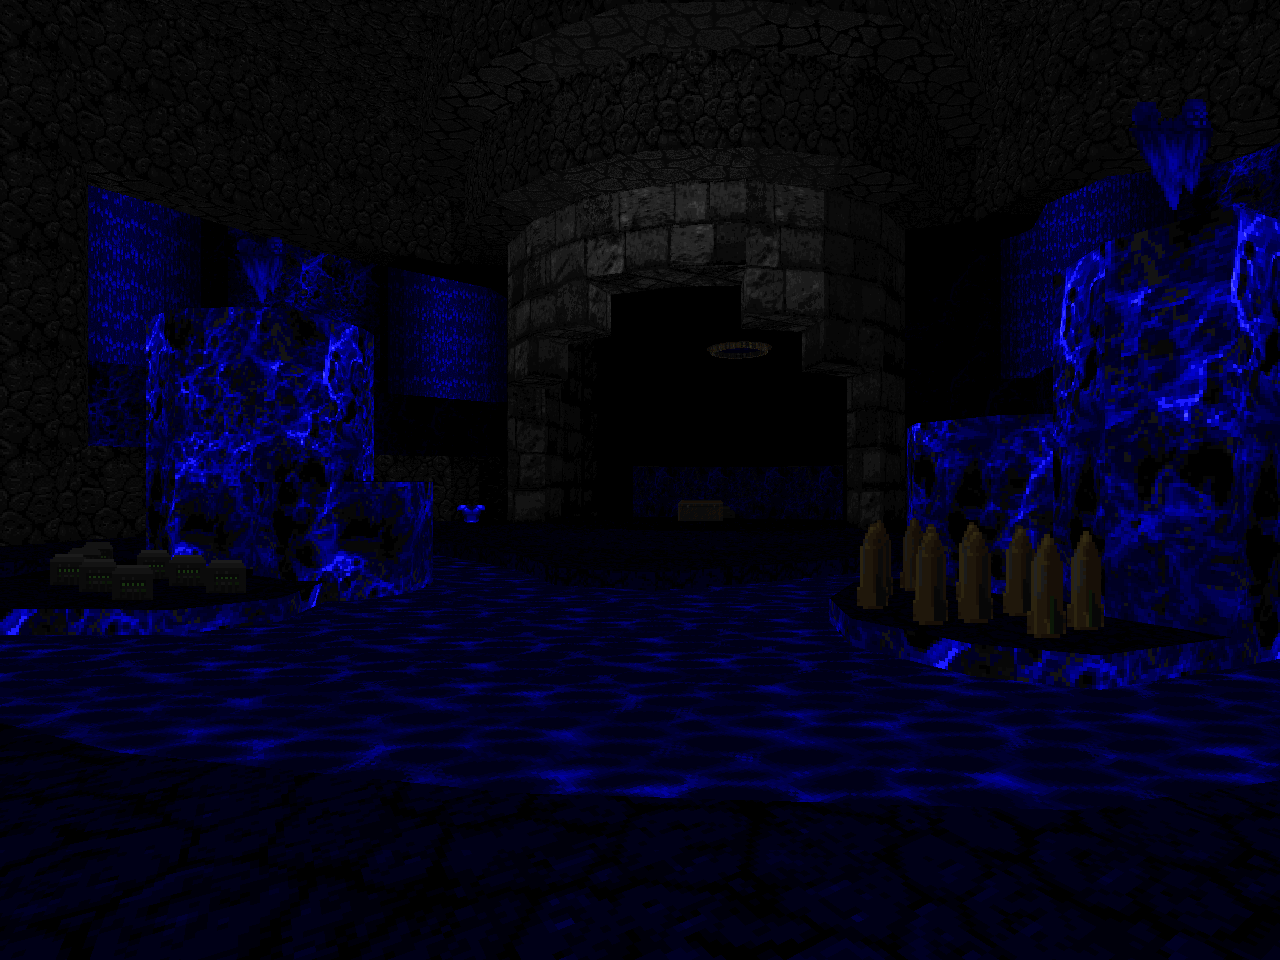
| MAP08 | Oneira |
|---|
| by Zach Stephens aka "Ribbiks" |
|---|
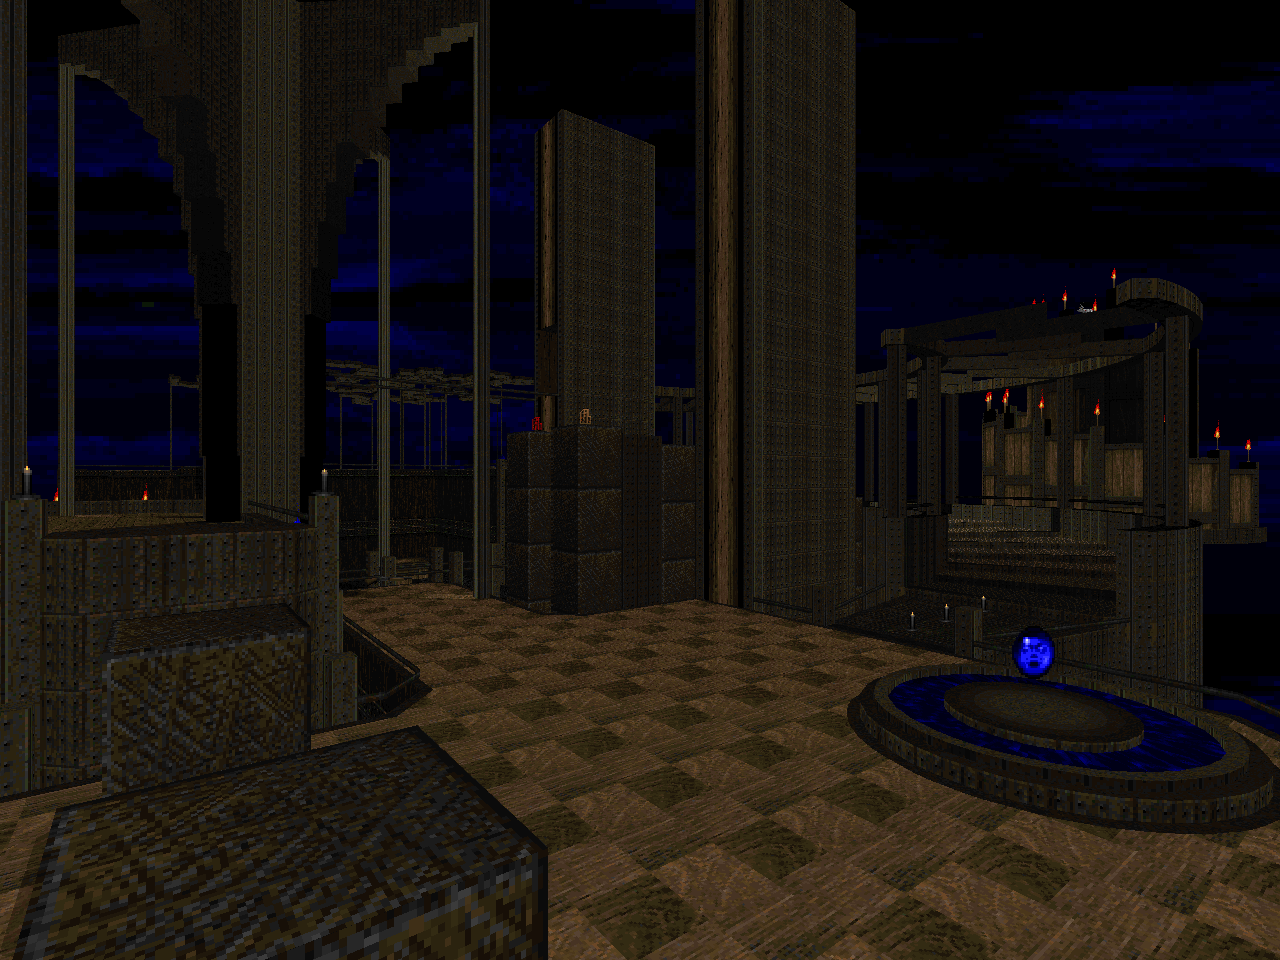
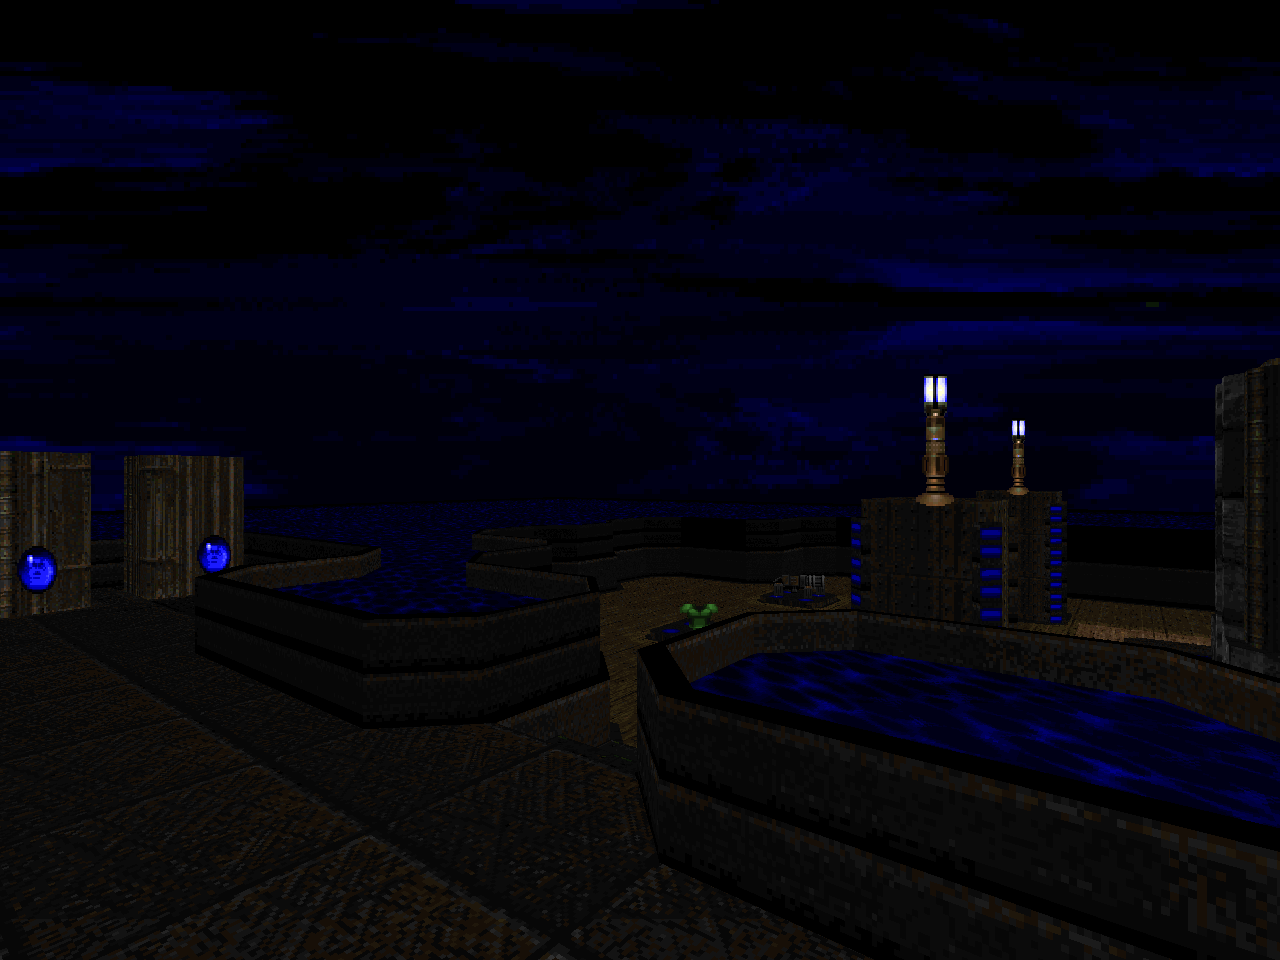 | A change of scenery into this immaculate fortress, a sort of grey stone and vibrant blue staged in the middle of the ocean. It's also a clear step up in terms of difficulty. Ribbiks throws you into not one but three (!) tense crowdshaping scenarios involving Cyberdemons, plus some surprise arch-viles that promote an increased need for spatial awareness. The battle for the BFG comes as one of the most memorable moments, considering the near and present danger of the Cyb, who is a more benign presence in the exit battle since you can tether most if not all of the Hell knights to him. Of course, I tried hacking the fight out the hard way more times than I would like to admit before remembering that there was a very simple telefrag setup, which greatly simplifies things. The ring o' imps setup is a masterful bout of claustrophobia. |
| Saquasohuh | MAP09 |
|---|
| by Daniel Jakobsson aka "dannebubinga" |
|---|
| danne continues the deep blue sea-marble and stone keep theme with this capricious castle. You can kind of assess where you want to start moving, but nothing will prepare you for the surprises contained within. Shotgun guys and imp-filled corridors guard dead drops that thrust you into nasty combat scenarios where the friendly-looking plasma rifle ushers in yet even more monsters. For what it's worth, I think that the slightly more open northwestern area, with its piston-columns of revenants, is slightly more approachable. The outdoor area is swarming with commandos and has a Cyberdemon providing overwatch, the same dude who also overlooks the interior's nexus. If you can get it all figured out, though, it's an intensely rewarding experience as you quickly but delicately pull its jagged teeth. If you've got the locked BFG in hand, the finale comes as something of a relief, since your weaponry removes some of the emphasis on delicate crowdshaping... until the pain elementals, that is. | 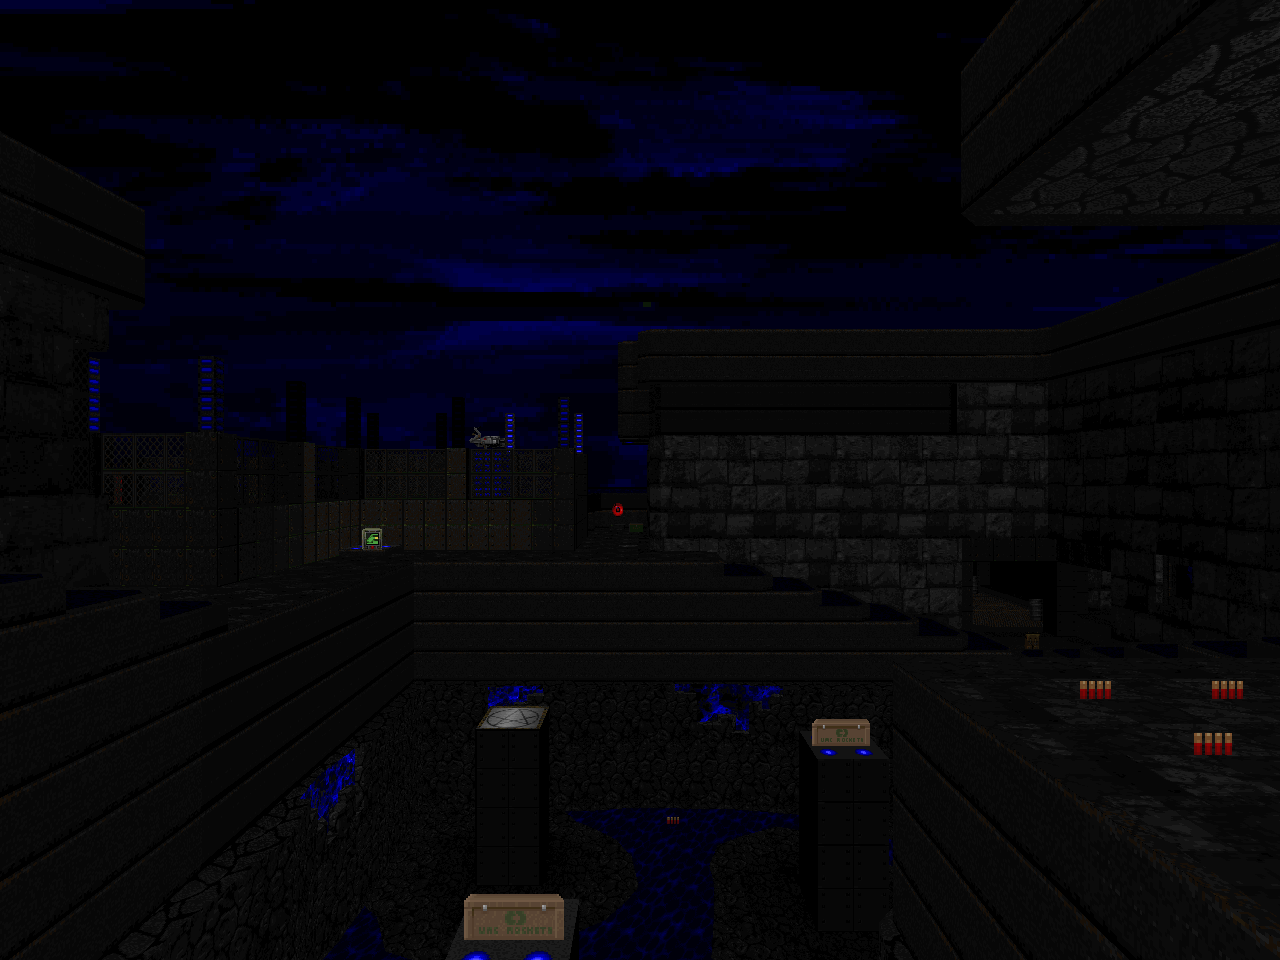 |
| MAP10 | Maru |
|---|
| by Zach Stephens aka "Ribbiks" |
|---|
 | Finishing off these seaside retreats with another misbegotten grotto. "Maru" is a little easier to figure out since you're allowed to poke around the starting few plateaus and get the lay of the land before really jumping into things. It's still got some Sunlust trademarks, like a Cyberdemon overlord and some exacting arch-vile placement, but the least straightforward encounter - to me - was the commando / pain elemental surprise guarding the BFG. And, uh, that trifecta six revenant / three mancubus battle for the blue key, which is some pretty exacting revenant rocket usage. I really like the southeastern chamber sequence, which lowers all the columns to reveal handy dandy exploding barrel hazards that are followed by a couple of barons and a storm of imps. The ending is downright neighborly, pretty much designed to do most of the work via the three Cyberdemons. with a couple of well-timed BFG blasts to stop anything from pinning you in. Fantastic visuals at the exit bridge. Cool map. |
| Cave Culture | MAP11 |
|---|
| by Daniel Jakobsson aka"dannebubinga" |
|---|
| The authors switch things up yet again, this time going for a sort of overgrown cave / ruins feel. The soundtrack shows that the difficulty has sort of mellowed out again, but danne only turns the dial down so far. Arch-viles provide perhaps the most challenge you'll see in the level, with one in particular dominating the zombie-swamped tunnels to the south that lead to the combat shotgun. The bit of cat and mouse in the atrium to the north is another potent moment, requiring some deft maneuvering on your part. I guess that the huge storm of enemies triggered in the rocket launcher room might end some monster-hunting careers short. The final battle is some good, clean fun, pitting you against imps on the ground to the south and a peanut gallery of pain elementals and commandos to the north. Bombs away! | 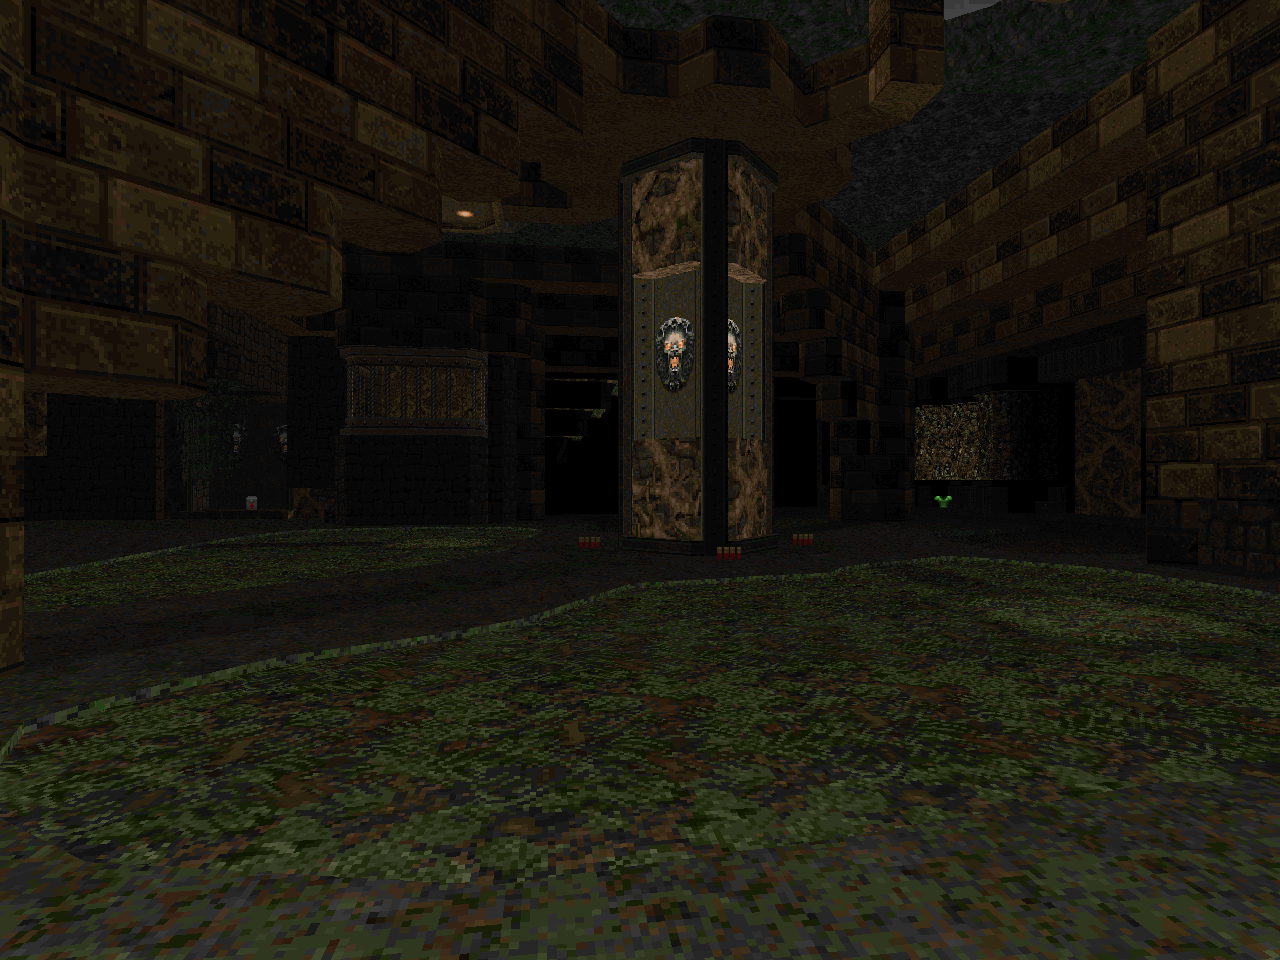 |
| MAP12 | Dangeresque |
|---|
| by Zach Stephens aka "Ribbiks" |
|---|
 | A more manic, open-air approach to the cavern style from Ribbiks. Sounds dangerous? No... sounds "Dangeresque". The author gives you plenty of room to get real nasty, with the northern area built to accommodate what will no doubt be a torturous finale involving a metric ton of pain elementals and one sole Cyberdemon. The western area has a pretty cool stair-building gimmick and sequential buildup through encounters, culminating in a wave of zombies, cacodemons, and mancubuses that you'll have to fend off in order to keep holding on to the red key. The main gimmick is a sort of CYOA where you have your pick of whatever power-up you need the most at the time, either health or armor. If you're anything like me, you'll be looking for the former. The Spiderdemon is a nice shock, but is easily handled through gratuitous infighting opportunities given the handy imp gallery in the back and the Hell knight channel. |
| Ruins of Skania | MAP13 |
|---|
| by Daniel Jakobsson aka"dannebubinga" |
|---|
| Another cool cavern level from danne that piles on the arch-viles. Actually, there hasn't really been a lot of "now there are Satanic sorcerers bringing your previously slaughtered enemies back to life", so seeing it start up here feels like an old friend. The opening is a pretty hectic shootout with a pretty varied monster group. Job one is slaying the archie, after which you get a series of more muted battles involving chaingunners and, in the western area, a big wave of revenants that, outside of a couple of sneaky guys, is easily fended off with the rocket launcher. danne knows how to make you uncomfortable, though, as the two major ravine battles can attest to. Both involve pain elementals and both are pretty awkward to move around in. The latter puts you at a vertical height disadvantage with the meatballs while you perform a plasma duel with a Cyberdemon. The big imp / Spiderdemon brawl before that is just good clean fun, with plenty of space to get mad rowdy. | 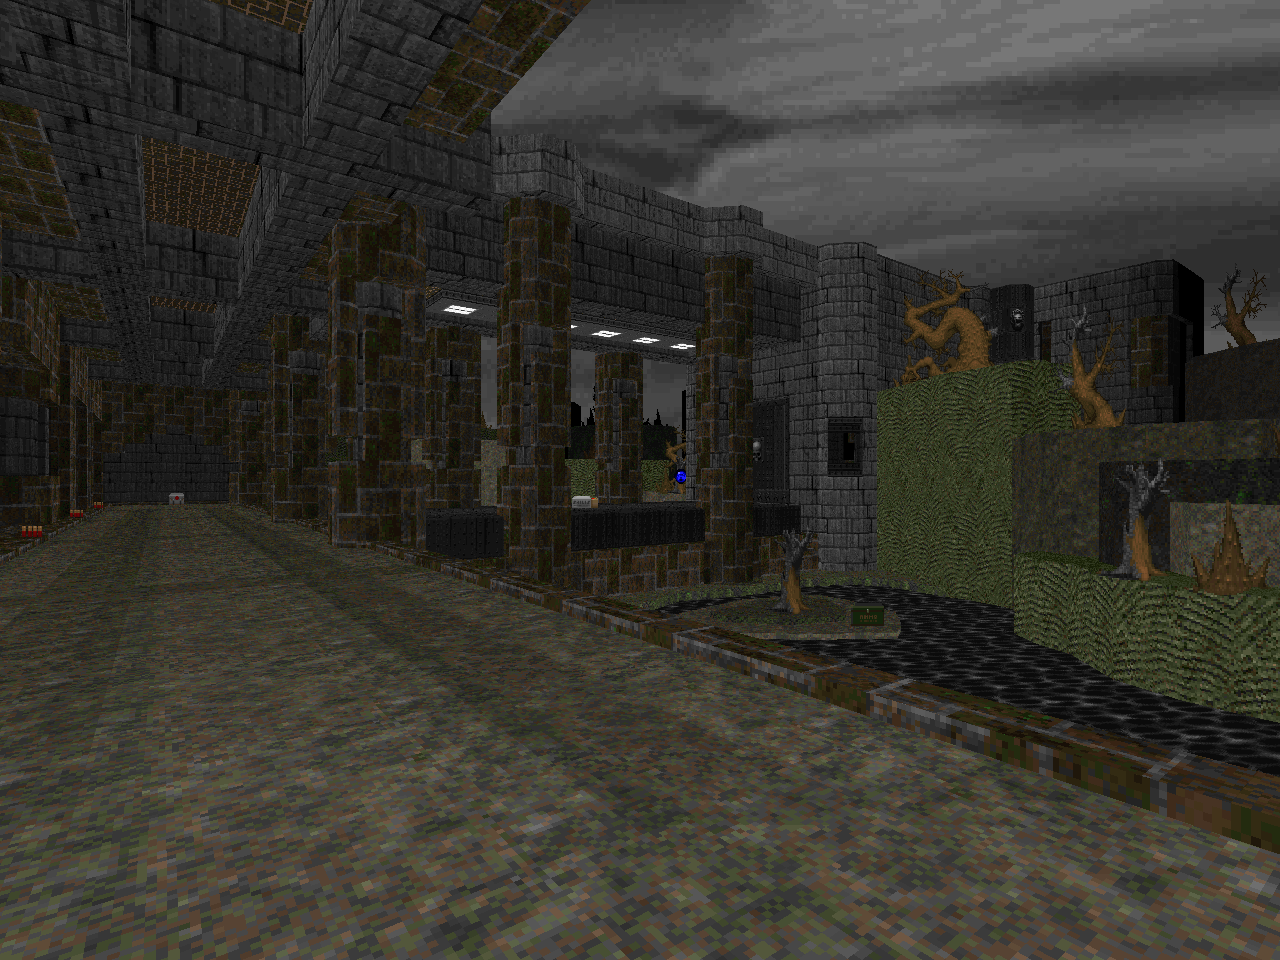 |
| MAP14 | Troglobite |
|---|
| by Zach Stephens aka "Ribbiks" |
|---|
 | A haunting, deadly grotto. Excellent use of "Esper World". It's perfectly possible to blitz through this level and miss more than half of it, since there are two different paths to the switch that opens up the exit. Both routes have their fair share of challenges, with the north culminating in a multi-front deathtrap that forces you to balance scant cover between pockets of chaingunners, mancubuses, Hell knights, and an arch-vile in a small outdoor area. The southern area has the really cool grotto, which hides a couple of secrets that grant access to the main secret, a really cramped battle with two Cyberdemons fronting a gallery of Hell nobles. The yellow key grants access to a couple of powerups, with one of them being a one-time deal. You can easily take the invul to Cyberdemon hoedown, though I wonder if it's also meant to shortcut the chaingunner roundabout. The Hell knight / revenant battle in the center of the map is an excellent lesson in the economy of space. I really love the grotto with dock and boat. |
| Strength and Anger | MAP15 |
|---|
| by Daniel Jakobsson aka "dannebubinga" |
|---|
| Enjoy the few stragglers in the caverns while it lasts. Once you enter the southern central room, there are no punches to be pulled. danne has concocted a series of challenging encounters built upon enemy-induced claustrophobia. The north central earthen staircase was my most memorable encounter, with its total storm of revenants pouring in from the buildings with a surprise Cyberdemon mixed in and that fissure of Hell knights covering your rear. Spamming the BFG is only part of the solution, since you'll have to crowd surf - a technique used pretty extensively here - in order to make it out alive. The storm of demons that erupts from the southwestern room is a bit more of a lukewarm encounter, but it's still memorable as you beat them back with the weapon of your choice. The eastern spire is a fantastic adornment, an ominous structure that - outside of the battle in its interior - serves more as atmosphere than anything else. | 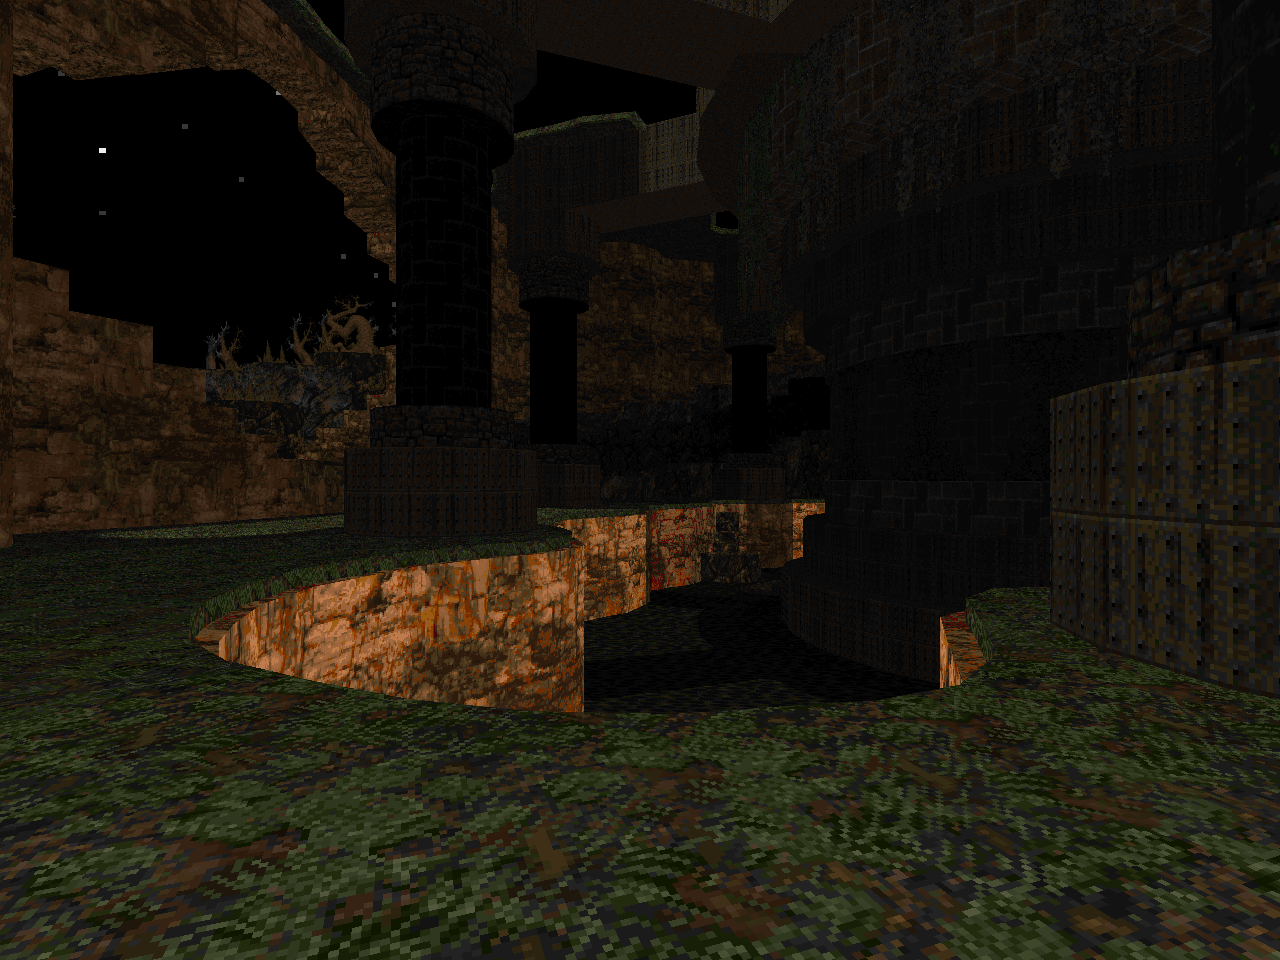 |
| MAP31 | Birds of a Feather |
|---|
| by Zach Stephens aka "Ribbiks" |
|---|
 | A strange level that is less based on exacting combat and more the puzzles hidden within Doom's geometry. It's kind of a wood and metal platform floating out in the void with floating chaingunner cages, stairways to nowhere, and a southeastern area with... thin, organic, orthogonal growths. The ammo balance is pretty tight, so you'll have to make the best of what you've got while you deal with arch-viles and revenants and other things in admittedly isolated encounters. The biggest fight is in the southeast, but it's pretty much imps and commandos, not that the latter aren't at all threatening. The trickiest challenge will be making the SR40 leap through the torches to the eastern platform, after which you'll have a couple of surprise skeletons breathing on you. Cool, and a little mind-wracking. I was stuck at the exit until I remembered those strange little health bonus pedestals on the upper wall... |
| Postcoitus Doom | MAP32 |
|---|
| by Daniel Jakobsson aka"dannebubinga" |
|---|
| danne takes things in a bit of a different direction, where the fights themselves are the puzzles. This slice of cavern is overseen by a cadre of arch-viles, which will be the bane of your existence. Not now; heavens, no. You've got plenty of cover to duck around when you start out. First you've got to deal with some tight platforming with a Cyberdemon overseer for the yellow key. Then, deal with a BFG zerg vs revenant zerg, made tough because the skellingtons are spawning on your cell ammo. Which power will prevail? When you're ready, you can head northeast, into the Cyberdemon cascade. Dealing with two of the fuckers is kind of rough, especially since you'll have to duck into the alcoves to grab some cells, and the staircase of pools. And that's when you realize that the only thing standing between you and the exit is that army of arch-viles. Maximize what little cover you have, use every trick in the book, and be prepared for the fight of a lifetime. | 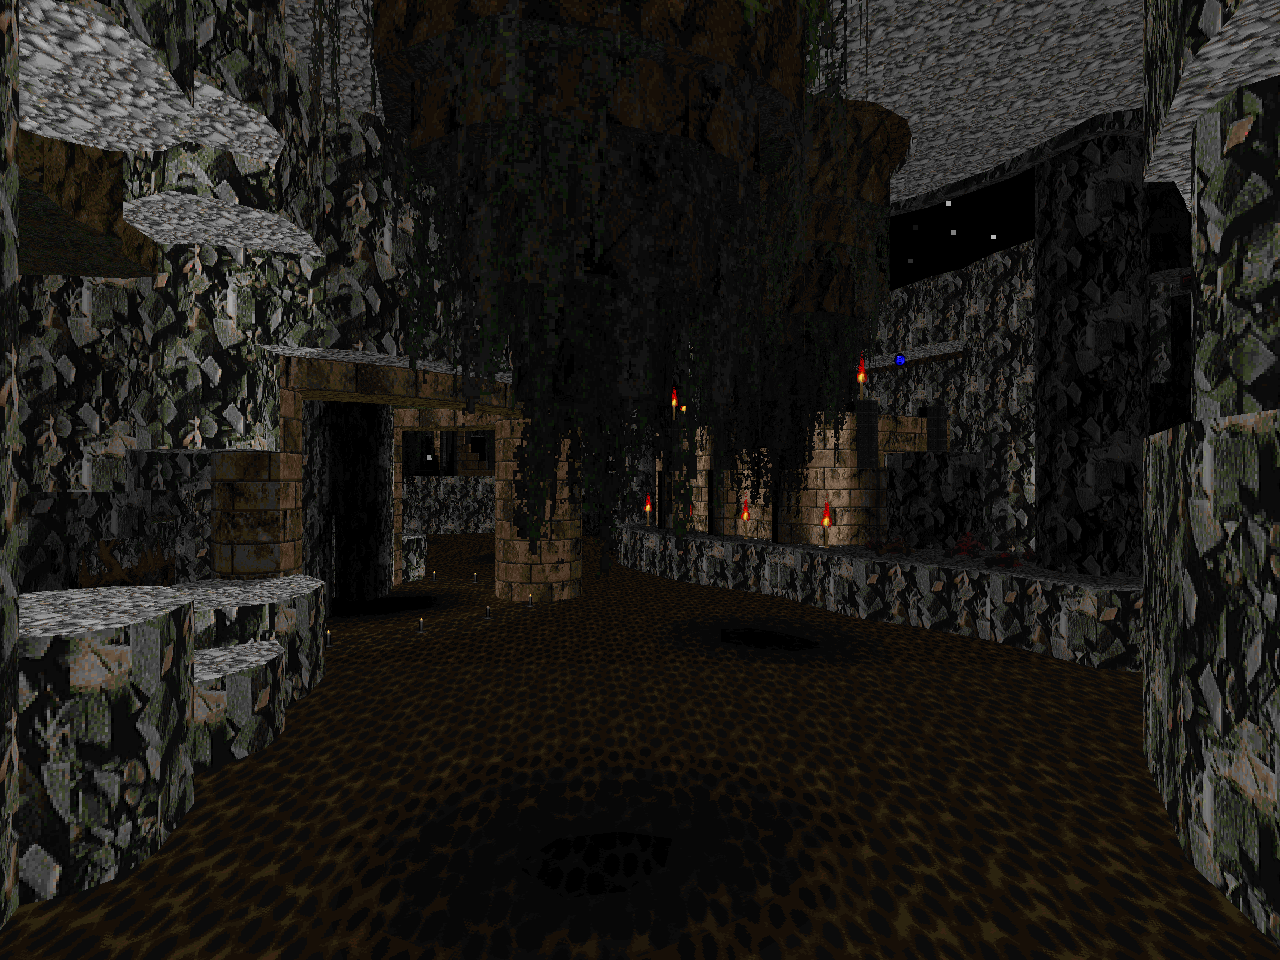 |
| MAP16 | Lost Antiques |
|---|
| by Daniel Jakobsson aka "dannebubinga" |
|---|
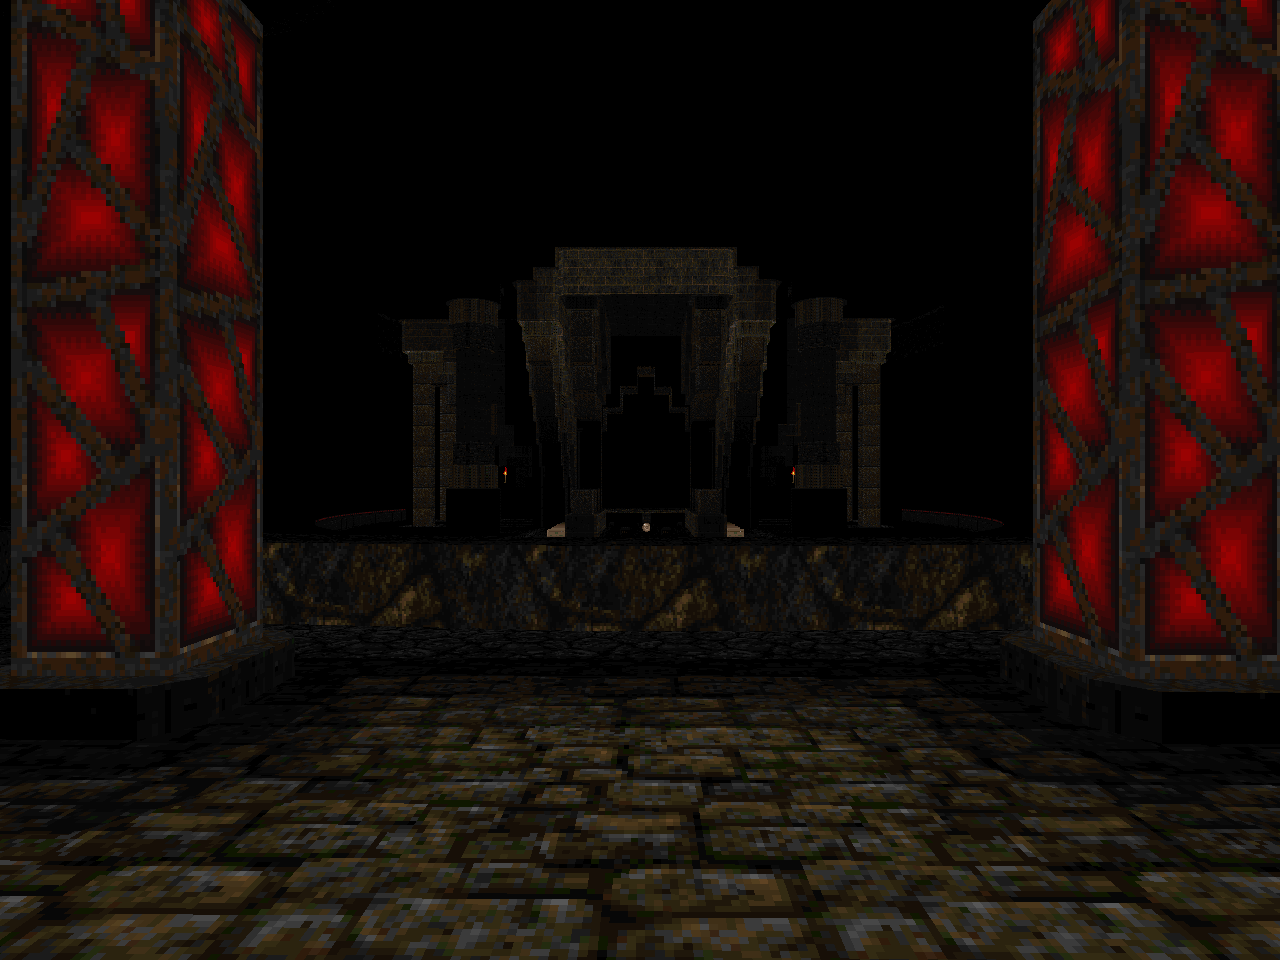
 | The end of the subterranean ruins theme, this time with an emphasis on gothic, yellow windows. This map explodes into elements of full-blown slaughter, especially in the last leg, starting with the switch you use to get to the red key. The opening is a tricky crossroads, with plenty of free agents roaming the hallways. The easy path seems to be grouping monsters up in one section of the ruins and then grabbing the combat shotgun, where you're more or less free to deal with the resultant arch-viles. And there will be arch-viles. The big show in the western area involves two big clouds of demons and a concentrated crowd of revenants, which has a couple of arch-viles mixed in for good measure. Plus, the ledge where you came from now has six of the buggers, cutting off any attempts at egress. You'll have to pull those two teeth as fast as possible if you want any slack in dealing with the other troublemakers. The encounter is kind of paralleled in the exit room, except there it's more of a claustrophobic clusterfuck where you have to pretty much blow your way into one of the monster closets to get one and then turn around so that you can prepare for the other. The Hell knight / arch-vile pincer attack in the southern cavern (with the hidden BFG) is a cool, smaller scale fight. I also dig the transition to the next theme... |
| The Womb | MAP17 |
|---|
| by Zach Stephens aka "Ribbiks" |
|---|
| Delivering on the promise of the end of the last level with this dark, organic nightmare. In case you thought that the beginning of a new theme would be a little kinder, uh, sorry! The BOI track is a fantastic herald of things to come. He actually plays it pretty easy to start off with; for all the arch-viles you'll have to kill, all of them can and should be dispatched with the crusher platform, which won't be an immediately obvious setup for newer players... not that they should be leaping headfirst into Sunlust. Once you've got the yellow key in hand, though, you'll trigger a series of completely claustrophobic encounters that smother you with monsters. The rocket launcher love-in with four different fronts composed of imps, Hell knights, barons, and more imps, with a couple of pain elementals as spoilers, is about the trickiest things get, but the follow-ups - including an up-close and personal scenario between barons and a Cyberdemon plus a revenant clusterfuck with another Cyberdemon guarding your only safe zone - aren't any less difficult. |  |
| MAP18 | Mu Cephei |
|---|
| by Daniel Jakobsson aka "dannebubinga" |
|---|
 | danne contrasts against the cramped interior of the previous map with this open air slaughter which looks pretty tame at first but quickly turns into a hornet's nest as scores of demons pop up to surprise you and you are looking for something, anything, with which you can turn the tide. While I am sure that the two secrets are super helpful, I only found the health / cell cache after I'd cleared the level. There is just a lot of opening chaos as you sort out the various monsters populating the hills and prioritizing the slaying of the few roaming arch-viles. The rocket launchers are pretty obvious, but the plasma rifle is better-hidden. Each of the keys comes with a pretty decent trap to fight through. The blue key fight is my least fave, with it being rich in pain elementals, having an arch-vile, a lot of open space, and a Spiderdemon in the back. The imp / arch-vile nest to the southwest is really cool, though. Straightforward with just the right amount of tension as you keep itching to switch to the BFG when the archies push far enough forward. The finale is a nasty BFG zerg that pits you between two ranked fronts of imps, revenants, and pain elementals in that order, with another Spiderdemon in between. Knowing when and where to use the BFG, plus having enough ammo to do it, turned into some literal troubleshooting. |
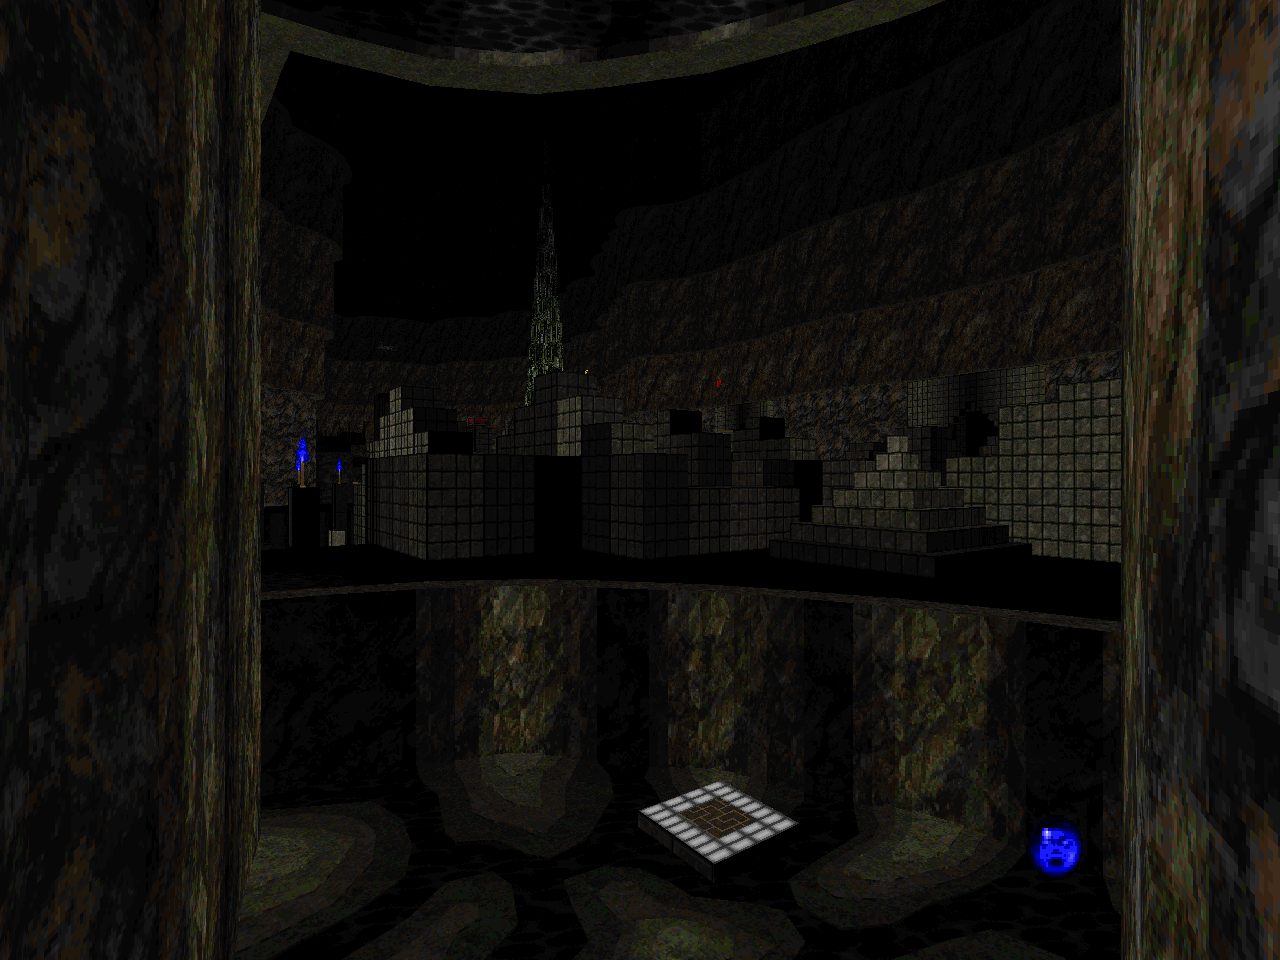
| Blood Geometry | MAP19 |
|---|
| by Zach Stephens aka "Ribbiks" |
|---|
| A tough but immensely satisfying experience. The contrast of blood red and the cubic sandstone that serves some the interior areas creates an unusual dynamic. The opening area has just enough cover for you to squeak by, maybe tethering some monsters to the Cyber and vice-versa so that you can take out the arch-vile snipers in peace. After that, it's on. The outdoor area to the north is a cool hectic battle in a more traditional scheme, but I think you're best served by just draggin' everything out and around until the Cyberdemon shows up. What follows is one of my favorite encounters in my years of playing Doom, where arch-viles ominously blink from one colonnade to the other. It's a pretty simple setup once you get the order of operations down - kill the two closest viles and then throw rockets down the length of the room until just about everything is dead, taking care to dodge demons and alternate sides to avoid being burned - but it's such a fun sequence to play through; an outstanding, dynamic encounter. The big finish is a true claustrophobic clusterfuck that took me awhile to puzzle out. In the end, my strategy was to kill the outdoor area's imps as fast as possible so that the revenants could start spawning in, taking care to duck the cacodemons and barons, then sneaking into the baron alcove to shell the incoming skeletons before bolting into the now clear outside section and shelling everything into oblivion. A superb, rewarding level. | 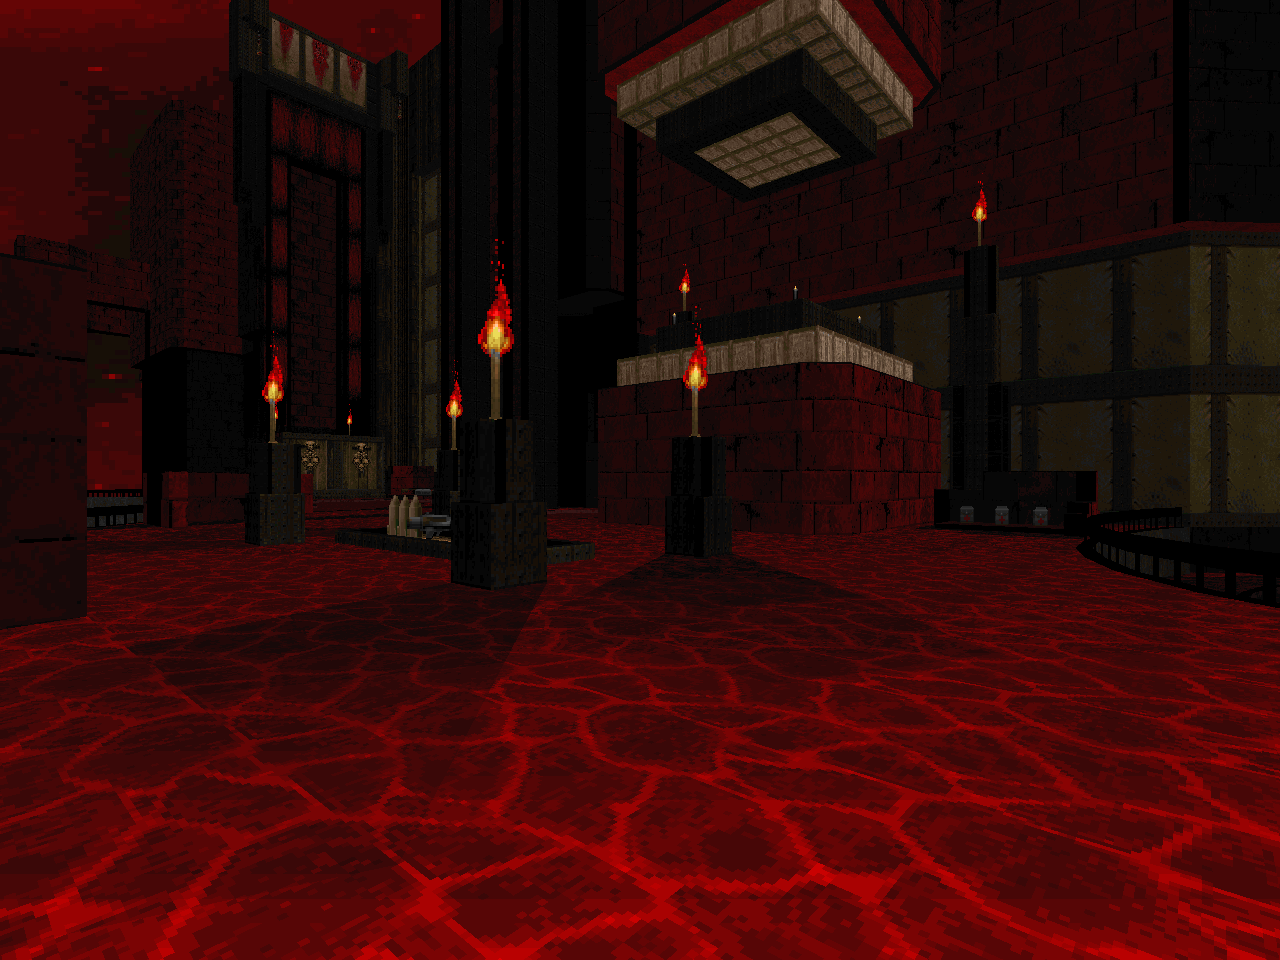 |
| MAP20 | Inverti in Darkness |
|---|
| by Zach Stephens aka "Ribbiks" |
|---|
 | A dark landscape in the void that echoes some of Ribbiks's more intricate levels, like Swim With the Whales MAP03. You start out in the thick of it, but have all the time in the world to plot your first move, after which you'll be exposed in the outdoor battleground, clearing all the incumbent monsters on pillars and nasty surprises like the pain elementals that crest over the lower plateau. Then, you can start poking around the branch points, which are just as treacherous. The area with the rocket launcher and yellow key is a personal favorite, with heavily entrenched opposition followed up with a big wave of barons and Hell knights that you kind of have to lure out but not in such a fashion that the inevitable arch-vile ambush gets locked behind. Snipers are a constant and real threat. Honorable mention to the BFG / red key annex, which is a total clusterfuck of sudden-opening doors that you take nice and slow, until you flip the switch that reveals a squad of arch-viles, barons, and a Cyberdemon, possibly the most difficult moment I had in the entire level. At this point, you can push through the dark tower (a revenant clown car moment) to the exit or activate the red key altar and unleash Hell. It's not the revenants or Cyberdemons that'll get you; it's the cloud of cacodemons that reds out the sky. If you can bust through, there's a final gauntlet for the blue key with some memorable monster positioning that involves some tight Cyberdemon tangos and one ambush that's tailor-made for a BFG zergfest. The blue key sets you up with health, armor, and ammo before entering the final arena, which is a lot easier - in my mind - than many of the fights you had to endure to get there. A tough level, but as always, satisfying to conquer. |
| Entering Aquatic Desert | MAP21 |
|---|
| by Zach Stephens aka "Ribbiks" and Daniel Jakobsson aka "dannebubinga" |
|---|
| A nice way to ease players back into the third episode. Compared to the last run, it's not particularly tough, but it has its share of snares to sidestep. The gray castle with blue highlight theme sort of suggests the MAP08-10 run, seen previously, but the sludge and tech elements offer a fresh take, with the back-paneled teleporter pads showing as a cool motif. There aren't a lot of big battlegrounds; enemies arrive in pockets, as is the case with the big brick of pain elementals in the northern yard, or teleport into crowded chambers. The exceptions form some pretty cool firefights. There's the Spiderdemon battle, for one, which has a bunch of rapidly blinking imps in the outer area, making for a tough assault. There's also a cool secret area with a megasphere that plays with the regular zombies plus arch-viles encounter with a double-threat, since you have to clear through the zombies to reach any cover (they immediately flood the area). My favorite choreographed fight is the finale, where you must slay some rapidly teleporting chaingunners as fast as possible before a similar wave of revenants teleports in from behind to lock you in on two fronts. The hints of gray-colored areas are neat touches. | 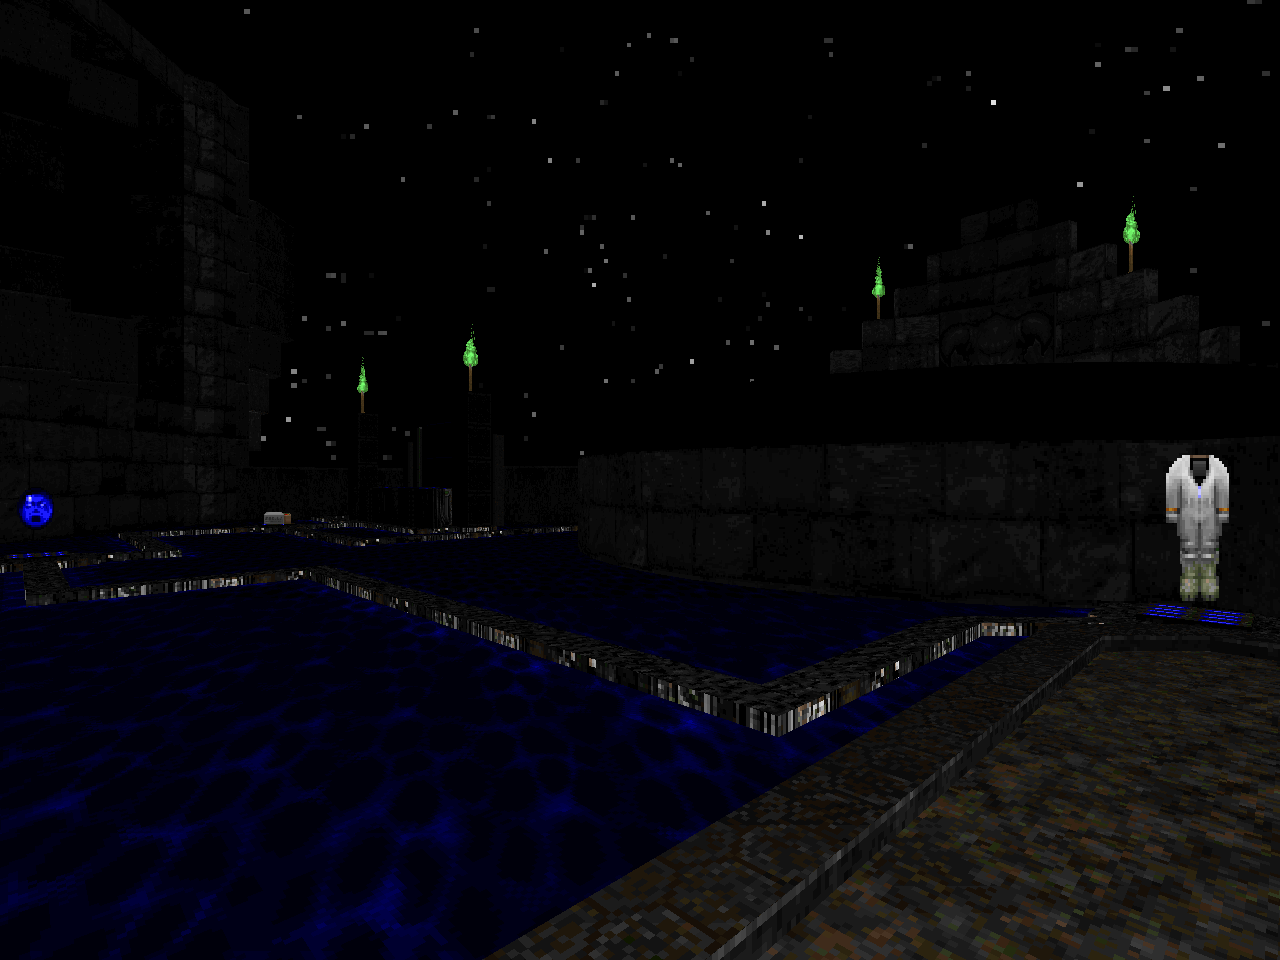 |
| MAP22 | Black Rabbit |
|---|
| by Zach Stephens aka "Ribbiks" |
|---|
 | A smaller monster count... But much harder encounters. The colors are more muted in this game of congestion in tight spaces and platforms. And, starting out, it's not too bad. The first big test is the block of Hell knights and barons in the main courtyard. After this, you're free to pick one of two paths, one of which isn't so obvious. Taking the teleporter the arch-vile came from leads to the southern isle, which has an intense, congested battle with a ranked pocket of imps backed by revenants and pain elementals bringing up the rear, with the rocket launcher as the only reasonable weapon. As bad as the crowd is, it's nothing compared to the yellow key battle, which at peak madness involves an enormous cloud of cacodemons that erupts to swarm your cozy little ledge. It took me a long time to figure out a firing pattern that worked, but beating the gasbags into a sort of wedge formation and then using the plasma rifle once I started getting overwhelmed did the trick, though you are always at risk for getting locked down by infinitely tall fliers. The exit ambush is small potatoes. |
| In Flight | MAP23 |
|---|
| by Zach Stephens aka "Ribbiks" |
|---|
| A more relaxed offering, provided you don't mind playing punchinello with all manner of monsters. Yeah, it's kind of a Tyson level. "In Flight" is also pretty dense as far as switches go. Access to some early goodies, like the rocket launcher and BFG, is dependent upon your ability to locate and flip the yellow switches. It's a small map, so it's mostly just picking them out of the chill surroundings and some cat-like tendencies to climb, leap, and otherwise explore. While the tone is more relaxed, you still don't have a whole lot of places to just stand still and scout since there are a bunch of pillar-placed snipers in the vein of revenants and other unsavory things. While the open chaos of the rewards chamber has some nice twists, the tech corridor to the south is my favorite stretch of level, and pretty easy to navigate if you're toting a bunch of rockets. | 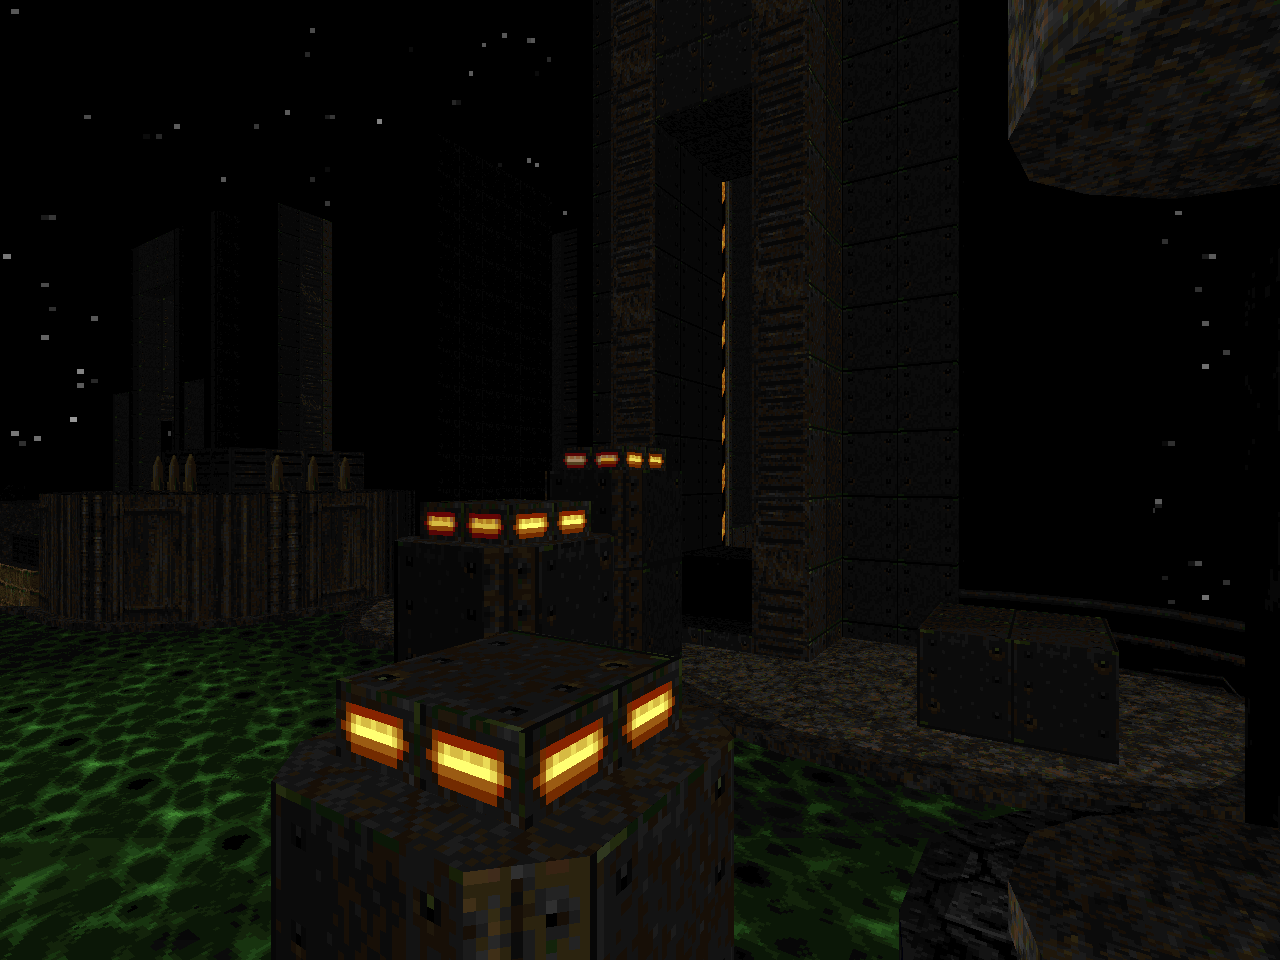 |
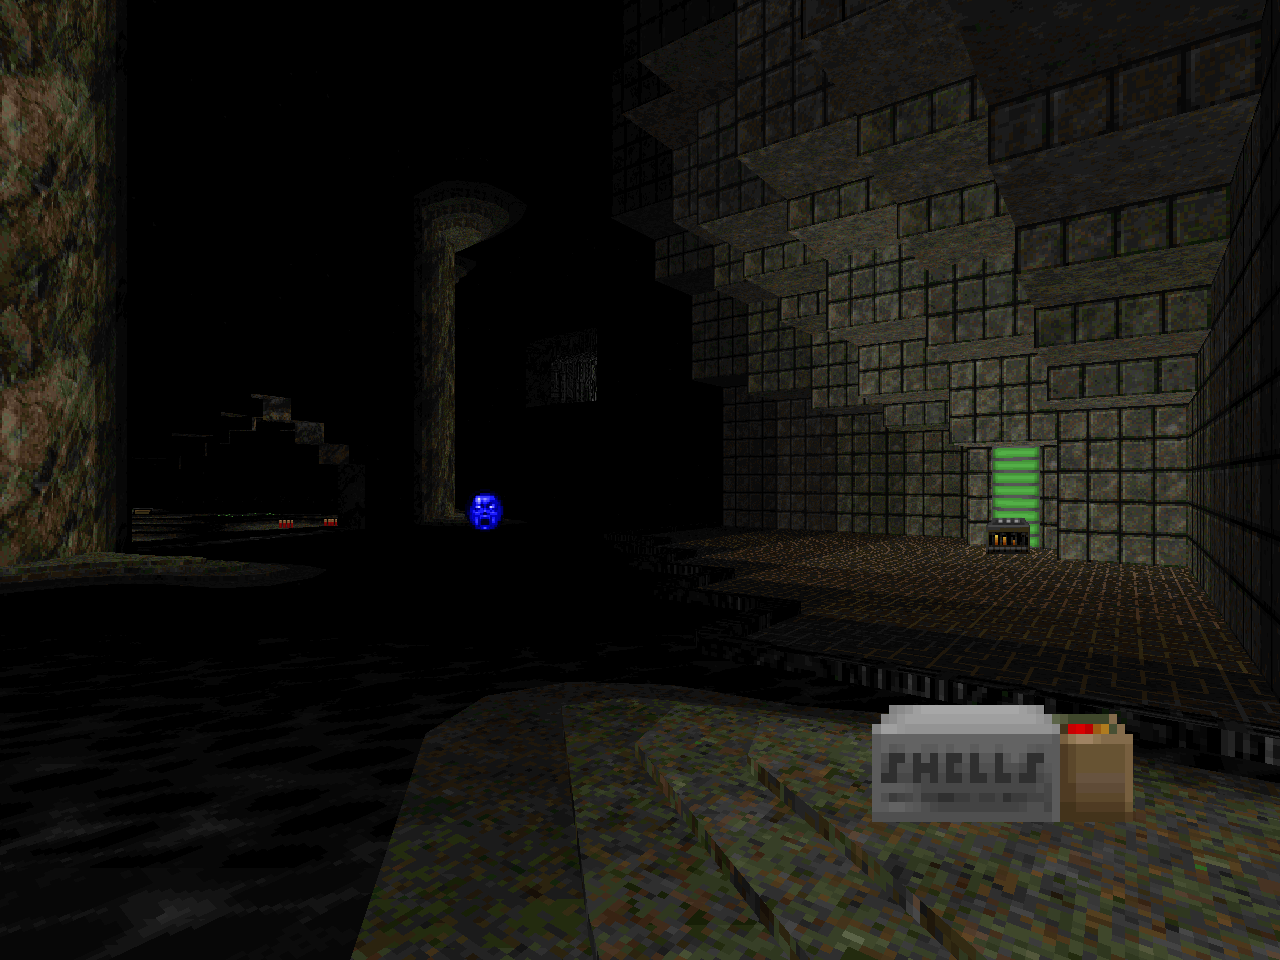
| MAP24 | Dying on Cue |
|---|
| by Daniel Jakobsson aka "dannebubinga" |
|---|
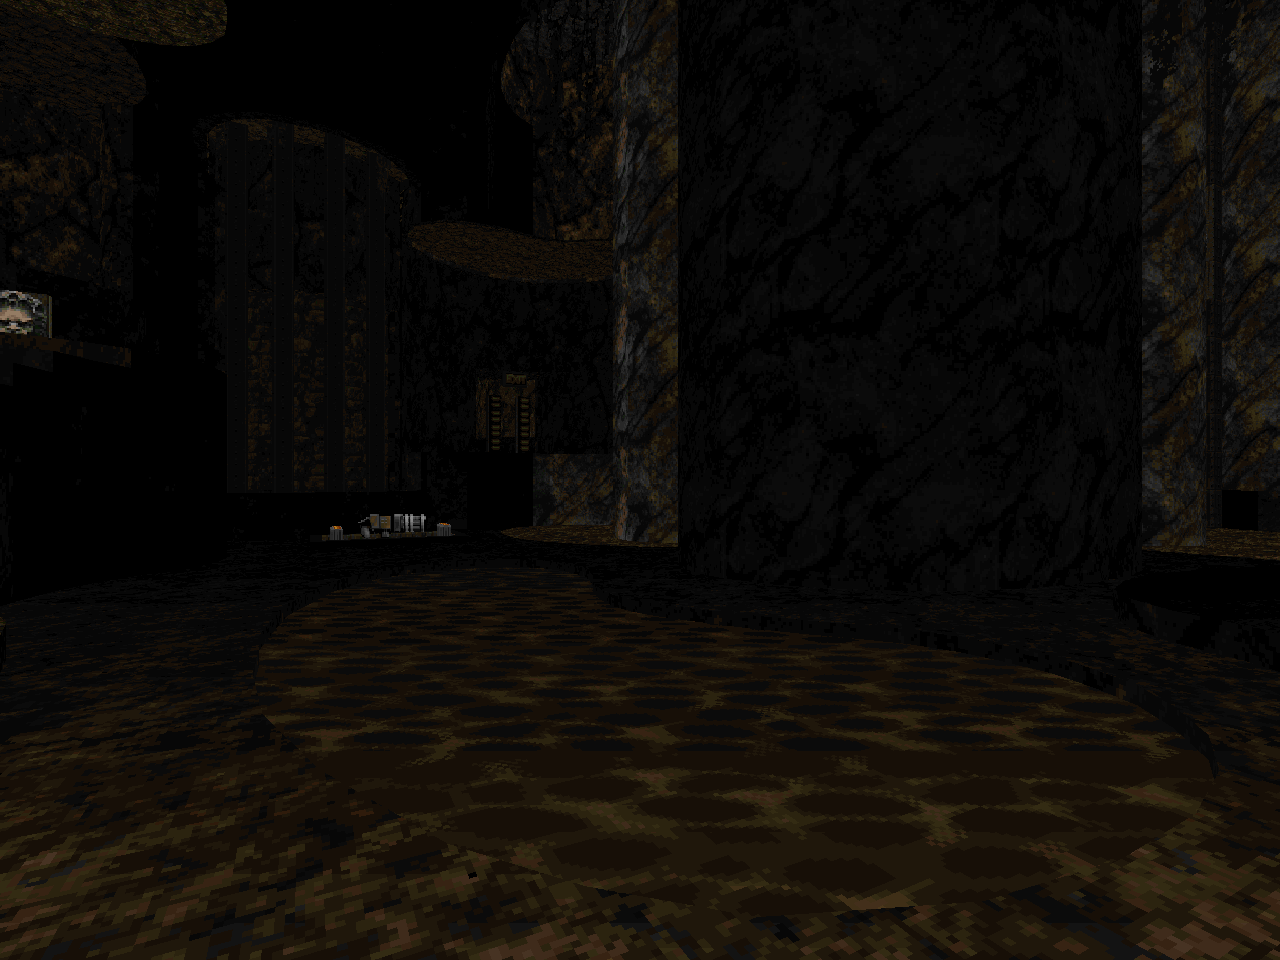
 | The end of innocence. "Dying on Cue" is a dark, impenetrable ruin located within an enormous cavern complex. Your first goal is to battle your way out of the tunnels, a slowly escalating series of claustrophobic firefights that dumps monsters into your limited real estate. Mastery of all the escape routes as you goad many of them into slaying each other is key. When you're done, you'll be forced to endure a series of even more congested battles in a crumbling cubic fortress. The fights aren't too rough, with some imp-squishing goodness after taking out all the hardbodies. Eventually you'll have access to the teleport hub. It is wholly within your power to bypass the red and yellow keys, but you won't win any prizes... or at all. The yellow key battle is pretty straightforward, forcing you to deal with a stampede of demons with some easily-fended off revenant snipers and a Cyberdemon as king of the Hill. The red key is the hard one, starting off with a crazy crossfire with shotgun guys, imps, and "Dead Simple" overseers. When you get outside, going for the BFG triggers a nasty battle with some awkwardly placed arch-viles, a couple of Cybs, and some lesser creatures that serve to crud up your mobility. Clearing one side of arch-viles and using it as a home base while you funnel all the landbound stuff worked well for me. The gate to the exit is carpeted with arch-viles, but between the BFG ammo and the secret invul sphere, you should be able to blow most of them away, supposing you can get a leg up to avoid getting blasted back. The finale is where most of the monsters come in. It's a cool fight with a conveyor belt of imps, then Hell knights, then revenants that funnels stuff into an outdoor area with some kind of crusher apparatus while cacodemons and pain elementals come in from the sides. It's an exercise in crowd-shaping and patience. I'd save most of my cells for clearing the fliers, since they're the worst thing you've got to deal with. Exhausting... but satisfying. |
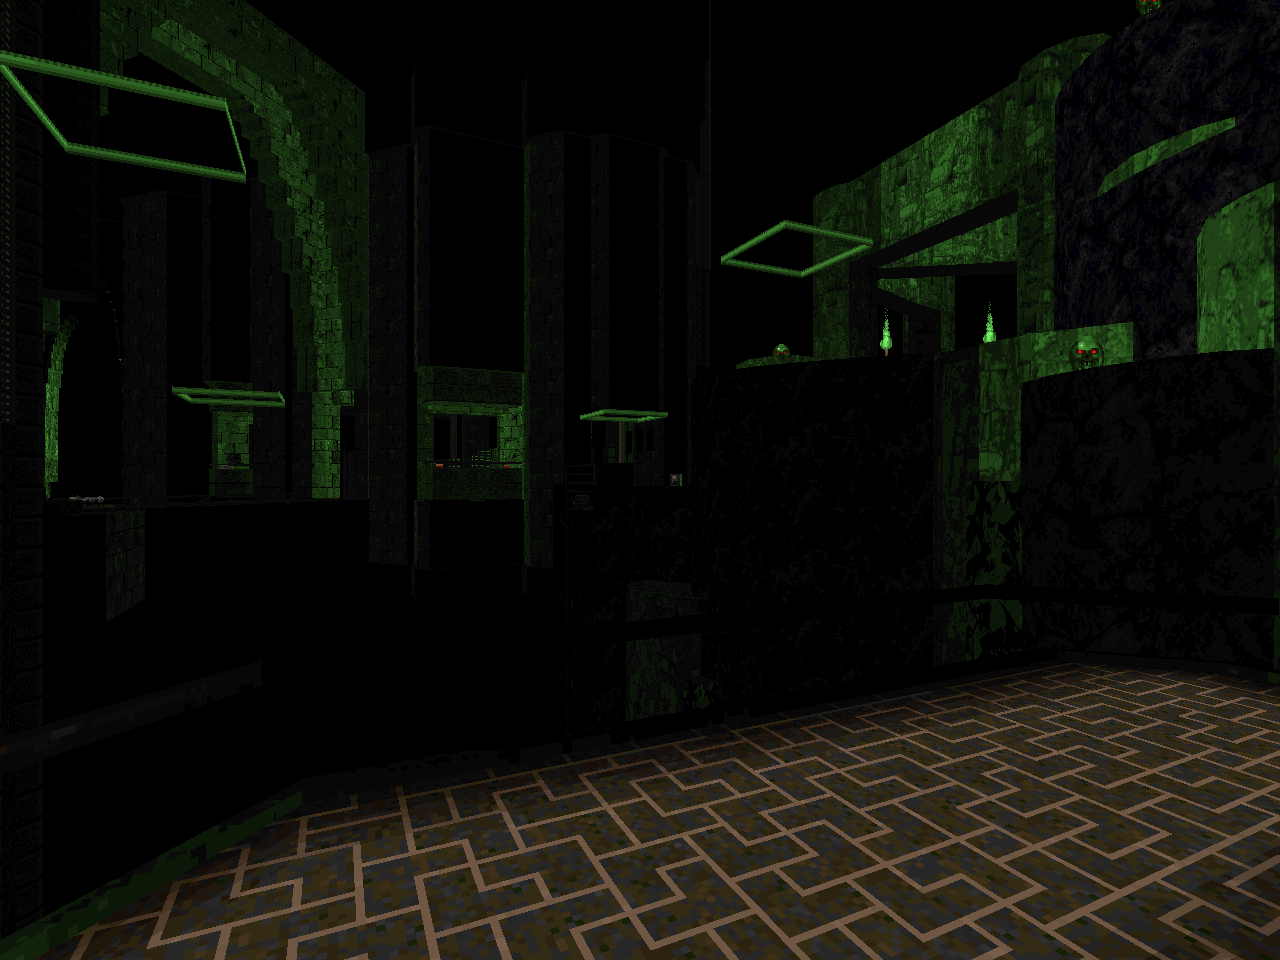
| Proxyon | MAP25 |
|---|
| by Daniel Jakobsson aka "dannebubinga" |
|---|
| This gorgeous dark metal garrison marked with green gives you all of your weapons up front, so you know you're about to be fucked. There are two different routes to choose from, but once you pick, you're committed. I went east and quickly regretted my decision, restarting and heading NORTH. It starts off pretty mild, throwing rockets at a long file of barons and Hell knights, but the arch-viles that bring up the rear are the confounding factor. A surgical BFG strike should knock them out, after which you can head on to your next nightmare, where waking the sleeping barons ushers in something much worse, like an arch-vile. The Cyberdemon staring you down isn't any better, but if you take care in using big boy to delicately wake one baron at a time, you can hide out in the hole and kill the arch-viles one at a time... if you're lucky. This leads to one of the two big brawls, a big L-shaped staircase that has imps teleporting in from the top, imps AND specters teleporting in at the bottom, and three brace of mancubuses on the outer edge. The rocket launcher is the only thing you got, which means killing yourself on the occasional specter as you slowly sort things out. Survival involves carefully balancing rocket fire in laying down suppression on both ends of the staircase with the occasional break to take those mancubuses out, one by one. It's very intense. Hopefully you saved all your cells, because you'll need them for the other route. The first encounter to the east is the absolute worst you'll have to endure, with cacodemons cresting over the southern and eastern walls. The Cyberdemon barely even registers. After a certain amount of time passes, the pillar blocking the north finally lowers, unleashing a bajillion revenants. If you don't have the cacodemons cleared out by then - which is what I saved the BFG ammo for - good luck. The little colonnade area is cute, but there's one last knife twist to follow, in a courtyard surrounded by imps. I think that you are actually better off leaving the imps alive when you trigger the wave of pain elementals; they do a decent job of distracting the meat balls. I just about switched to HMP on this map, but I'm glad I endured. |  |
| MAP26 | Kinetics |
|---|
| by Zach Stephens aka "Ribbiks" |
|---|
 | Something more manageable... Ribbiks brings the previous theme to the interior, with a slightly saner monstercount for the space they occupy. The author starts things out with some low-key claustrophobia requiring some precision SSG work, after which you get your pick of two routes. One leads directly to the BFG battle, a clusterfuck I served by slaying imps with the combat shotgun until I got pinned down and then clearing everything, cacodemons and all, making way for the friendly neighborhood Cyberdemon to mop up. I did that after taking the western leg, though, which is quite the gauntlet of installed enemies. At some point the main hall is carpeted with revenants with a lone Cyberdemon who is quickly overwhelmed. I kind of raced through once shit went south, did the BFG fight, and then came back for the big finish. Using the yellow key summons forth a big wave of barons and Hell knights and places six arch-vile snipers on the back columns. If you stay out of arch-vile range and lay down suppression fire, you should have enough room to pick the last few off with the combat shotgun. Having to pause for cover will ruin your day, though. The leftover viles are easily handled, and it's all over. There's a really nasty secret annex - accessed via an arch-vile jump, I think - that gets you an early BFG if you're willing to do a congested waltz that involves yet another Cyberdemon... and some baron wallflowers. |
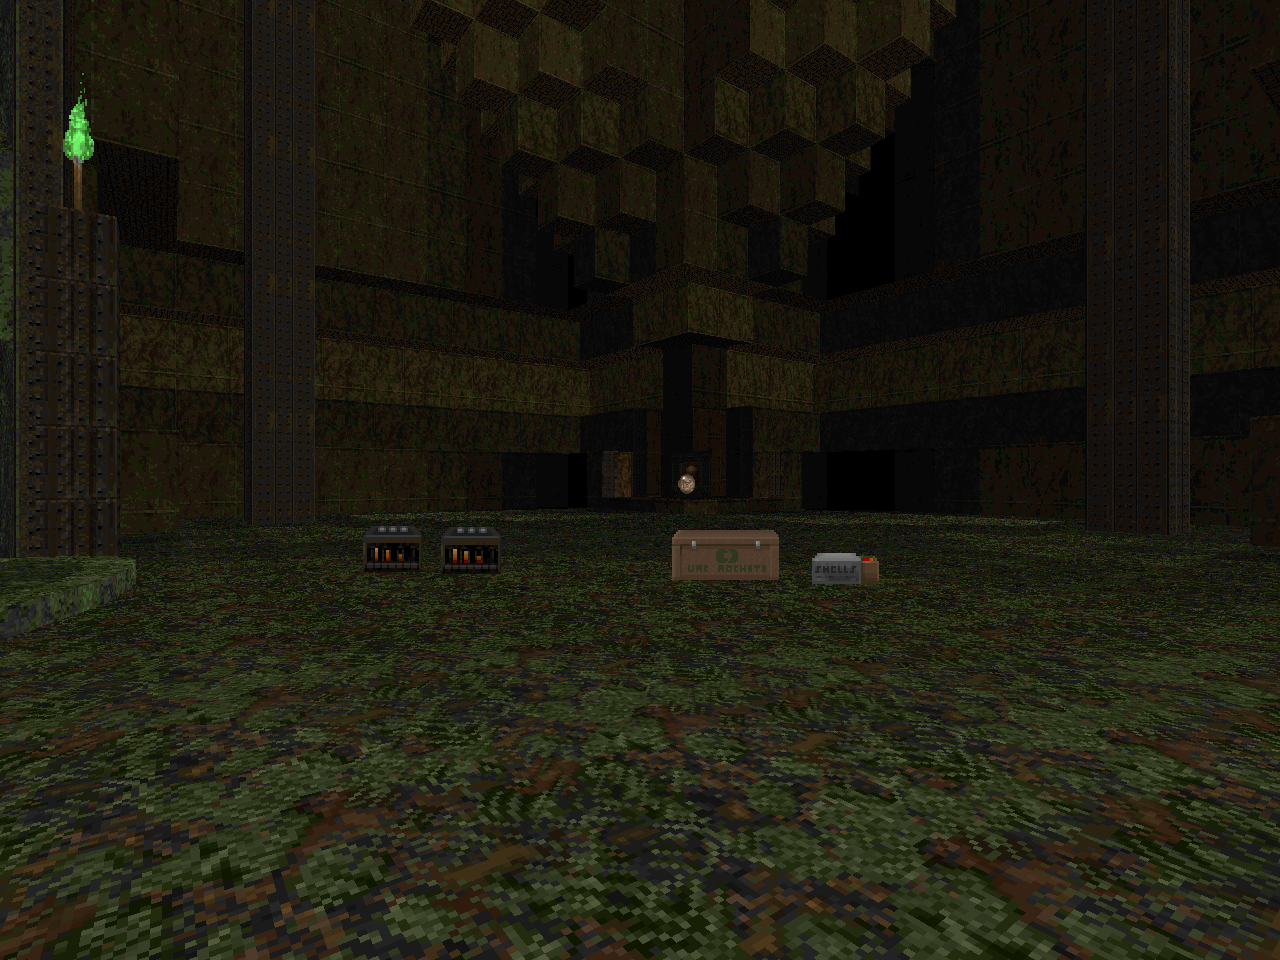
| Emerald Spire | MAP27 |
|---|
| by Zach Stephens aka "Ribbiks" and Daniel Jakobsson aka"dannebubinga" |
|---|
| This time, the aesthetic swings from the dark metal to the brilliant green. "Emerald Spire" is a brilliant adventure, but tough as nails. The way the action is compartmentalized gives it a very different feel compared to many of the maps that have gone before. I was also not expecting the relative dearth of ammo... but I missed out on a few prime opportunities for saving some, like the Spiderdemon telefrag, or the BFG brawl, whose switch I had completely missed during all that frenzied action in the southern leg. The first thing I did was plunge into the eastern tower, which has a claustrophobic as fuck battle with some Hell knights where you're almost sure to lose a chunk, followed up with a revenant / pain elemental invasion. From here, you can go to the exit (which will be locked) or access the southeastern fight, which sets you up with a megasphere and then goes all weird with two entrenched areas of revenants and a central conga line of barons. You'll get some shells for your trouble, but it's such a weird fight, and probably more manageable with the BFG in hand. The southern island is a hornet's nest setup with various snipers, including that Spiderdemon you heard at the beginning, which you can sort of pick away at methodically. Just don't forget to take the BFG plunge, which is a fairly standard invasion fight, the most important element being to not wind up on the wrong side of the pillar once most of the monsters are dead. With the proper setup (pre-pumping rockets) the BFG guardians are easily slain. The final battle isn't so rough, but with all the arch-viles hanging around and the two Cyberdemons, there isn't much room for error. A stunning, sinister sojourn. | 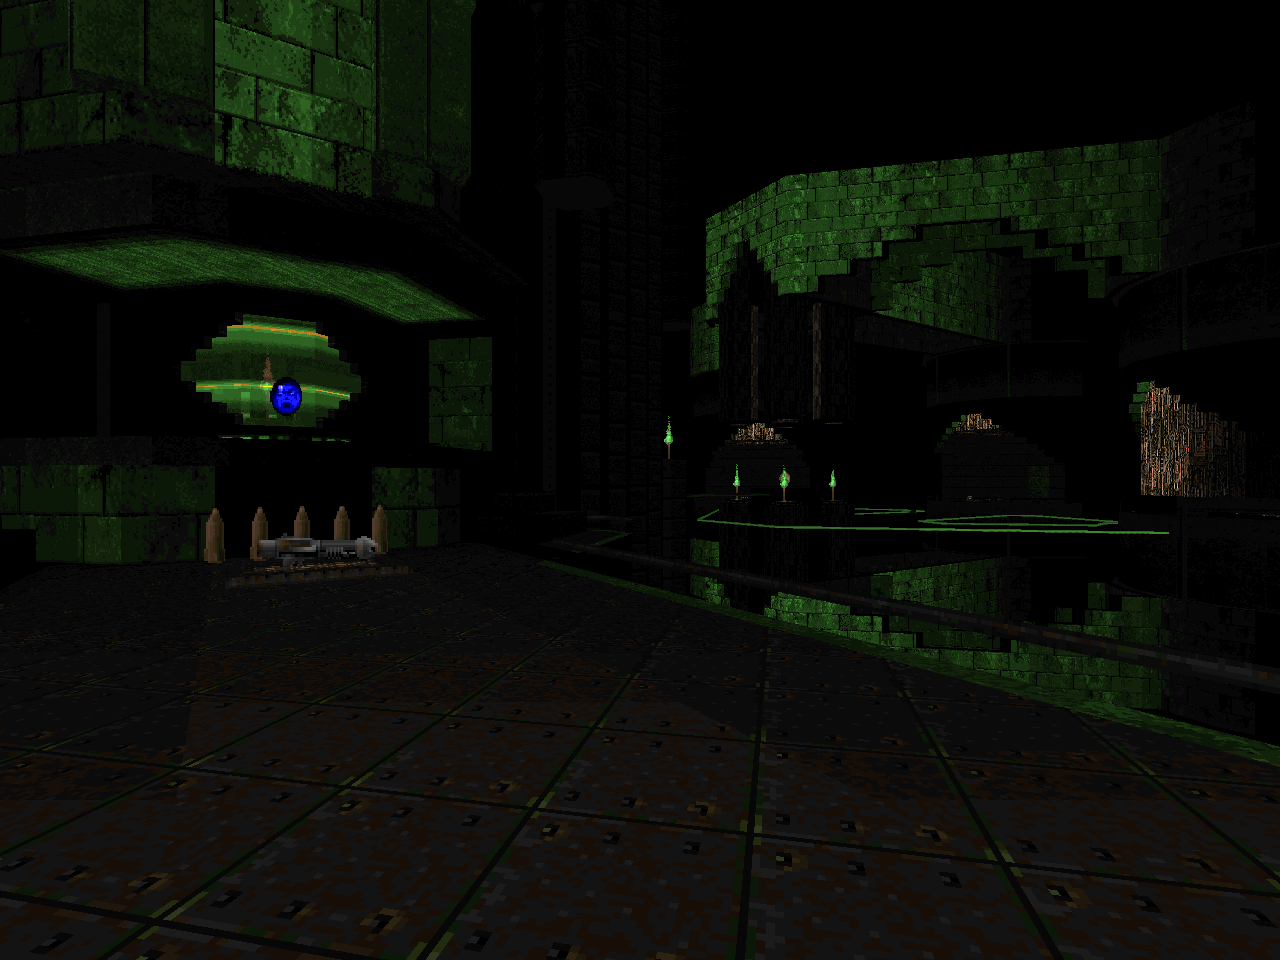 |
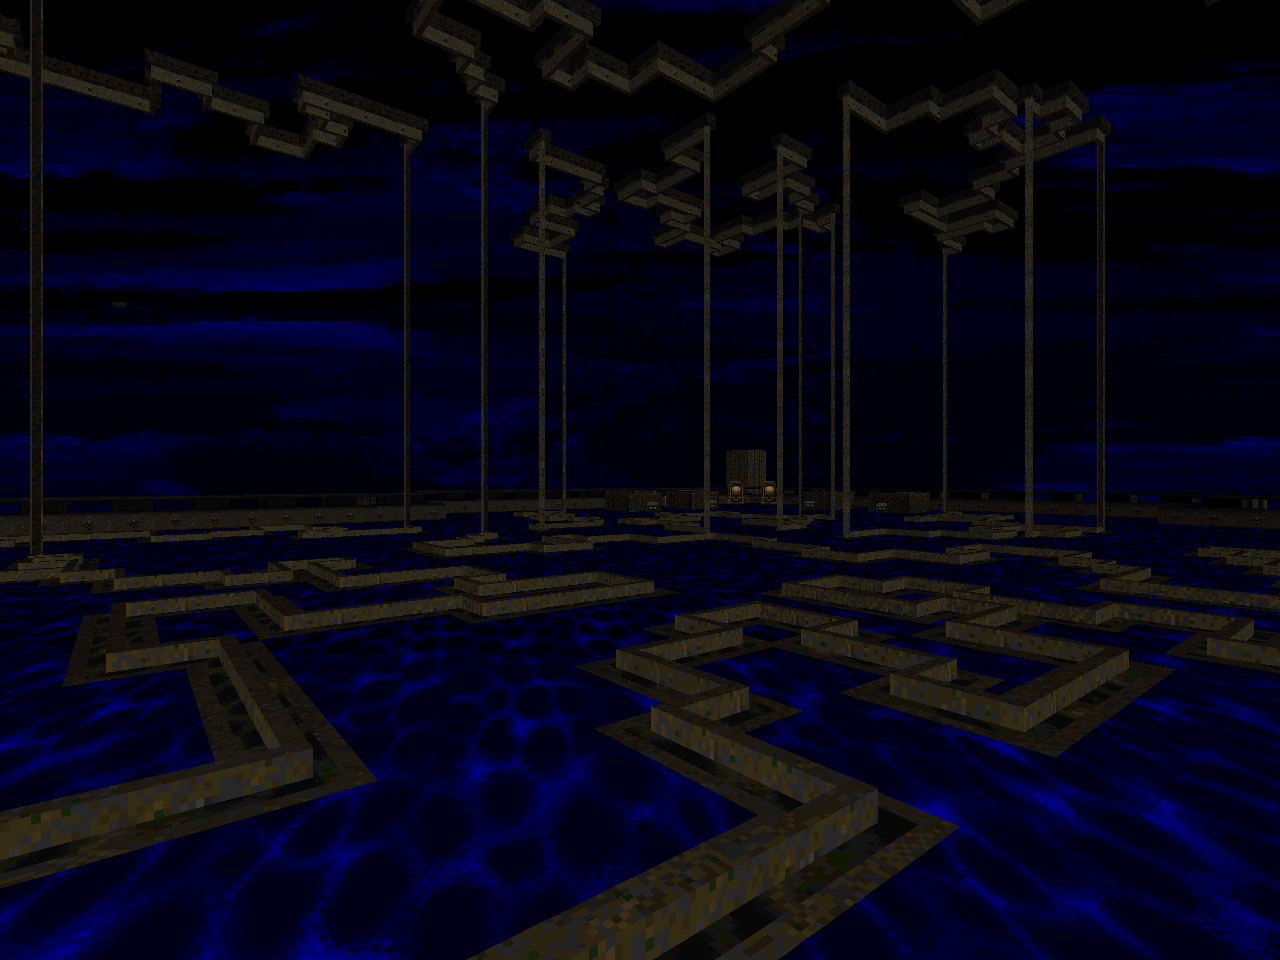
| MAP28 | Maelstrom |
|---|
| by Zach Stephens aka "Ribbiks" and Daniel Jakobsson aka "dannebubinga" |
|---|
 | This time, the authors ply the greenish scheme toward more topographic oceans. It's another very difficult level, but if you're just trying to get by, you can ignore more than half of the enemies. You need both the blue and yellow keys to reach the normal exit, located on the southern isle. The two northern isles house the keys themselves, but they also have optional areas that can only be accessed by bringing over the key from the other area. Completing these additional challenges - and flipping the red switches - will release the red key in the teleporter hub, which is then used to access a final fight that's right at home with the likes of Sunder, Combat Shock, and darkwave0000. Ribbiks's island - the eastern one - is a full-on beach assault with heavily entrenched enemies that can be carefully picked apart as long as you're cognizant of everything that can go wrong in the pain elemental coffin area. His optional area is pretty small and seems to be built for BFG zerging. At least, that seemed like the quickest way to get to the arch-vile behind the barons. danne's area has the hypnotic green soul tower and opens with some rocket - on - imp action while mancubuses fire from on high. Which isn't so bad if you come in with a megasphere from Ribbiks's island. The following fight is pretty clever, pitting you against arch-viles on one side and commandos on the other and then reversing the positions for the second wave. His optional area is just a good ol' fashioned slaughter. The secret exit... Well, it's a big infighting melee with a peanut gallery of revenants and arch-viles that will harry you throughout the whole thing. The pain elementals in the back will bloat things up pretty well since you'll be pretty busy not dying to give them your undivided attention. Once they're all gone, though, you sort of have the place to yourself. Whatever the advanced strategy is, it's not for me, so I just painstakingly picked off all the arch-viles before pressing the button that unleashed a huge wave of cacodemons, who are pretty easily swatted with the BFG and all that ammo. The arch-viles plus Spiderdemons released by the other switch, not so much. It seems like a classic "let them infight and pick off the ones that stray from the herd" moment. Your reward for your suffering is bypassing the regular (death) exit. Oh, and like a ton of cells and a megasphere, which would help to soften the blow of the next level if you weren't starting from scratch. |
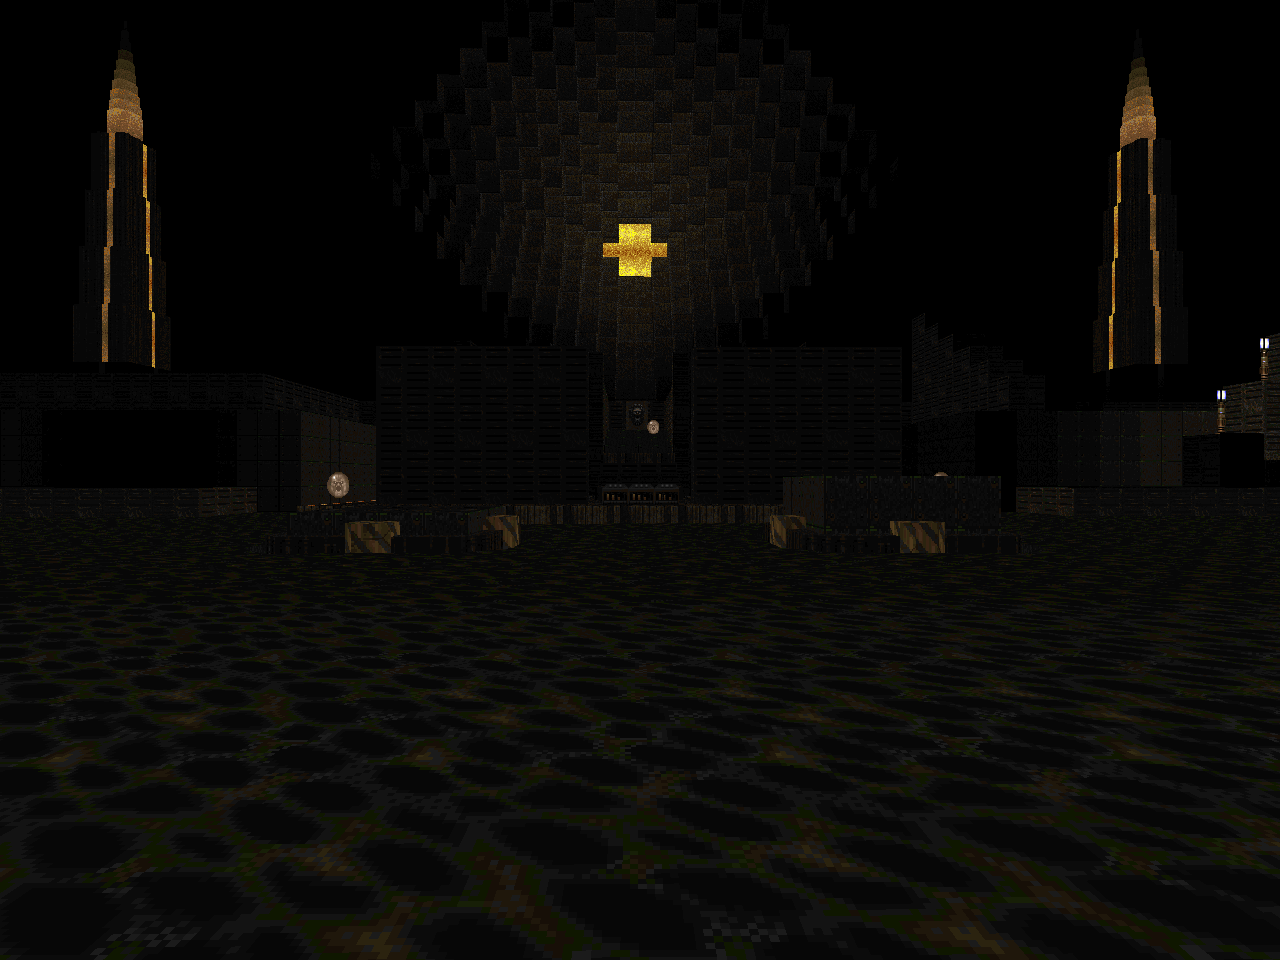
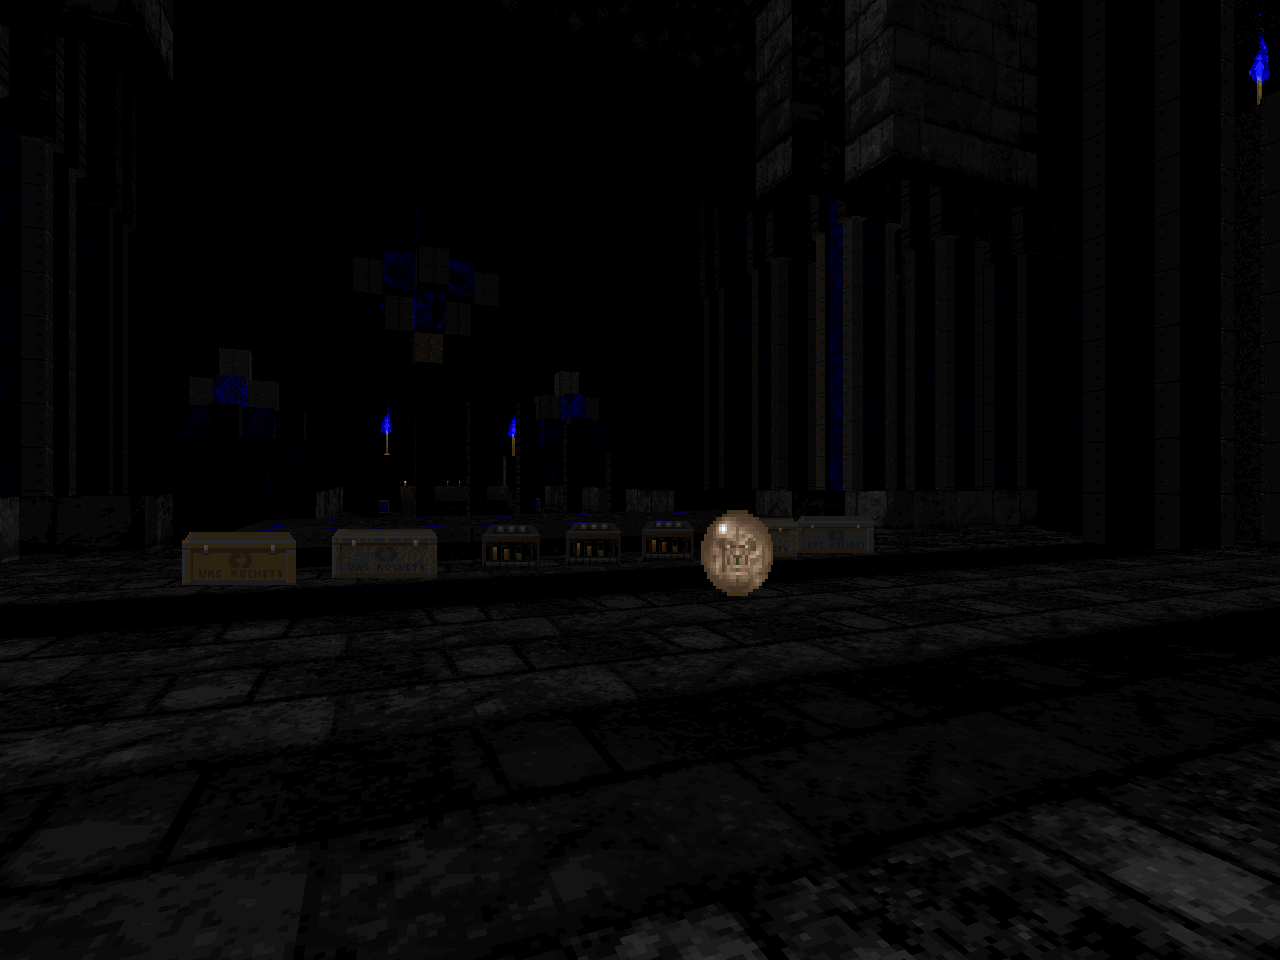
| Go Fuck Yourself | MAP29 |
|---|
| by Zach Stephens aka "Ribbiks" |
|---|
| Dark metal and, here, eschewing the green of the previous levels for yellow. The title is made manifest in the first encounter, where you leap past a clutch of arch-viles into a room with Hell knights and Cyberdemons as overseer. If you wake them up, your next feat will be difficult. Pressing the switch stations four viles around the central pillar. You must carefully hump your way around the column at a measured pace so that you don't run round the column before each of their attacks expire. It's a brilliant setup, and there's more where that came from. After doing the roundabout, the central chamber turns into a typical hornets' nest, though being MAP29, it's even more treacherous. Eventually, you'll have to make a decision, east vs. west. Both paths begin with a stunning encounter. My favorite is the west, which involves a circular track with opposing walls raising and lowering. It looks pretty fuckin cool, but once you start the invasion, their use becomes immediately apparent as they provide your only cover from the arch-viles that now stand on the central pillar. MAP19 revisited... and this is so much cooler. You've got to walk the track, staying behind the wall, and quickly disposing the imps (and, later, Hell knights) that start to gum it up. Brilliant. The eastern leg is much longer, but the tight little firefight that starts it out is made fantastic through those columns that stretch out into the void, creating an eye-popping visual as the revenants arrive. The rest is BFG frenzy antics against revenants and arch-viles, followed by two packs of Cyberdemons, finishing with a couple more arch-viles. All over a battleground that's dominated by a damage floor. Use your two rad suits wisely! The finale is kind of humdrum in comparison, just a good ol' pack of monsters that's just begging for some infighting. Well, maybe not those arch-viles hanging back against the exit gate. In any case, a wild, wild ride. | 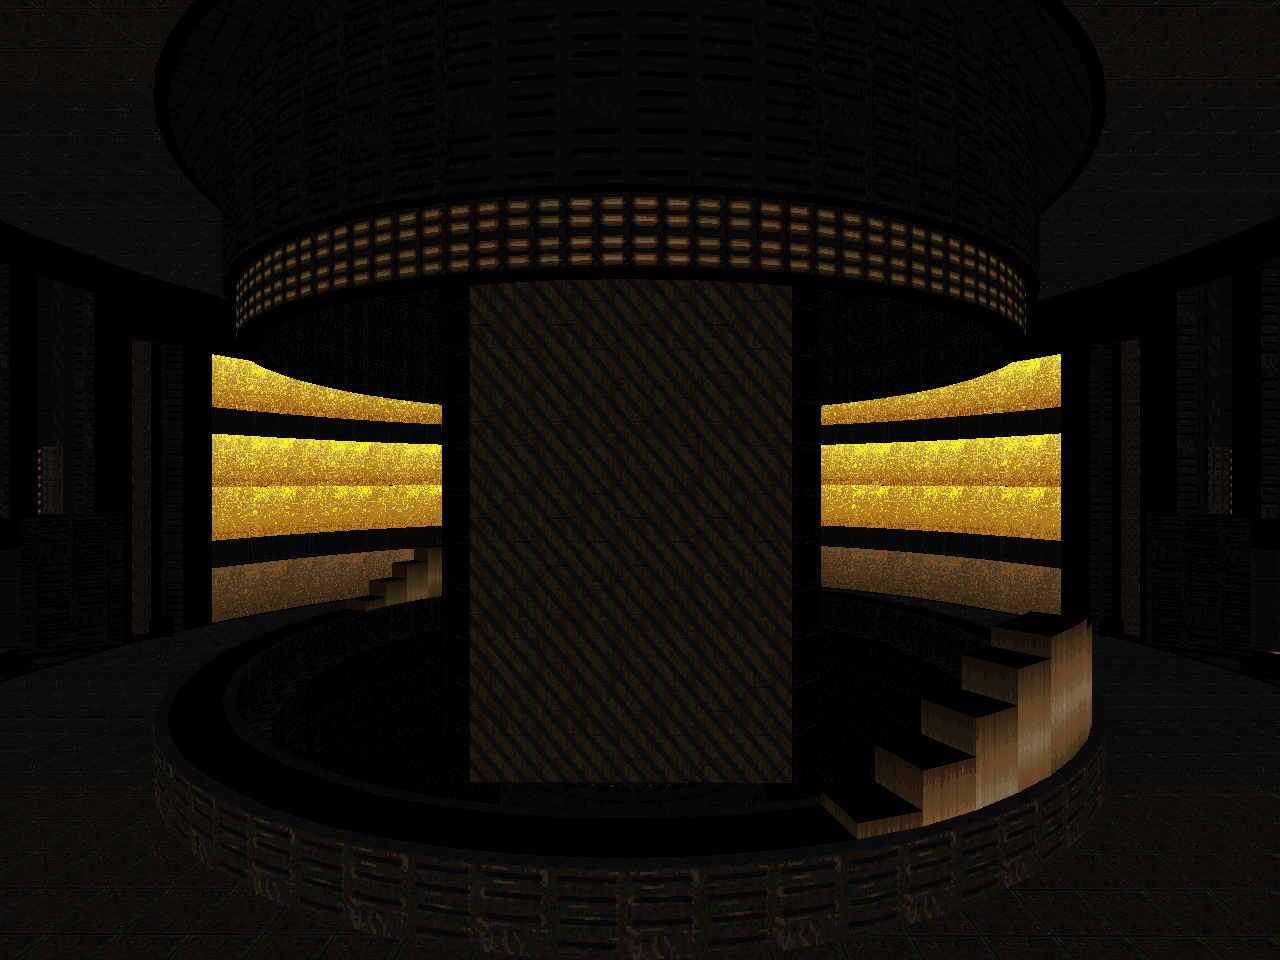 |
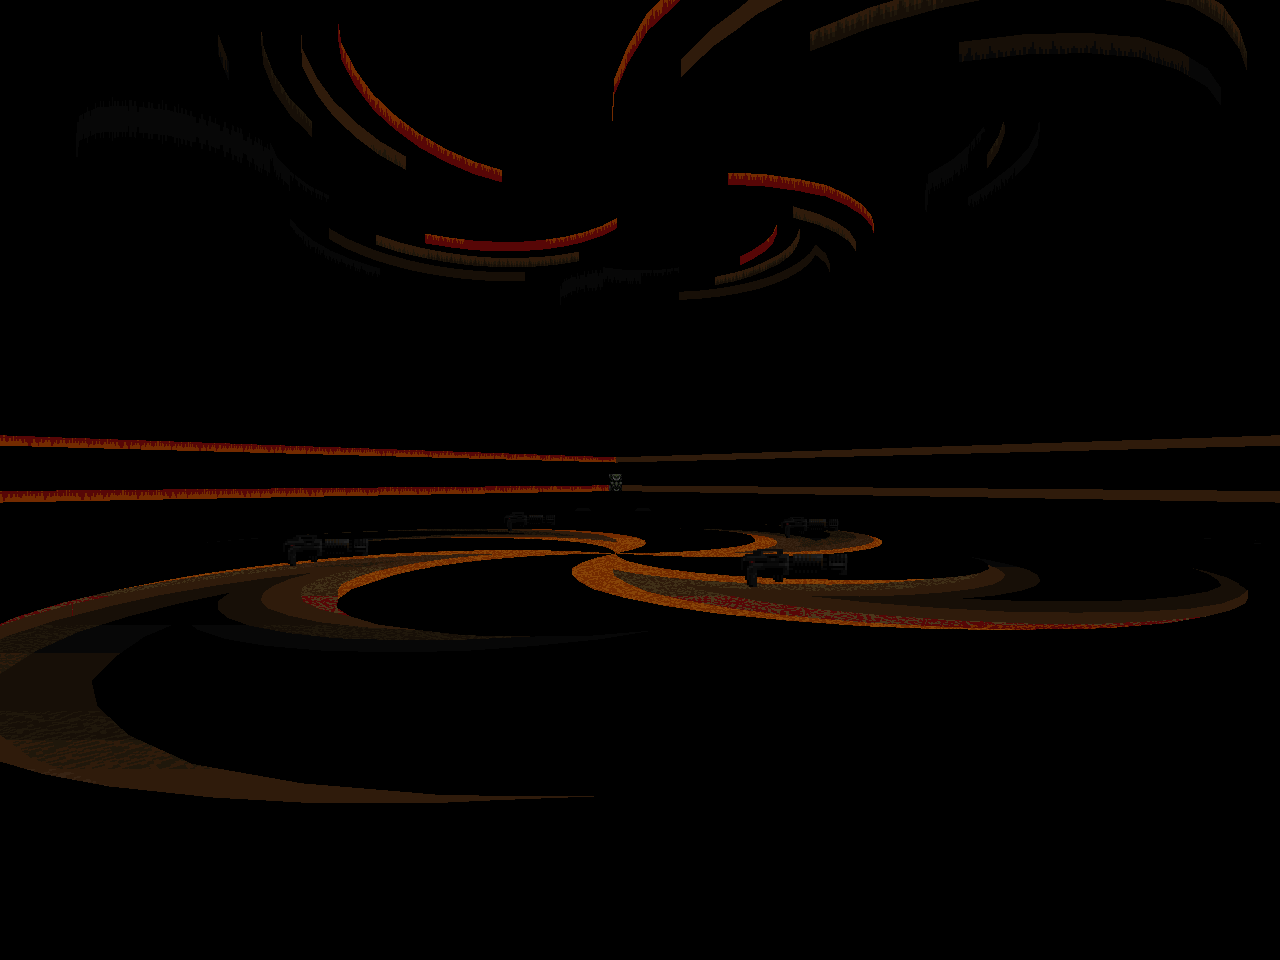
| MAP30 | God Machine |
|---|
| by Zach Stephens aka "Ribbiks" and Daniel Jakobsson aka "dannebubinga" |
|---|
 | The end. "God Machine" is totally a Sunlust map, but it also revels in its atmosphere. Which is very cool. The opening is nothing but vistas of some ominous, unspeakable apparatus - and you're inside of it! Players who crave the action that has otherwise dominated the megaWAD may be put off by the switch hunts and three-dimensional labyrinths, but the authors have pegged just about everything that makes adventure maps so fun. Plus, there is the occasional super-hard battle interjected among all the exploring. They rarely come as a surprise since they're part of some major set piece. The first few use resurrecting monsters as something of a hook, which is a nice way to set the mood. The northeastern hall is the hardest of the normal fights, as I see it. The ground floor is carpeted with Hell nobles and imps with a bunch of Cyberdemons and a peanut gallery of skeletons. You will probably get shredded, which I suppose is why there is a line of megaspheres. At least, my meager crowdshaping / crowdsurfing skills were not enough to avoid just plowing through, which seemed to get the max infighting going on. When you've got it all sorted out, you can approach the big finish, which occurs in a massive outdoor area whose central structure is carpeted with mancubuses and which has revenants and arachnotrons running around outside plus imps on the outer catwalks. It's a bear to get started, but once you figure out the essential areas for cover, you can be as methodic as you can stomach. There are two side battles that put some core slaughter skills to the test in incredibly blunt fashion. Together, they unlock the big button, which ushers in the last wave of enemies, which is pretty varied and has - of course - an enormous crowd of pain elementals entering in from the south for maximum annoyance. It also reveals a switch that eliminates those floating arch-viles and allows access to the central structure. Your final fight is a frantic BFG duel against successive pairs of arch-viles whose compartments open on a tight schedule. There isn't much room for error. When it's all done, step into the helix and transcend. |
before anyone asks, i know that summer of '69 exists and will eventually get around to playing it
ReplyDeleteLook at the size of those descriptions.
ReplyDelete^Exactly my thoughts. Somebody loves their slaughter maps :)
DeleteTruth be told, there is that much to say about these maps.
DeleteThanks for the review :) A very fun read!
ReplyDeleteyou are most welcome
DeleteThanks for your work... Keep them coming!
DeleteA very good and very hard megawad. Loved it all.
ReplyDeleteyes indeed
DeleteThanks for giving this masterpiece it's justice. So many people complain about the difficulty and balance here and deduct points or even say the gameplay sucks for no reason I can imagine except that they REFUSE TO PLAY THE THING ON HMP. Because UV will frustrate most people out there and HNTR is too easy. If you're an average player (not a 'doom god' and not someone with the patience to die hundreds of painful deaths), then play this on HMP or DON'T PLAY IT AT ALL. But don't give it negative feedback and complaints either, please. Thanks. End of 'rant'.
ReplyDeletethe silly thing to me is a section of the doom community that is looking for a standard of difficulty that is very specific to each individual, a sort of goldilocks scenario - "this difficulty is too hard, this difficult is too easy". i think that these players will be impossible to satisfy via any reasonable attempts because the breadth of user-created content removes any need on their part to accomodate the gameplay instituted by the author. if it's not meeting their standards, they can just bin it and move on to something that might be closer to their speed. i think that part of the problem is this emphasis on continuous gameplay across an entire megawad, where they might acknowledge that HMP is a great place to start out in, but then anticipate being forced to dial it down to HNTR in a later section of the mapset and loathing the idea and just sticking with the lower settings rather than part with their weapon kit.
Deletethe notion of a level being too easy is something I felt at one point, but I am now mostly at home with the idea of easy stuff as the Doom equivalent of comfort food. it's fattening, dulling your Doom reflexes, but - with a little bit of seasoning - avoids the pitfalls of pure, bland gameplay. an ambush doesn't have to be potentially lethal to offer a little variety. of course, it seems as though some of the people in the slaughter crowd have lost some of their taste for something more nostalgiac, and that's great. their need for something different will continue to carve out a niche in the doom community that would go otherwise unfulfilled, and when they take the time to tune up some difficulty settings meant for more "casual" play, it's fantastic. i think that some people declaring HNTR as being "too easy" is itself a victory of sorts.
i am slightly at odds with a section of the community that must have their experience spoon-fed to them, but i am a creature of now ancient sensibilities, i suppose. there was a time when, for me, the idea of playing through something like Sunlust and enjoying some success (as far as being able to make it through an entire set piece encounter without saving) would have been unthinkable. my dogged determination has raised my skill ceiling, however, and the only thing separating me from those who stamp their feet and champ their teeth is - as danne suggests in the liner notes for MAP32 - "practice". some, will. and some, won't.
I like slaughter maps - I always play UV regardless. I like the challenge and pushing yourself improves your game - like playing against a better opponent in tennis - I find.
DeleteI remember how difficult I found Hell Revealed, but when I go and revisit that WAD it seems like a walk in the park compared to Sunder etc
my general complaint about Sunlust (and Sunder) is that they overuse the 'lock-in trap' scenario, ie - lock you in a room and throw monsters at you while a timer counts down. It gets tedious after a while, and they're very obviously signposted. But otherwise this is an extraordinary WAD
i think this is colloquially known as a scythe arena? while it doesn't personally bother me, i definitely understand your point
DeleteMap 26 - the nasty secret annex is actually accessed by a small hidden gargoyle switch in the green slime pool nearby. You then have to jump up the pillars in record time before it shuts. Very difficult
ReplyDeletegot to wonder if it's worth it!
considering what may be left of the megasphere by the time you're done, it's a potentially faustian bargain
DeleteI personally think this wad is best on HMP pistol starts, but of course for someone looking to challenge themselves to the max, or just be able to proudly say 'I beat it!', then UV is a worthwhile adventure, cause you'll always find a way to move on somehow. And I think that was exactly the authors' aim for UV. The only problem with this wad seems to be the people who don't like the UV experience but are just hell bent on playing UV, and end up not enjoying the wad because of it. Anyways one of the best wads of the year and the last couple of years no doubt.
ReplyDeleteHi, just grabbed this megawad and was as always curious to see if you had reviewed it. 'Review' seems like an injustice given how much work you put into these articles.
ReplyDeleteAnyway, I know this review was nearly 10 years ago, but please indulge me... I've only just got started with Sunlust and I'm glad I read the readme, read the warning and dialed down to HMP (for the first time in a Doom wad in a very, very long time).
I DID complete the first level blind without dying, though to be honest I am not entirely sure how :) I even took a max damage fireball to the face from one of the barons. Hopefully I'll continue fairly smoothly, I'm crap at slaughters and I have a religious belief in pistol starts, so we'll see if I ever graduate to a UV playthrough. Cheers.